How to Clean Up Blood Safely Using Cloth
Learn safe, step-by-step methods for cleaning up a blood spill using cloth. PPE, blotting, disinfection, and proper disposal guidance for homes, apartments, and shared spaces.

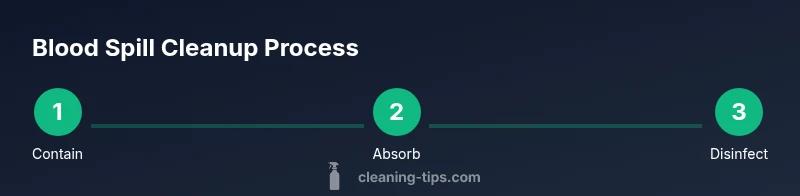
This guide shows you how to safely clean up a blood spill using cloth. You'll learn containment, PPE, blotting techniques, disinfection, and proper disposal of contaminated materials to minimize exposure and protect your home. Whether you’re cleaning a kitchen countertop, a bathroom floor, or fabric, following these steps helps reduce risk and ensure surfaces are sanitary.
Why safety matters when cleaning up blood
Blood spills can carry pathogens, and even a small amount requires careful handling. Prioritizing safety protects your family and pets while reducing the chance of spreading contaminants. A practical rule of thumb is to prepare before you act: gather the right tools, put on proper PPE, and ensure good ventilation. When cleaning up blood use cloth to blot and lift the liquid rather than rubbing it into the surface, which can push contaminants further into fibers or tiny crevices. This approach minimizes particulate dispersion and makes subsequent disinfection more effective. The Cleaning Tips team emphasizes that quick, deliberate action with the right technique lowers risk and keeps your home hygienic.
Before you begin, consider the surface type and any sensitive materials nearby—carpets, upholstery, or electronics may require different methods or professionals. If you’re ever unsure about the spill size or surface compatibility with cleaners, opt for a cautious, conservative approach and review product labels for warnings and contact times. Safety first, efficiency second, and you’ll reduce exposure for everyone in the home.
Essential tools and materials you should gather
Having the right tools at hand makes cleanup faster and safer. Prepare disposable gloves, eye protection, absorbent cloths or paper towels, dedicated cleaning cloths, a disinfectant (EPA-registered) or a bleach solution following label directions, sturdy plastic bags for disposal, and a small bucket or spray bottle for gentle cleaning solutions. Keep a separate set of towels devoted to biohazard spills and never reuse contaminated materials on clean surfaces. Label and store these supplies so they’re easy to grab in an emergency. Choosing the right disinfectant matters: use products that specify effectiveness against common pathogens and follow the manufacturer’s instructions for contact time and dilution. With these tools ready, you’ll reduce the chance of cross-contamination and improve outcomes. Cleaning Tips recommends keeping your cleanup kit in a accessible, well-ventilated area for quick response.
Step-by-step spill containment and cleanup workflow
Spill containment begins with stopping the spread and securing the area. Start by removing sources of splash and isolating the spill from children and pets. Then, using clean cloths, blot the liquid—don’t rub—to lift as much as possible. Move from the edge toward the center to prevent pushing liquid outward. Next, clean the area with a mild detergent and water to lift residue, followed by a disinfectant to address potential pathogens. Always follow the product’s label for dilution and contact time. Finally, rinse with a fresh cloth if required by the disinfectant and allow the surface to air dry. Keep contaminated materials in a sealed bag until disposal. A well-executed cleanup reduces residual odor and the risk of recontamination. Pro-tip: work in a well-ventilated area to avoid inhaling fumes from cleaners.
Surface cleaning: fabrics, hard surfaces, and upholstery
Different surfaces require tailored approaches. For hard, nonporous surfaces (like tile or sealed countertops), wipe with clean cloth and apply disinfectant per label directions. For fabrics and carpets, absorb as much liquid as possible with towels, then treat the area with an appropriate spot cleaner or detergent compatible with the fabric. Always test a hidden area first to verify colorfastness. If staining persists on fabric, repeat blotting and cleaning steps with gentle products to minimize fiber damage. Hard surfaces can typically be disinfected more quickly, while fabrics may require more sustained treatment and possible professional cleaning for persistent stains. The goal is to remove both liquid and residue while maintaining fabric integrity and surface finish.
Disinfection guidelines and product selection
Choose a disinfectant that is effective against bloodborne pathogens and safe for your surfaces. Read labels carefully for surface compatibility, dilution instructions, and required contact time. Some surfaces may respond best to hydrogen peroxide or quats-based cleaners, while others may tolerate a diluted bleach solution on nonporous areas. Never mix cleaners, especially bleach with ammonia or other cleaners, as this can release dangerous fumes. After applying disinfectant, allow it to remain wet for the recommended contact time, then wipe away any residue with a clean cloth. Proper ventilation helps reduce inhalation risks and speeds drying. Remember: surface sanitation is a multi-step process, not a single wipe. Cleaning Tips suggests prioritizing products with clear pathogen efficacy and an easy-to-follow contact time.
Textiles, fabrics, and laundry considerations
Textiles that have contact with blood should be handled with care. Use dedicated towels or cloths, and place reusable items in a designated laundry cycle separate from regular laundry. Pre-treat stains with a mild detergent before washing, then launder on the hottest setting recommended for the fabric. For items you cannot launder, seal them in a sealed bag and follow local disposal guidelines. If odors persist after washing, rewash with an enzyme-based detergent and ensure textiles are fully dry before reuse. Always handle soiled textiles with gloves and control the spread of any residue during transport to the laundry area.
Waste disposal and cleanup aftercare
Seal all contaminated materials—towels, cloths, and disposable items—inside a sturdy bag before discarding. If possible, place the bag inside another bag to contain odors and prevent leaks. Wash and disinfect the cleaning tools used, and store them separately from everyday cleaning supplies. After disposal, sanitize the area again if needed and check surrounding surfaces for any missed spots. Keeping a log of spills and responses can help with improved safety practices and compliance with household guidelines. The Cleaning Tips team emphasizes consistent disposal practices to minimize exposure risk and maintain a clean, safe home environment.
Quick reference checklist for homeowners
- Put on PPE and isolate area
- Blot with dedicated absorbent cloths (don’t rub)
- Clean with mild detergent and water
- Apply EPA-registered disinfectant; observe contact time
- Wipe dry and ventilate the area
- Dispose of contaminated materials securely
- Launder reusable cloths separately from regular laundry
- Inspect for remaining stains or odors and repeat as needed
Practical examples and common scenarios
Spills can happen in kitchens, bathrooms, or living areas. In kitchens, focus on countertop and floor areas with a two-step approach: blot first, then wipe with a mild cleaner, and finish with a disinfectant. In bathrooms, check tile grout and sealant edges where residue can hide; apply a disinfectant and wipe away. On fabrics like towels or carpets, treat quickly with a spot cleaner designed for the material and consider professional cleaning for delicate fabrics. In all cases, keep surfaces dry after disinfection to prevent mold growth and ensure safety for household members. By consistently following the steps, you reduce exposure risk and maintain a healthier home.
Tools & Materials
- Nitrile gloves(Powder-free; change gloves after each spill)
- Eye protection(Safety glasses recommended for splash risk)
- Disposable cloths or paper towels(Use absorbent materials; avoid reusing contaminated towels)
- Dedicated cleaning cloths(Keep separate from regular laundry)
- Disinfectant cleaner (EPA-registered)(Follow label for contact time and dilution)
- Bleach solution (optional, nonporous surfaces)(Only on appropriate surfaces; follow label; avoid mixing with cleaners)
- Plastic bags for disposal(Leak-proof; seal contaminated materials securely)
- Bucket or spray bottle(For applying cleaning solutions; optional but helpful)
- Laundry detergent(For washing reusable cloths and textiles separately)
Steps
Estimated time: about 30 minutes
- 1
Wear PPE
Put on disposable gloves and eye protection before approaching the spill. Ensure you have adequate ventilation to avoid inhaling fumes from cleaners. This initial step reduces exposure risk as soon as you see a spill.
Tip: Choose gloves that fit well; tight gloves reduce dexterity but improve protection. - 2
Contain the spill
If possible, isolate the area to prevent tracking the spill to other rooms. Use absorbent materials to encircle the spill and prevent spreading. Stand to the side and avoid stepping on the fluid.
Tip: A wide barrier helps keep pets and kids away. - 3
Blot the spill
Gently blot the liquid with a clean, dedicated cloth. Do not rub, as rubbing can push the liquid deeper into fibers or porous surfaces. Work from the outside inward toward the center.
Tip: Use a fresh cloth for each pass to avoid recontaminating the area. - 4
Clean the surface
Wipe with a mild detergent and warm water to lift any remaining residue. Rinse with a clean cloth to remove soap and loosened material before applying disinfectant.
Tip: Rinse surfaces where soap residue could react with the disinfectant. - 5
Disinfect the area
Apply an EPA-registered disinfectant according to the product label. Ensure the surface remains visibly wet for the recommended contact time, then wipe away residue if instructed.
Tip: Do not mix cleaners; read labels to avoid dangerous fumes. - 6
Handle textiles
Bag and seal contaminated towels or cloths in a plastic bag. If washable, launder separately using hot water and the appropriate detergent. Dry completely before reuse or storage.
Tip: Label laundry items as biohazard if needed in shared spaces. - 7
Dispose properly
Place final waste in a sealed bag and dispose of it in your regular trash if permitted by local guidelines. If you’re unsure, check local regulations for biohazard waste disposal.
Tip: Double-bag for extra containment. - 8
Inspect and restore
Check the cleaned area for any remaining stains or odors. Re-treat as needed and ensure the space is dry before allowing return of occupants or pets.
Tip: Keep a cleanup log for future reference.
Questions & Answers
Is it safe to use household bleach for blood cleanup?
Bleach can be effective on nonporous surfaces when used according to label directions, but it can damage some materials and create fumes. Always test on an inconspicuous area first and never mix with other cleaners.
Bleach can be used on nonporous surfaces if the label is followed; test before use.
Can I reuse cloths after cleaning a blood spill?
Reuse is not recommended for contaminated cloths. Use dedicated cleaning cloths that are washed separately, or dispose of disposable materials in a sealed bag.
Yes, but only if they are designated for biohazard spills and washed separately.
What should I do with contaminated towels?
Place contaminated towels in a sturdy plastic bag, seal it, and dispose of it according to local guidelines. If laundering, use hot water and an appropriate detergent, and dry completely.
Seal the towels in a bag and dispose of them properly, or launder separately.
How long should surfaces stay wet with disinfectant?
Refer to the product label for required contact time. Do not wipe away until the merchandise indicates it has remained wet long enough to kill potential pathogens.
Just follow the label’s contact time and don’t rinse too soon.
Should I wear a mask when cleaning blood?
A mask is not always required, but it can be helpful if splashes or odors are a concern. Use a mask if advised by the product instructions or if you have respiratory sensitivities.
A mask can help if you’re worried about splashes or fumes.
What if the spill is large or on fabric that’s hard to clean?
For large spills or difficult fabrics, stop cleaning and consult a professional cleaning service. Large areas may require more intensive treatment and specialized equipment.
For big spills or delicate fabrics, consider professional help.
Watch Video
The Essentials
- Act quickly to contain and clean the spill
- Wear PPE before handling any blood spill
- blotting is preferred over rubbing to lift liquid
- Follow label directions for disinfectants and disposal
- Launder reusable cleaning cloths separately from everyday laundry