Baking Soda Clean Battery Terminals: A Practical How-To
Learn to safely clean battery terminals with baking soda to neutralize corrosion, improve connections, and extend battery life. This step-by-step guide covering safety, materials, technique, and maintenance helps both car and household battery care.

Cleaning battery terminals with baking soda is a simple, effective way to neutralize corrosion and restore a solid connection. This quick guide shows you how to prepare, clean, and test terminals safely using a baking soda paste and basic tools. Follow safety precautions and avoid overwetting sensitive components during cleaning.
How baking soda works on battery terminals
Baking soda is a gentle base that helps neutralize acidic corrosion that forms on battery terminals over time. When you apply a baking soda paste (baking soda mixed with a little water) to corroded clamps and posts, the alkaline compound reacts with acidic residue, loosening crusty buildup without harming metal surfaces. The idea behind this method is simple: baking soda clean battery terminals when applied as a paste. In most cars and many household batteries, the most common corrosion appears as a white, powdery crust around the terminal clamps. This crust is a mixture of salts and moisture from the battery acid. Using a mild baking soda paste helps lift this crust, making it easier to wipe away with a damp cloth. As you work, keep the area dry and avoid touching the exposed plates inside the battery. If you notice green or blue discoloration, that can indicate copper corrosion or a different issue that may require professional service.
Types of corrosion you may see on terminals
Corrosion around battery terminals can manifest in several ways. The most common is a white, powdery crust, which is the dried residue of sulfuric acid salts and moisture. A bluish or green tint can indicate copper alloy corrosion, often from contact with exposed metal clamps. A black or dark crust may appear when oils, dirt, or humid air combine with the electrolyte. Each type suggests slightly different cleaning needs, but the safe, consistent approach remains a mild paste and careful scrubbing. Before you start, visually inspect clamps for looseness, cracks, or melted insulation, because damaged parts may require replacement rather than cleaning. Understanding the corrosion type helps you judge how aggressive your cleaning should be and whether you should seek professional help for stubborn cases.
Safety considerations and prepping your workspace
Safety first. Work in a well-ventilated area, wear protective gloves and safety glasses, and keep a damp cloth handy in case of splashes. Disconnect the battery if you’re comfortable and it’s safe to do so by removing the negative terminal first, then the positive. Avoid metal tools that can spark near exposed terminals, and never lean metal objects across the battery posts. Keep baking soda away from kids and pets, and ensure surfaces are dry to prevent slipping. If you’re cleaning a car battery, ensure the engine is off and the keys are removed from the vehicle. For household batteries, remove the device from the device holder and place on a stable, non-slip surface. Remember: never submerge the battery or allow liquid to pool inside the battery housing.
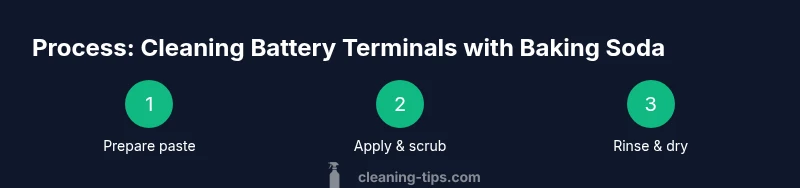
Cleaning procedure overview and approach
A mild baking soda paste is your primary tool. Mix a heaping teaspoon of baking soda with a few drops of water to form a paste. Dip a small brush or old toothbrush into the paste, then scrub the terminal clamps and posts in circular motions, focusing on the white crust. Use a damp cloth to wipe away loosened residue and paste. Dry the terminals thoroughly with a clean microfiber cloth, paying close attention to the clamps and cable ends. If you notice persistent crust, repeat the scrubbing briefly. Finally, reattach the clamps in the correct order (negative first, then positive) and gently snug the connections without overtightening.
Post-cleaning checks and maintenance tips
After cleaning, test the battery by attempting a restart or using a multimeter to verify a solid voltage around the expected range for your battery type. Inspect the clamps for tightness and ensure cables are seated properly. Apply a thin layer of dielectric grease if recommended by your battery’s manufacturer to slow future corrosion, then wipe away any excess. Regularly inspect terminals for signs of new corrosion, especially in humid environments or during seasonal transitions. Keeping terminals clean can prevent starting problems and maintain optimal electrical contact.
Alternatives and common mistakes to avoid
Some people try harsher cleaners or acidic solutions; avoid strong acids near battery components as they can damage terminals and seals. Don’t mix cleaning agents unless the instructions clearly state compatibility. Never use metal tools that can gouge metal or cause short circuits. Do not use excessive water or let cleaning solution pool on the battery case. If you have a severely corroded terminal or frayed cables, replacement parts may be safer than cleaning.
Long-term maintenance and seasonal care
Make terminal cleaning part of your seasonal vehicle maintenance or device care routine. Regular checks help catch corrosion early. Store cleaning materials in a dry, cool place and keep a small kit in your trunk or storage area for on-the-go maintenance. If you live in a humid climate or drive in winter salt conditions, plan for more frequent inspections to keep metal contacts clean and secure.
Troubleshooting persistent corrosion
If corrosion returns quickly after cleaning, inspect for hidden issues such as loose clamps, damaged cables, or a failing alternator or charging system. Clean once more and ensure clamps are tight, then monitor for recurring buildup. If the problem persists after two cleanings, consult a professional to assess potential battery replacement or wiring issues.
Tools & Materials
- baking soda(use plain, unscented baking soda)
- water(lukewarm or distilled water)
- old toothbrush or small cleaning brush(for scrubbing corrosion)
- rag or microfiber cloth(to dry and wipe)
- protective gloves(to protect skin from alkaline paste)
- safety glasses(eye protection)
- container or mixing cup(for mixing paste)
- terminal wrench or pliers(to disconnect battery if needed)
Steps
Estimated time: 30-45 minutes
- 1
Disconnect the battery safely
If you’re comfortable and it’s safe, remove the negative terminal first to minimize the risk of a short circuit. Then remove the positive terminal. This creates a clearly isolated system for cleaning and reduces the chance of sparks. If you’re unsure, skip disconnection and work carefully around the terminals.
Tip: Always disconnect the negative terminal first; this is a key safety rule. - 2
Prepare the baking soda paste
Mix approximately one teaspoon of baking soda in a small amount of water to form a thick paste. The paste should cling to your brush and terminals without dripping. A thick consistency helps you target crusty buildup without running into the battery case.
Tip: Aim for a paste that sticks to the brush but isn’t too watery. - 3
Apply paste and scrub the terminals
Dip the brush into the paste and scrub the terminal clamps and posts with gentle, circular motions. Focus on the white crust and any green or blue discoloration. Avoid forcing paste into the battery housing.
Tip: Let the abrasive action do the work; scrubbing too hard can damage clamps. - 4
Rinse and dry thoroughly
Wipe away loosened residue with a damp cloth, then dry the area completely with a clean microfiber towel. Ensure no moisture remains on the posts or in the clamps, as residual dampness can cause renewed corrosion.
Tip: Use distilled water if you’re rinsing to limit mineral residues. - 5
Reconnect and test the system
Reconnect the terminals in the correct order (negative first, then positive) and snug them without overtightening. Start the engine or test with a multimeter to confirm a solid connection and proper voltage.
Tip: Take a moment to double-check torque feel; it should be snug but not pinched. - 6
Clean clamps and battery case
Wipe the clamps and battery case edges to remove any remaining paste. A clean surface improves future contacts and helps you notice early signs of corrosion next time.
Tip: Apply a thin layer of dielectric grease if device manufacturer recommends it. - 7
Dispose of waste and clean up
Dispose of used baking soda paste and disposable towels in accordance with local guidelines. Wash your hands and store cleaning materials in a dry place away from children and pets.
Tip: Always wash hands after handling battery components.
Questions & Answers
Is baking soda safe to use on car battery terminals?
Yes, baking soda is a safe and common method to neutralize corrosion on battery terminals when used as a mild paste with water. Avoid soaking components and follow safety steps. For severe corrosion or damaged cables, seek professional help.
Yes. Baking soda is safe for corrosion neutralization when used as a mild paste with water, but avoid soaking and get help for damaged cables.
Should I remove the battery from the vehicle before cleaning?
In many cases you can clean with the battery in place, but disconnect the negative terminal first and follow safety steps. If you’re unsure, remove the battery per the vehicle’s manual and clean with the area accessible.
Usually you should disconnect the negative terminal first; remove the battery if you’re unsure and follow the manual.
Can I use vinegar instead of baking soda?
Vinegar is acidic and can react unpredictably with battery components. Baking soda paste is preferred for neutralizing residues safely. Avoid mixing cleaners unless a manufacturer instructs otherwise.
Vinegar can react with battery acids; use baking soda paste instead for safety.
What if corrosion returns after cleaning?
If corrosion reappears, check for loose clamps, damaged cables, or a failing charging system. Repeat cleaning and consider parts replacement if the issue persists.
Persistent corrosion means there may be a bigger issue like loose cables or a failing charging system.
Are sealed AGM batteries cleaned the same way?
Sealed AGM and other sealed batteries can be cleaned similarly, but avoid opening the cells and use gentle scrubbing to prevent damage. Follow manufacturer guidance for any special precautions.
Be gentle and don’t open sealed batteries; follow the manufacturer’s guidance.
How often should I clean battery terminals?
Check terminals every few months or whenever you notice starting issues or visible corrosion. Regular checks help prevent unexpected failures and extend battery life.
Inspect every few months or if you notice problems.
Watch Video
The Essentials
- Disconnect the battery safely before cleaning.
- Use a mild baking soda paste to neutralize corrosion.
- Dry thoroughly and recheck connections after cleaning.
- Regular maintenance prevents recurring corrosion.