Can You Clean Mold Off Wood? A Practical Guide
Learn proven, safe methods to remove surface mold from wood, protect your home from moisture, and prevent regrowth with practical steps, tools, and prevention tips from Cleaning Tips.

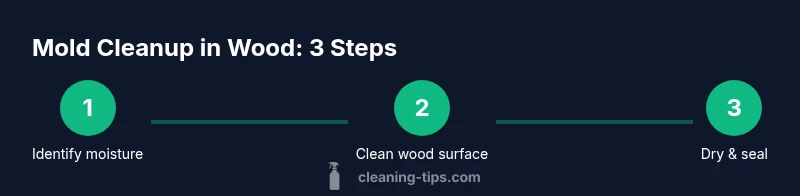
You can clean light surface mold from wood using a careful, step-by-step routine focused on safety, drying, and moisture control. Start with PPE and ventilation, then scrub with a detergent or vinegar solution, disinfect with hydrogen peroxide or a baking soda paste, and finish by sealing and monitoring moisture to prevent regrowth.
Why wood mold is a problem
Mold on wood signals excess moisture and, if ignored, can lead to wood decay and structural damage. Wood is porous, so mold can take hold in tiny pores and cracks, making spores harder to remove the deeper they penetrate. For people, mold exposure can trigger allergic reactions or respiratory symptoms, especially in homes with children, seniors, or asthma. Cleaning moldy wood requires care: you must dry the wood thoroughly after cleaning and fix the moisture source to prevent regrowth. According to Cleaning Tips, addressing both the mold and the moisture source is essential for a lasting solution. Reducing humidity and improving air flow around the affected area are as important as the cleaning itself.
This guide aims to empower homeowners to act safely and effectively, while recognizing when professional help is warranted. By combining basic cleaning steps with moisture control, you can restore wood surfaces and minimize the chance that mold returns.
Can mold grow in wood? Understanding porosity and moisture
Wood’s porosity means it can absorb and release moisture, which mold loves. When humidity stays elevated, wood can swell, fibers weaken, and spores become embedded in the surface. The approach to cleaning depends on whether the wood is finished or unfinished. Finishes can slow absorption but won’t always stop spore penetration; unfinished wood may require more aggressive drying and sometimes replacement. Surface mold on finished wood is typically easier to treat, while mold that has penetrated deeper may require sanding or refinishing. The Cleaning Tips team emphasizes that the priority is to remove the mold and eliminate the moisture source, not just mask the problem with cleaners.
Always address airflow, temperature, and moisture levels to reduce recurrence risk. A dehumidifier and good ventilation are often as important as the cleaning itself, especially in basements, bathrooms, or kitchens where moisture tends to linger.
When to clean mold yourself vs when to call a pro
For small, clearly defined patches on wood with no visible water damage, a DIY cleaning approach is reasonable. If the mold covers a large area (for example, more than a few square inches), has caused wood rot, or if you have health concerns (asthma, allergies, or immune issues), professional remediation is safer. If the mold reappears after cleaning, moisture control has not been adequately addressed and a professional should assess structural or plumbing issues. Cleaning Tips recommends erring on the side of caution with mold in living spaces, especially on wood that supports shelves, cabinetry, or structural components.
Health factors, such as exposure history and sensitivity, should influence your decision to DIY or hire a specialist. Always prioritize safety: if you suspect hidden water damage behind walls or under floors, a pro can evaluate moisture sources and perform containment and cleaning with appropriate equipment.
Cleaning methods you can trust (wood-friendly options)
Choose wood-friendly, low-toxicity cleaners to protect finishes and avoid color changes. A mild dish soap solution with warm water is a gentle starting point for lightly soiled surfaces. White vinegar (undiluted or mildly diluted) can be used on many non-porous wood surfaces, but test on a hidden spot first to check for discoloration. Hydrogen peroxide (3% solution) is a common disinfectant that can help eliminate remaining spores on finished wood. For porous wood, a baking soda paste can help deodorize and lift stains without saturating the material. Avoid bleach on most wood surfaces, especially unfinished or sealed wood, as it can damage the finish and underlying wood. Always dry thoroughly after cleaning and ensure the moisture source is addressed to prevent regrowth. Cleaning Tips emphasizes balancing effective cleaning with finish preservation, especially on older or antique wood.
Step-by-step overview (integrates with the detailed steps below)
The following steps are designed to keep you safe while effectively removing surface mold and reducing recurrence. You’ll start by preventing spread and protecting yourself, then remove surface spores, apply a wood-friendly disinfectant, and finish by drying and sealing to protect the wood. Remember: moisture is the driver of mold growth, so controlling humidity is essential for long-term success.
Aftercare: drying, sealing, and prevention
Once the wood is clean, it must dry completely to prevent regrowth. Improve air circulation with fans or a dehumidifier, and monitor humidity levels in the room—aim for a relative humidity level that keeps the wood dry (often below 60%). If the wood has sustained surface damage or minor rot, consider sanding and refinishing to restore the surface or replacing severely damaged sections. Sealing the wood with a water-based sealant after it’s fully dry can create a barrier against future moisture intrusion. To prevent recurrence, address the moisture source, fix leaks, and maintain consistent ventilation. Cleaning Tips recommends routine inspections of areas prone to dampness (basements, bathrooms, kitchens) and establishing a moisture management plan.
Authoritative sources
- U.S. Environmental Protection Agency (EPA) mold guidelines: https://www.epa.gov/mold
- National Institute of Environmental Health Sciences (NIEHS) mold topic: https://www.niehs.nih.gov/health/topics/agents/molds/index.cfm
- Centers for Disease Control and Prevention (CDC) mold information: https://www.cdc.gov/mold/default.htm
These sources provide complementary guidance on mold risks, moisture control, and safe cleaning practices. Cleaning Tips highlights these authorities as foundational references for mold-related cleaning and prevention.
Troubleshooting and mistakes to avoid
Common mistakes include using too much water on wood, which can push moisture deeper into porous surfaces, and rushing to seal moldy wood without ensuring it’s completely dry. Avoid abrasive tools that can scratch and harbor mold spores. Always test cleaners on a small, hidden area first to ensure no unintended damage or discoloration. If you’re unsure about moisture levels or the extent of damage, pausing to seek help from a mold remediation professional can prevent costly mistakes.
What to do with mold-damaged wood
If wood is deeply penetrated by mold or shows signs of rot, replacement is often the most reliable solution. Surface mold that hasn’t damaged the structural integrity of the wood can be cleaned and preserved with proper drying and sealing. If in doubt, consult a professional to assess whether repair or replacement is necessary and to ensure that the mold issue is fully resolved, including the moisture source.
Tools & Materials
- N95 respirator mask(Fit-tested if possible; protects against inhaling spores)
- Protective safety goggles(Eye protection against splashes and spores)
- Nitrile gloves(Chemical resistant; avoid latex if you have a latex allergy)
- Long-sleeve clothing / coveralls(Minimize skin exposure; washable after use)
- Soft-bristle brush(Gently dislodge surface mold without scratching wood)
- Non-abrasive sponge(For applying cleaners without abrading finish)
- Bucket(Mix cleaning solutions and rinse tools)
- Spray bottle(Apply cleaners evenly without soaking wood)
- Mild dish soap(Gentle cleaning base for surfaces)
- White vinegar (5% acidity)(Natural cleaner for mold on non-porous surfaces)
- Hydrogen peroxide (3% solution)(Disinfectant to reduce spores)
- Baking soda(Create a paste for deodorizing and mild abrasion)
- Microfiber cloths(Lint-free cleaning and drying)
- HEPA vacuum or high-efficiency filter vacuum(Capture spores during cleanup)
- Box fan or dehumidifier(Speed up drying and reduce humidity)
- Wood sealant or water-based polyurethane(Optional after drying to protect wood)
Steps
Estimated time: 2-4 hours
- 1
Assess moisture and mold extent
Identify how widespread the mold is and locate the moisture source. If the area is small and free of water damage, DIY cleaning is reasonable; otherwise, plan for moisture remediation first.
Tip: Document the area with photos before starting to track changes. - 2
Protect yourself and the space
Put on PPE (mask, goggles, gloves) and isolate the area with plastic sheeting if possible. Open windows or run a ventilation fan to improve air flow while you work.
Tip: Never work in bare skin exposure to mold; cover exposed arms and legs. - 3
Ventilate and begin drying
If you detect moisture, start air movement and remove dampness with a dehumidifier or fan. The aim is to reduce relative humidity in the space to below 60%.
Tip: Place absorbent materials (towels, rags) nearby to catch drips without pooling. - 4
Remove loose mold and spores
Gently brush the surface with a soft-bristle brush and vacuum with a HEPA-equipped cleaner to capture loose spores. Work from less affected areas toward more contaminated spots.
Tip: Avoid aggressively scraping; you can drive mold deeper into pores. - 5
Clean the wood surface
Wash with a mild detergent solution or apply white vinegar to the surface. Wipe with a damp sponge, taking care not to oversaturate the wood.
Tip: Test any cleaner on a hidden area first to check for discoloration. - 6
Disinfect and deodorize
Apply hydrogen peroxide to the mold-affected area or make a baking soda paste for porous wood surfaces. Allow it to sit briefly before wiping away.
Tip: Do not mix cleaners; rinse after use and dry completely. - 7
Dry thoroughly and inspect
Allow the wood to dry completely, using fans and dehumidifiers as needed. Check for any remaining staining or smell that indicates lingering spores.
Tip: A moisture meter can help confirm drywood status. - 8
Repair, seal, and prevent recurrence
If the wood is damaged, repair or replace it. Seal the surface with a wood-safe sealant after it’s fully dry to reduce future absorption.
Tip: Address moisture sources (leaks, humidity) to prevent recurrence.
Questions & Answers
Can you clean mold off wood without removing paint or finish?
For light surface mold on finished wood, you can clean without removing the finish using mild cleaners and proper drying. If mold has penetrated the finish or wood, refinishing or replacement may be necessary.
Yes, you can clean surface mold off painted or finished wood, but deeper penetration may require refinishing or replacement.
Is bleach safe to use on wood mold?
Bleach can kill mold on non-porous surfaces, but it is not ideal for porous wood and can damage finishes. For wood, prefer vinegar or hydrogen peroxide and ensure thorough drying.
Bleach isn’t the best choice for wood mold; use vinegar or hydrogen peroxide and dry thoroughly.
What if mold returns after cleaning?
If mold returns, re-evaluate moisture sources and ensure the area is fully dried. Re-clean and adjust ventilation and humidity control; persistent growth may require professional assessment.
If it comes back, fix the moisture and re-clean; persistent growth needs a pro.
Should I remove mold-damaged wood?
If wood is deeply mold-damaged or rotted, replacement is typically the safest option. Surface mold can often be cleaned and preserved with proper drying and sealing.
Deeply damaged wood should be replaced; surface mold can be cleaned and sealed.
How long should I ventilate during cleaning?
Keep the space well-ventilated for at least 24-48 hours after cleaning to help dry out residual moisture and prevent regrowth.
Ventilate for a day or two after cleaning to dry the area.
Can hot water cause more mold growth?
Water and moisture drive mold growth. Use warm, not soaking wet cleaning methods, and immediately dry the wood after washing.
Moisture is the key factor, not heat; avoid soaking wood and dry it promptly.
Watch Video
The Essentials
- Identify moisture source and limit exposure
- Use wood-friendly cleaners and test first
- Wear PPE and ventilate the area
- Dry wood thoroughly to prevent regrowth
- Seal and monitor humidity to protect wood