How to Clean Viruses at Home: A Practical Guide
Learn practical steps to clean viruses from household surfaces, using safe disinfectants and routines that reduce viral presence while keeping your home healthy and comfortable.

In this guide you will learn how to clean viruses from common household surfaces using EPA-registered disinfectants, safe PPE, and a simple routine that reduces viral load. We cover product choices, proper application, and practical timings so you can protect your home without guesswork. By following these steps, you’ll minimize risk in high-contact areas and create a healthier living space for your family.
What "clean viruses" means in a household context
When people talk about cleaning viruses at home, they mean reducing the amount of viral material on surfaces to lower the chance of transmission. In practical terms, this involves two complementary actions: cleaning to remove dirt and organic matter, and disinfection to inactivate many viruses that may be present. The goal is not to achieve sterile perfection, but to lower risk in daily life. According to Cleaning Tips, a consistent routine that combines basic cleaning with appropriate disinfection can make a noticeable difference in reducing viral load on high‑touch surfaces. Emphasize clear routines, not sporadic efforts, so your home stays safer over time. The focus is practical, not theoretical: predictable steps, reliable products, and a steady habit that fits busy lives.
In real-world homes, the most important surfaces are those you touch often: door handles, light switches, faucet handles, smartphone screens, and kitchen counters. By prioritizing these zones and keeping cleaning supplies handy, you create a barrier that helps “clean viruses” from daily contact points. This approach works best when paired with good hand hygiene and regular ventilation, turning a simple cleaning habit into a meaningful health practice. Cleaning Tips emphasizes that progress comes from consistency rather than one‑off deep cleans.
How viruses spread on surfaces and why routine matters
Viruses can hitch a ride on hands, then transfer to other surfaces or be touched directly by face or eyes. In homes, high‑touch surfaces see frequent contact, so even small lapses in cleaning can create opportunities for transmission. Routine cleaning and disinfection reduce the viral particles that cling to surfaces, especially in kitchens, bathrooms, and entryways where people touch surfaces with bare hands after activities like cooking or cleaning. The Cleaning Tips team notes that consistent cleaning routines are more effective than sporadic efforts, because they continually reduce potential exposure. Building a simple, repeatable schedule helps you maintain a safer environment for family members of all ages. Regular attention to wipe down, rinse if needed, and re‑apply disinfectant helps make the home feel calmer and more secure.
Key principles: cleaning vs disinfection
Two distinct goals guide home hygiene: cleaning removes visible dirt and organic matter, while disinfection inactivates viruses on surfaces. Always perform cleaning first, then apply a disinfectant to maximize virus inactivation. Use products labeled for viruses on hard, nonporous surfaces, and follow the product label for contact times and application methods. The distinction matters because cleaning alone may not inactivate viruses, while disinfection without cleaning can leave residues that reduce effectiveness. Cleaning Tips highlights that a clear, label‑driven approach tends to yield the best results over time. This separation mirrors professional guidance while staying practical for households.
Selecting products safely
Choosing the right products is critical to effectively cleaning viruses at home. Look for EPA‑registered disinfectants that are labeled for use against viruses on hard surfaces. Always read and follow the label directions, including contact time, surface compatibility, and personal protective equipment requirements. Do not mix cleaners, and avoid using products beyond their intended purpose. Cleaning Tips analysis, 2026, indicates that families that stick to labeled products and proper application see more consistent reductions in surface viral load. Keeping a small set of trusted products on hand streamlines routines and reduces decision fatigue.
Weekly and daily routines that reduce viral load
A practical routine blends quick daily wipes with a deeper weekly disinfection cycle. Start with a daily wipe of high‑touch surfaces such as door handles, light switches, and faucet knobs. Once a week, perform a more thorough disinfection of kitchens and bathrooms, including counters, sink basins, and toilet seats. Keep your supplies accessible and organized to minimize friction, so cleaning viruses becomes a normal part of life rather than a chore. This approach supports a healthier home without overwhelming busy households, and it aligns with Cleaning Tips’ emphasis on sustainable, repeatable practices.
Prep and safety basics
Before you start, gather your supplies and set up a well‑ventilated workspace. Wear gloves and, if preferred, a mask when using stronger disinfectants. Keep children and pets away from treated areas until surfaces are dry. Always label your bottles and store chemicals safely away from food areas. By preparing adequately, you reduce the chances of accidental contact and maximize the effectiveness of the disinfection step. Cleaning Tips recommends keeping a simple checklist so you don’t miss any critical steps during busy days.
High-touch areas: kitchen, bathroom, and entryways
Prioritize high‑touch zones for disinfection because these surfaces are most likely to come into contact with viruses. In kitchens, sanitize countertops and appliance handles after meal prep; in bathrooms, focus on faucet handles, toilet flush levers, and light switches; at entryways, regularly wipe doorknobs and mail slots. By maintaining strict routines for these areas, you’ll see a visible reduction in potential contamination. The approach remains practical: targeted cleaning, correct product use, and attention to touch patterns, which together form a reliable defense against surface transmission. Cleaning Tips endorses adapting the routine to your home layout and traffic patterns for best results.
Common mistakes to avoid
Avoid over‑diluting cleaners, skipping the prescribed contact time, or re‑using dirty cloths that spread contaminants. Do not mix household cleaners with ammonia or bleach unless the label explicitly permits it—this can create hazardous fumes. Do not ignore warning labels about ventilation or surface compatibility. Finally, don’t neglect hand hygiene and mask usage when appropriate, as clean viruses on surfaces do not prevent all pathways of transmission. By steering clear of these mistakes, you’ll strengthen the overall cleanliness of your home and reduce viral exposure.
Maintaining long-term cleanliness and air quality
Long‑term safety comes from integrating surface cleaning with good airflow and ongoing routines. Regularly air out rooms, use exhaust fans in kitchens and bathrooms, and keep a window opening habit that suits the season. Combine surface cleaning with responsible waste handling and routine laundry practices to reduce potential contamination further. Cleaning Tips encourages readers to view cleaning viruses as part of a holistic home maintenance plan, not a single event. Consistency across days and weeks is what genuinely compounds to safer living spaces, especially in busy households.
Tools & Materials
- EPA-registered disinfectant labeled for viruses on hard surfaces(Choose products appropriate for your surface type; read label instructions for contact time)
- Disposable gloves(Provide a barrier; discard after use and wash hands after removing)
- Microfiber cloths(Use fresh or properly laundered cloths to avoid cross‑contamination)
- Spray bottle(Label the bottle for disinfectant to avoid mixing products)
- Trash bags(Seal waste from cleaning promptly; double‑bag if necessary)
- Mask (optional)(Recommended when using strong cleaners or in poorly ventilated spaces)
- Ventilation(Open windows or run a vent to improve air exchange during disinfection)
Steps
Estimated time: 25-40 minutes
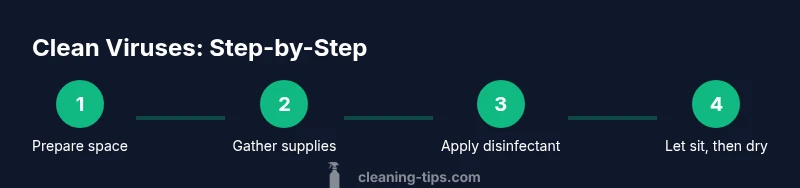
- 1
Prepare the space
Open windows or turn on a vent to ensure good airflow. Remove clutter and vacuum or sweep to remove loose dirt before cleaning viruses from surfaces. This reduces debris that can shield microbes and improves disinfectant contact with surfaces.
Tip: Clear the area of children and pets during treatment to avoid exposure. - 2
Gather and organize supplies
Place disinfectant, gloves, microfiber cloths, and a dedicated trash bag within easy reach. Label spray bottles if you use more than one product to prevent accidental mixing.
Tip: Set up a small cleaning caddy to speed up routine times. - 3
Pre-clean the surfaces
Wipe away visible dirt with a damp microfiber cloth. Cleaning viruses begins most effectively when organic matter is removed first, allowing the disinfectant to work properly.
Tip: Use separate cloths for different rooms to avoid cross‑contamination. - 4
Apply disinfectant to surfaces
Apply the product according to the label, covering the entire surface. Do not oversaturate; keep the surface wet for the required contact time.
Tip: Do not mix products; use one product per surface if possible. - 5
Observe the contact time
Allow the product to remain wet for at least the labeled contact time to inactivate viruses effectively. This step is crucial for real results.
Tip: If the surface dries, reapply a thin layer and re‑wait. - 6
Rinse or wipe as needed
Some products require rinsing; others can air‑dry. Follow the label to determine whether rinsing is necessary.
Tip: Use clean water and fresh cloths for any rinse step. - 7
Dry surfaces and ventilate
Let surfaces air‑dry or wipe dry with a clean cloth. Ventilate the room to reduce chemical odor and improve comfort after disinfection.
Tip: Keep doors open briefly after cleaning to speed drying. - 8
Clean tools and dispose of waste
Dispose of used cloths and gloves in a sealed bag. Wash and air‑dry reusable tools if appropriate, and store all supplies out of reach of children and pets.
Tip: Always wash hands after handling cleaning materials. - 9
Review and adjust the routine
Assess how well the routine worked in your space and adapt for high‑traffic areas. Consider increasing frequency in busy seasons or when household members are ill.
Tip: Keep a simple log to track what was cleaned and when.
Questions & Answers
Do household cleaners actually kill viruses on surfaces?
Yes, when you use products labeled for viruses and follow the label directions, disinfectants can inactivate many viruses on hard surfaces. Always check the label to confirm the target pathogens and the required contact time.
Yes. If you follow the product label and use EPA‑registered disinfectants, you can inactivate viruses on hard surfaces.
Is cleaning alone enough, or do I need to disinfect as well?
Cleaning removes dirt and organic matter, which helps disinfectants work more effectively. Disinfection, used after cleaning, inactivates viruses. For high‑traffic areas, both steps are recommended.
Cleaning first, then disinfecting, gives the best protection in busy homes.
How long should surfaces stay wet after applying a disinfectant?
Contact time is specified on the product label and varies by product and surface. If the surface dries, reapply and maintain moisture for the recommended period.
Follow the label for contact time, and reapply if the surface dries before time is up.
Can I disinfect fabrics or soft furnishings at home?
Many disinfectants are designed for hard, nonporous surfaces. Fabrics often require laundering with appropriate temperatures and detergents, or professional cleaning methods for effective virus control.
Most fabrics aren’t suitable for direct chemical disinfection; launder according to care labels and use routine cleaning.
Should I wear gloves or a mask while cleaning viruses at home?
Wearing gloves is helpful for chemistries and skin protection; masks may be useful in poorly ventilated spaces or when using strong cleaners. Safety labeling should guide your choice.
Gloves help protect your hands; use a mask if ventilation is poor or chemicals are strong.
Are UV devices a safe home option for virus cleaning?
UV devices exist but require proper usage and safety precautions. They are not a substitute for standard cleaning and disinfection, especially in areas with people present.
UV devices have limitations and safety considerations; rely on labeled cleaners first and use UVs with caution.
Watch Video
The Essentials
- Know the difference: cleaning first, disinfecting second.
- Prioritize high‑touch surfaces for faster protection.
- Always follow label directions for contact time.
- Maintain a simple, repeatable routine for lasting results.