Full Detox com Clean: A Complete Home Cleaning Guide
Learn a step-by-step detox cleaning routine for a healthier home. This guide covers safe methods, eco-friendly products, time-saving tips, and practical checklists from Cleaning Tips.

You will perform a full detox cleaning routine that targets high-traffic areas, reduces residue, and refreshes indoor air. This guide explains the exact sequence, required supplies, and safety considerations so you can complete a thorough refresh in under a day.
Why a full detox cleaning matters
According to Cleaning Tips, a comprehensive reset of living spaces goes beyond quick surface cleaning. The phrase 'full detox com clean' captures the idea of a complete reset—removing built-up grime, stale odors, and hidden residues that affect air quality and mood. This approach isn't a one-off; it's a practical habit that reduces allergens, improves ventilation, and creates a healthier home environment for you and your family. By investing a few focused hours, you can reclaim brightness in kitchens, baths, and living areas. The benefits compound over time as routine tasks become faster and more predictable.
In practice, a detox cleaning targets three layers: surface dirt, embedded film on surfaces, and microscopic particles in the air. You’ll learn to sequence tasks so you don’t re-contaminate cleaned areas while staying mindful of occupant safety and product ingredients. Cleaning Tips analysis shows that households that adopt a regular detox routine report noticeable improvements in air freshness and overall cleanliness. This section sets the stage for the practical steps that follow.
Before you begin, gather a simple, non-toxic toolkit and allocate a dedicated window of time. The goal is consistency, not perfection; small, repeated sessions yield lasting results. If you have kids or pets, choose fragrance-free products and ensure drying times are respected to minimize exposure. The next sections walk through the strategies and steps that make a full detox com clean feasible in real homes.
Top areas to target in a detox routine
A successful detox cleaning starts with prioritizing spaces that accumulate the most grime and affect air quality. Begin with the kitchen and bathrooms, then move to living areas, bedrooms, and entryways. In the kitchen, wipe high-touch surfaces like cabinet fronts, handles, and the stovetop; clean appliances from exterior to interior where accessible, and finish with a fridge exterior wipe that removes fingerprints and spills. In bathrooms, target grout lines, tile surfaces, and fixtures where mineral deposits build up. Living rooms and bedrooms should receive dust removal from ceiling fans, light fixtures, and air vents, followed by fabric care for curtains and throw pillows.
Floor care is essential in detox cleaning. Start with vacuuming to remove hair, dust, and allergens, then mop with a gentle cleaner designed for your floor type. Textiles—curtains, rugs, and bedding—are hotspots for dust and odors; address them with regular washing or steam cleaning when possible. Finally, consider airing out spaces for 15–30 minutes after cleaning to flush out any remaining odors. A consistent, room-by-room approach prevents cross-contamination and ensures a uniform level of cleanliness across the home.
Choosing safe, effective cleaners
Detox cleaning relies on simple, non-toxic ingredients that are effective when used correctly. A vinegar-and-baking-soda toolkit provides versatile cleaning power for most non-porous surfaces, while baking-soda paste works well on stubborn grime and grout. When selecting cleaners, prioritize products with low or no VOCs, and avoid harsh solvents that can irritate the lungs or skin. Read labels for active ingredients and avoid combining cleaners that can release harmful gases. For those with sensitivities, fragrance-free options reduce the risk of headaches or allergies.
Testing is a crucial step: always try a small, inconspicuous patch before applying a new cleaner to a larger area. Keep a color-safe cloth handy to monitor residue; if you notice streaks or color transfer, switch to a milder solution. Storage matters too—label bottles, keep chemicals away from children and pets, and store in a cool, dry place. By choosing safer cleaners and using them properly, you safeguard your family while achieving a genuinely refreshed home environment.
Step-by-step flow of a detox cleaning day (workflow)
A detox cleaning day benefits from a clear workflow that minimizes backtracking and maximizes efficiency. Plan to tackle zones sequentially, for example: kitchen first (surfaces, appliances, sink), then bathrooms (toilet, sink, shower), followed by living spaces (dusting, upholstery), and finally floors. Allocate buffer times between zones to allow surfaces to dry and odors to dissipate. If you’re cleaning with others, assign non-overlapping tasks to keep momentum up and prevent confusion. A well-timed playlist or timer can help you stay on track without cutting corners.
Ventilation is essential during this process; open windows before starting and keep them open as you move through each zone. When using cleaners, work from top to bottom to catch falling debris, and avoid reintroducing grime by cleaning nearby surfaces after finishing a section. If you notice persistent odors, address them with targeted deodorizing steps such as deodorizing the garbage area, washing textiles, and refreshing air with a purifier or fresh air exchange. The goal is a cohesive, breathable space rather than a series of isolated clean patches.
Maintaining a detox standard
To sustain the benefits of a full detox com clean, turn cleaning into a habit rather than a one-off event. Schedule regular mini-sessions—15 to 30 minutes once or twice a week—to address hot spots before they become ingrained. Create a simple maintenance checklist: wipe high-touch surfaces weekly, vacuum or sweep floors every few days, and wash textiles every few weeks depending on use. Tracking progress with a checklist helps you stay motivated and consistent, which compounds long-term results. Finally, educate household members about the detox routine so they understand the purpose and participate actively. Regular communication sustains momentum and reduces future deep-clean demands.
Quick-start plan and expectations
If you’re starting from a lower baseline, begin with a foundational detox day that covers the kitchen, bathroom, and a main living area. Expect noticeable improvements in air quality, brightness, and smell after the first pass. Subsequent sessions will become faster as you build muscle memory for the steps and develop a better sense of which surfaces need more attention. Remember, the goal of this guide is to establish a practical, repeatable system that protects your family’s health and keeps the home inviting.
Tools & Materials
- All-purpose cleaner (eco-friendly, non-toxic)(Label-free or low-VOC; store away from children)
- White vinegar(Dilute for surfaces; avoid mixing with bleach)
- Baking soda(For scrubbing and deodorizing)
- Microfiber cloths(Lint-free; replace when dirty)
- Spray bottles(At least two; label separate solutions)
- Rubber gloves(Protect hands during scrubbing)
Steps
Estimated time: 3-4 hours
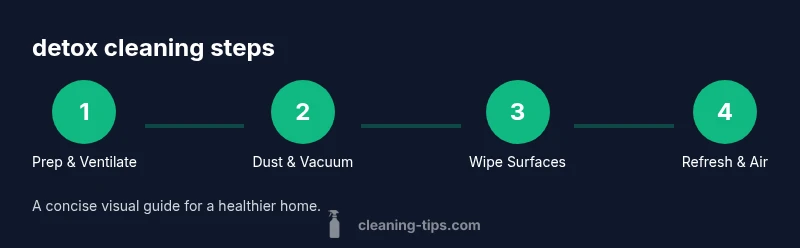
- 1
Clear and ventilate
Begin by opening windows and doors to create airflow. Remove clutter from surfaces you’ll clean to prevent recontamination as you work. This step reduces the concentration of airborne particles and makes the following steps more effective.
Tip: Ventilate for at least 10–15 minutes before starting deeper cleaning - 2
Dust and vacuum high-traffic areas
Dust ceiling corners, light fixtures, and shelves. Vacuum floors thoroughly to remove hair and dust that will otherwise spread when you mop. This reduces allergens and makes surface cleaning easier.
Tip: Use a vacuum with a HEPA filter if possible - 3
Prep cleaning solutions
Mix a safe, vinegar-based cleaner for many surfaces and a baking-soda paste for tougher grime. Label bottles to avoid cross-contamination. Always test a small area first.
Tip: Do not mix vinegar with bleach or ammonia - 4
Clean kitchen surfaces and appliances
Wipe countertops, cabinet fronts, and the stove. Clean the sink with a paste or gentle abrasive. Empty and wipe the fridge exterior; discard expired items.
Tip: Focus on handles and edges where germs accumulate - 5
Tackle bathrooms and floors
Clean toilets, sinks, showers, and tiles. Use the baking-soda paste on grout where needed. Mop floors with a mild cleaner and allow to dry completely.
Tip: Rinse mop frequently to avoid spreading grime - 6
Refresh textiles and air
Launder towels and rugs as needed. Replace or wash shower curtains. Finish by running a door-to-door air out and consider an air purifier if available.
Tip: Spot-clean fabrics to prevent residue transfer - 7
Final check and maintenance
Walk through the home to ensure every area feels fresh. Note any persistent spots to revisit. Schedule a 15-minute weekly touch-up to maintain results.
Tip: Keep your supplies organized and accessible
Questions & Answers
What is a full detox cleaning routine?
A detox cleaning routine is a comprehensive approach that removes built‑up grime, odors, and residue from all living areas using safe, eco-friendly methods. It focuses on deep cleaning surfaces, fabrics, and indoor air quality.
A detox cleaning routine is a deep, eco-friendly cleaning plan that targets every room for a healthier home.
How long does a full detox cleaning take?
Typical sessions take 3–4 hours for a thorough refresh, depending on home size and clutter level. You can split into two sessions if needed.
Most people finish in about half a day, depending on space and prep.
Can I use DIY cleaners safely around kids and pets?
Yes, using simple, non-toxic ingredients like vinegar, baking soda, and water can be safe when used as directed. Always test surfaces and ensure proper ventilation.
Yes—stick with non-toxic ingredients and test first, with good ventilation.
What if I have allergies or sensitivities?
Consider fragrance-free products and rinse thoroughly. Use an air purifier and keep windows open during cleaning when possible.
If you have allergies, choose unscented products and improve airflow.
Should I replace filters or clean air ducts?
Inspect and replace HVAC filters as recommended by the manufacturer and consider professional cleaning for ducts if you notice persistent odors or reduced airflow.
Check filters and ducts; replace or clean as recommended.
Watch Video
The Essentials
- Plan a detox cleaning day with ventilation first.
- Target surfaces, then textiles for best results.
- Use eco-friendly cleaners to protect indoor air quality.
- Ventilate and dry surfaces to prevent mold growth.
- Maintain routine to sustain a cleaner, healthier home.