How to Clean a Clean Out: A Practical DIY Guide
Learn how to safely clean a plumbing clean out with practical steps, required tools, safety tips, and when to call a professional. This Cleaning Tips guide covers safety, testing flow, and proper re-sealing.

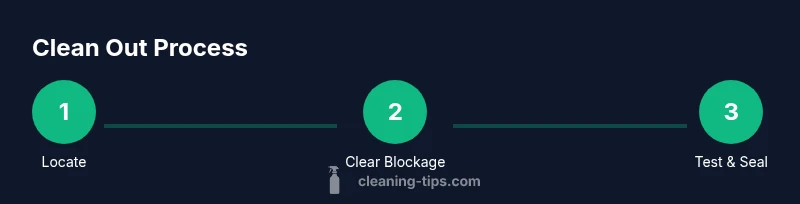
To clean a clean out, locate the exterior or basement access, remove the cap, and clear minor blockages with a plumber’s snake or flexible wire. Use a bucket and towels for spills, and avoid flushing harsh chemicals. Always wear gloves and eye protection, label the line, and re-secure the cap after testing. This guide covers safety, tools, and best practices.
What is a clean out and why it matters
A clean out is an access point to your home’s sewer or drainage line. It gives you a controllable entry for clearing blockages, venting, or inspecting the line without tearing into walls. According to Cleaning Tips, understanding the location and purpose of the clean out helps homeowners avoid unnecessary damage and backups. Regular, careful maintenance reduces the risk of sewage backup and costly repairs. This block explains what a clean out looks like, where it’s typically located, and why it matters for routine home cleaning and plumbing health.
Key takeaway: A clean out is a critical, accessible choke point for maintaining drainage and preventing backups when routine cleaning or emergency clearing is needed.
Safety first: PPE and hazards
Before you touch a clean out, prepare with personal protective equipment (PPE) and a clear plan. Sewer gas and contaminated water can pose health risks, so gloves (nitrile or rubber), eye protection, and a face mask are essential. Work in a well-ventilated area and keep children and pets away. Never mix chemical drain cleaners with other cleaners in or near a clean out; this can create hazardous fumes or pressure buildup. Have a bucket, towels, and rags ready to manage spills. If you smell strong sewer gas, stop and seek professional help immediately.
- PPE: gloves, eye protection, and a mask
- Ventilation: open doors/windows if possible
- Safety: avoid hazardous chemical mixtures and abrupt pressure changes
Tools and materials you will need
Preparing the right tools saves time and reduces risk. Below is a practical list, with essential items marked as required. If you lack a tool, consider borrowing or renting rather than improvising and risking injury.
- gloves (nitrile or heavy-duty rubber) — required for skin protection
- eye protection — required to shield from splashes
- plumber’s snake or drain auger (3–6 ft) — required for clearing blockages
- bucket or trough to catch water and debris — required
- old towels or rags — required for cleanup
- flashlight or headlamp — required for visibility inside the clean out
- adjustable wrench or channel locks — optional but helpful for stubborn caps
- marker or tape — optional for labeling after testing
- vented water source or hose — optional for thorough rinsing when allowed
Tip: Keep a dedicated cleaning kit for clean outs to streamline future maintenance.
Locating the clean out and preparing the work area
Most homes have a clean out near the foundation, in crawl spaces, basements, or outside walls. Look for a capped pipe with a screw-on or plug-style cap. If you’re unsure, consult your home’s schematic or a licensed plumber. Once located, place towels around the area to catch any spills and ensure proper lighting. If the cap is difficult to remove, don’t force it; use heat or penetrating oil sparingly and avoid tools that could damage the cap.
- Identify the correct access point
- Clear the surrounding area of debris
- Ensure good lighting and a stable working space
Step-by-step cleaning overview
This section provides a high-level, non-duplicative overview of the cleaning process. You’ll follow practical, mechanical methods first before resorting to chemicals. The goal is to clear blockages, verify drainage, and reseal the access properly. Maintain control of the workflow, document any unusual findings, and stop if conditions worsen or backflow occurs. Remember, mechanical methods typically work best for minor clogs and reduce exposure to potentially hazardous cleaners.
- Assess the blockage type and approach
- Prepare the area and PPE
- Use manual tools to clear debris
- Reassess drainage after each action
Step-by-step cleaning process (overview of actions)
The following actions are intended as a practical roadmap. For detailed instructions, refer to the dedicated STEP-BY-STEP section later in this article. The workflow emphasizes safety, patience, and testing during each stage. Keep your tools within reach and avoid rushing the process to minimize splash-back and injury risks.
- Access and inspect the cap
- Clear debris with mechanical means
- Test flow with water
- Re-seal and verify no leaks
Testing the cleared line and verifying flow
Testing ensures the blockage is cleared and the line is functioning correctly. Slowly pour water or run a fixture nearby to observe drainage through the clean out. If you still observe resistance or backflow, repeat the clearing steps with careful manipulation of the snake. Bright lighting helps you see any residual debris. If water backs up into other fixtures, stop and reassess; persistent backups may require professional service.
- Test with a small amount of water at a time
- Watch for backflow or gurgling sounds
- Confirm that water drains smoothly
Re-sealing, cleanup, and disposal considerations
Once the line clears, re-secure the clean-out cap tightly. Clean the area, wipe down surfaces, and dispose of debris properly in accordance with local regulations. If you used any mechanical tools, wash and dry them before storage. Document any issues encountered during the process and plan a follow-up check in the next few months to prevent recurrence. If the cap threads are damaged, replace the cap before use.
- Tighten the cap firmly to prevent leaks
- Clean up tools and spills
- Schedule a follow-up check if problems recur
Troubleshooting common issues and when to stop
Even with careful technique, some blockages are stubborn or dangerous. If you encounter sewage odors, strong backflow, or persistent backups after multiple attempts, stop immediately and contact a licensed plumber. Never force a cap that won’t budge; forcing can crack the pipe or create other hazards. For minor leaks, verify the line is dry and reseal with plumber’s tape if needed. Remember that sewer lines can pose health risks, so err on the side of caution.
- Stop if you smell sewer gas or see active backflow
- Do not mix cleaners or use harsh chemicals
- Seek professional help when in doubt
Prevention and maintenance tips to reduce future clogs
Prevention is easier than repair. Schedule regular inspections of exterior drainage, install strainers in sinks and showers, and avoid pouring fats, oils, or non-dissolvable products down the drain. A quarterly maintenance routine can include flushing with hot water (if permitted by your plumbing system), using a plunger on stubborn drains, and keeping vegetation away from outdoor clean-outs. Cleanouts should be kept accessible and labeled clearly to simplify future maintenance.
- Implement regular maintenance routines
- Use strainers and avoid inappropriate materials down the drain
- Maintain clear access to clean-out locations
When to call a licensed plumber
If you encounter repeated blockages, sewage backups, or sewer gas, consult a licensed plumber promptly. While basic cleaning can be DIY, complex clogs, root intrusion, or damaged pipes are beyond safe DIY scope and require professional assessment. A plumber can perform camera inspections to locate the exact blockage and provide a permanent solution to prevent future issues. Always follow local codes and permit requirements for any substantial work.
- Call when backflow or sewer gas is detected
- Consider professional camera inspection for persistent problems
- Check local codes and permit requirements
Tools & Materials
- gloves (nitrile or heavy-duty rubber)(Protect hands from sewage and debris)
- eye protection(Safety glasses or splash goggles)
- plumber’s snake / drain auger (3–6 ft)(For clearing blockages)
- bucket(Catch water and debris)
- old towels or rags(Contain spills and cleanup)
- flashlight or headlamp(Inspect inside the cleanout)
- adjustable wrench or channel locks(Helpful for stubborn caps)
- marker or tape(Label the line after testing)
- penetrating oil (optional)(Use sparingly on stubborn caps)
Steps
Estimated time: 60-90 minutes
- 1
Locate the clean-out access
Identify the correct clean-out location near the foundation or in a basement crawl space. Confirm it is the clean-out by checking for a capped pipe with a nut-style or screw cap. This reduces the risk of working on the wrong line.
Tip: If unsure, consult a diagram of your home’s plumbing or call a pro to confirm. - 2
Put on PPE and prepare the area
Don gloves, eye protection, and a mask. Place towels beneath the area to catch spills and ensure good lighting. Have your bucket ready for debris.
Tip: Ventilate the area; opening a nearby window helps reduce fumes. - 3
Remove the clean-out cap safely
Use the wrench if necessary and twist counterclockwise to loosen. Do not pry forcefully. If it sticks, apply a small amount of penetrating oil around the threads and wait 5–10 minutes.
Tip: Protect the threads by turning slowly and evenly. - 4
Inspect the interior and clear debris
Shine a light into the opening and assess the blockage. Use the plumber’s snake to engage and break up the obstruction, twisting to dislodge. Remove debris into the bucket as you go.
Tip: Work slowly; quick jerks can cause splashes. - 5
Test drainage incrementally
Warm water or a small amount of clean water can help observe the flow. If water clears, proceed to the next step; if it stalls, repeat the snake action more gently.
Tip: Always test with small amounts to avoid overflow. - 6
Re-seat the cap and check for leaks
Twist the cap back on securely. Use a towel to wipe any drips and check that the cap sits flush against the housing. Run water from a nearby fixture to confirm there are no leaks.
Tip: If leaks persist, inspect the gasket or threads for damage. - 7
Clean up and store tools
Dispose of debris in accordance with local regulations. Clean and dry tools before storing and return any borrowed equipment. Label the area for future reference.
Tip: Record the date and any observations for future maintenance.
Questions & Answers
Do I need a professional to clean a clean-out?
For simple blockages, a confident DIY approach with mechanical clearing can work. Persistent backups, sewer gas, or repeated clogs indicate a professional assessment is wise to avoid damage and ensure safety.
For minor blockages you can try clearing with a snake, but if backflow or sewer gas appears, call a plumber.
Can I use chemical drain cleaners in a clean-out?
Chemical cleaners are generally not recommended for clean-outs because they can create dangerous fumes and damage the pipe. Mechanical clearing is safer and more controllable.
Avoid chemical cleaners in clean-outs; use mechanical clearing first.
What PPE should I wear when cleaning a clean-out?
Wear waterproof gloves, safety glasses, and a mask if fumes are present. Ensure good ventilation and keep a towel handy for spills.
Put on gloves, eye protection, and a mask; work in a ventilated area.
How can I tell if the blockage is cleared?
Run clean water through the fixture and observe a smooth flow with no gurgling or backups. If resistance returns, repeat mechanical clearing or pause and reassess.
Test with water and watch for smooth drainage.
What should I do if the cap is stuck?
If the cap won’t budge, apply penetrating oil sparingly and wait, or seek professional help. Avoid forcing, which can damage threads or the pipe.
Don’t force the cap—use penetrating oil and seek help if needed.
Is it safe to DIY if sewage backs up?
No. Backups indicate a significant blockage or sewer issue. Stop, evacuate if necessary, and contact a licensed plumber to avoid exposure and health risks.
If sewage backs up, stop DIY and call a pro.
Watch Video
The Essentials
- Identify the correct clean-out location before starting
- Use mechanical methods first; chemicals are a last resort
- Wear appropriate PPE and maintain a clean workspace
- Test drainage incrementally and reseal cap securely
- Know when to stop and call a licensed plumber