How to Make Cleaning Vinegar: A Practical DIY Guide
Learn how to make cleaning vinegar safely, with practical substitutes, dilution tips, and usage guidance. This expert guide explains when to DIY, how to substitute with regular vinegar, and how to keep your home clean and eco-friendly.

To answer how to make cleaning vinegar: DIY concentration of acetic acid is not advised at home. Cleaning vinegar is a labeled product usually 6% acidity. For most cleaning tasks, use a store-bought cleaning vinegar or a regular white vinegar solution. This guide explains safe substitutes, proper dilutions, and best-use practices.
What is cleaning vinegar and why it's used
Cleaning vinegar is a labeled cleaning product designed for household cleaning, typically stronger than cooking vinegar. It helps remove mineral deposits, cut grease, deodorize, and brighten glass surfaces without leaving residue. Because it’s clearly labeled for cleaning, it provides a consistent strength and safer handling guidance. According to Cleaning Tips, cleaning vinegar offers a practical, eco-friendly option for everyday chores. This section clarifies what you’re working with and why it matters when you consider how to make cleaning vinegar. In practice, it’s useful for kitchen counters, bathroom fixtures, and appliances where mineral buildup or soap scum is an issue. It’s important to note that cleaning vinegar is not for ingestion, and products vary by market, so always read the label before use.
Is it possible to make cleaning vinegar at home?
In short, making true cleaning vinegar at home by altering acidity is not recommended. Commercial cleaning vinegar is produced under controlled conditions to ensure a consistent strength, safety, and labeling. Attempting to concentrate or modify acetic-acid content using household methods can create unpredictable results and hazardous fumes. If your goal is a stronger cleaner, the safer approach is to purchase a labeled cleaning vinegar or to use regular white vinegar with carefully measured dilutions. Cleaning Tips emphasizes following label directions to maintain surface safety and avoid unintended chemical reactions. For most homeowners, the best path is to choose a readily available product that meets the cleaning task at hand and use it according to the manufacturer’s instructions.
Understanding acidity: strength, safety, and labeling
Acidity strength influences cleaning power and potential surface impact. Cleaning vinegar products are labeled to help you compare strength to regular white vinegar. The labeling communicates the intended use, safety requirements, and storage guidelines. You’ll find warnings about surfaces that can be damaged by acids and recommendations to avoid mixing with bleach or ammonia. Reading the label helps you pick the right product for your task and reduces the risk of etching, discoloration, or corrosion. Use on non-porous surfaces first to gauge effect and always rinse or wipe clean after use. The Cleaning Tips team notes that users should respect concentrations and never assume all vinegars behave the same on every surface.
When to use cleaning vinegar vs regular vinegar
Regular white vinegar is versatile and affordable for many tasks, but cleaning vinegar is formulated for cleaning applications requiring a stronger, more predictable acid action. For tasks like deodorizing, descaling kettle surfaces, removing soap scum, and cleaning glass and chrome, cleaning vinegar is a convenient choice. For routine tasks or delicate surfaces, a dilute regular vinegar solution may suffice. The key is to match the product to the surface and the level of grime, then follow safety guidelines. The Cleaning Tips guidance suggests starting with a mild approach and escalating only if needed, using surface tests to minimize risk.
Common DIY substitutes and safety tips
If you don’t have cleaning vinegar on hand, you can use regular white vinegar for many tasks. A common DIY all-purpose cleaner is a 1:1 mix of white vinegar and water in a spray bottle. Optional fragrance via a few drops of essential oil can improve the scent, but avoid adding oils that leave residues or create slippery surfaces. Do not mix vinegar with bleach or ammonia, as dangerous gases can form. Always remember that acidity can affect certain materials; test on an inconspicuous spot first and rinse after cleaning. The goal is to achieve effective cleaning without damaging surfaces or harming household members.
How to use cleaning vinegar effectively in different tasks
Glass and mirrors are cleaned best with a spray-and-wipe method for a streak-free finish. In the kitchen, use vinegar after meals to cut grease and freshen surfaces; in bathrooms, it helps with soap scum and mineral deposits; for appliances, apply to kettle interiors or coffee makers to help remove scale buildup. Let the solution sit briefly on tough deposits, then wipe with a non-scratch cloth. Always use warm rather than hot vinegar for better performance, and maintain a regular cleaning routine to prevent heavy buildup. The Cleaning Tips team highlights that consistency yields the best long-term results.
Dilution guidelines for safe cleaning with vinegar
For most household tasks, a diluted spray solution is sufficient. A 1:1 ratio of vinegar to water is a common starting point for all-purpose cleaning. For delicate surfaces, begin with a more diluted mix (1:2) and increase only if needed. When dealing with greasy grime, you can apply a stronger solution briefly, but avoid letting the acid sit on surfaces for long. Always perform a spot test first. Using distilled water can reduce mineral deposits and help prevent streaks, while keeping surfaces safe.
Storage, shelf life, and disposal
Store vinegar-based cleaners in clearly labeled containers in a cool, dark place away from children and pets. Keep containers sealed to prevent evaporation and odor. Shelf life for vinegar-based cleaners is generally long, but avoid metal containers, as acids can corrode metal over time. If you need to dispose of a small amount, rinse the container with plenty of water and recycle the bottle where permitted. Following responsible disposal guidance helps minimize environmental impact and waste.
Alternatives and eco-friendly options
Other natural cleaners include baking soda, lemon juice, and safe essential oils used appropriately; these can complement vinegar cleaners. Baking soda provides gentle abrasion and deodorizing effects; lemon juice adds natural acidity and fragrance but can be harsh on some surfaces. For a fresh, non-toxic cleaning routine, combine these elements thoughtfully and follow surface compatibility guidelines. The goal is to minimize chemical exposure while maintaining cleaning effectiveness for everyday tasks.
Quick-start checklist and best practices
To begin using cleaning vinegar effectively: choose the right product, prepare a safe workspace, perform a surface test, dilute appropriately, label containers, wear gloves, and store safely. Develop a simple routine for routine cleaning to reduce buildup. Remember to avoid mixing with bleach or ammonia and never ingest cleaning vinegars. Consistency and proper labeling help maintain a healthy home environment while using eco-friendly products.
Tools & Materials
- White vinegar (5% acetic acid)(Base cleaner or substitute for dilutions)
- Cleaning vinegar (6% acetic acid)(If available; use per label directions)
- Spray bottle(Clear bottle preferred for monitoring)
- Measuring cup or graduated cylinder(For accurate dilutions)
- Funnel(Helpful for transferring liquids)
- Latex or nitrile gloves(Protect hands during handling)
- Essential oils (optional)(For fragrance; choose skin-safe options)
- Lemon juice (optional)(Alternative fragrance and mild acidity)
- Distilled water(Use for dilutions to reduce minerals)
- Label tape or permanent marker(Label homemade mixtures clearly)
Steps
Estimated time: 30-45 minutes
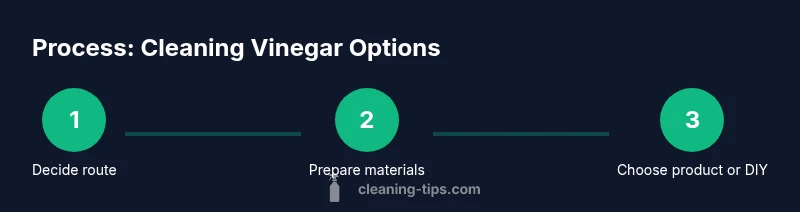
- 1
Decide route (buy vs DIY)
Determine whether you will use store-bought cleaning vinegar or prepare a diluted regular vinegar solution for your tasks. This sets the approach and reduces risk from attempting to modify acidity at home.
Tip: Document your chosen ratio and surface tests for future reference. - 2
Gather materials
Collect all required items from the Tools/Materials list and place them on a clean workspace. Having everything ready prevents mid-task interruptions and reduces accidents.
Tip: Set up in a well-ventilated area to avoid strong fumes. - 3
Prepare the workspace
Clear the area, open a window or turn on a vent, and lay down a protective cloth or mat. This minimizes drips and protects surfaces nearby.
Tip: Wear gloves to protect skin from acid exposure. - 4
Decant cleaning vinegar (if using bottle)
If you are using store-bought cleaning vinegar, pour a small amount into the spray bottle. This avoids clutter and makes application easier.
Tip: Label the bottle immediately with contents and date. - 5
Prepare dilution with regular vinegar (if not using cleaning vinegar)
Mix white vinegar with water at the chosen ratio (common starting point is 1:1) in the spray bottle for all-purpose cleaning.
Tip: Start with milder dilutions on test surfaces. - 6
Add fragrance (optional)
If desired, add a few drops of essential oil or a splash of lemon juice to improve aroma and masking of the vinegar scent.
Tip: Avoid heavy oils that leave residues on heat-sensitive surfaces. - 7
Label and set usage instructions
Label the container with contents, dilution ratio, and date. Clear labeling reduces misuse and accidental mixing with incompatible cleaners.
Tip: Include surface-safe notes to guide use. - 8
Test on a small area
Before broad use, apply the solution to a hidden or inconspicuous area and observe for any adverse reactions for a few minutes.
Tip: If discoloration or damage appears, discontinue use on that surface. - 9
Store and cleanup
Store in a cool, dark place away from kids and pets. Rinse surfaces with water after cleaning and wipe dry to prevent residue buildup.
Tip: Wash hands after handling and recycle empty containers where possible.
Questions & Answers
What exactly is cleaning vinegar and how does it differ from regular vinegar?
Cleaning vinegar is a cleaning-specific product designed for household use and is typically stronger than cooking vinegar. It is intended for cleaning tasks, not consumption, and comes with labeled instructions for safety and usage.
Cleaning vinegar is a cleaning-focused product that’s stronger than cooking vinegar and clearly labeled for safe household use. It’s not for drinking.
Can I make cleaning vinegar at home?
DIY concentration of acetic acid at home is not advised. For reliable results and safety, buy a labeled cleaning vinegar or use regular vinegar with proper dilution according to guidance.
DIY concentration is not advised. Buy a labeled cleaning vinegar or properly dilute regular vinegar following guidance.
Is cleaning vinegar safe on marble or granite?
Acids can damage natural stone finishes. Avoid applying vinegar on marble, granite, or unsealed stone without checking manufacturer guidance. Always test first on a hidden area.
Avoid using vinegar on natural stone like marble or granite, and test on a small area first.
Can vinegar disinfect surfaces?
Vinegar is not a registered disinfectant. For disinfection, use EPA-approved products as directed by manufacturers and follow surface compatibility guidelines.
Vinegar isn’t a registered disinfectant, so rely on EPA-approved products for disinfection when needed.
What ratio should I use for a basic cleaning spray?
A common starting point is a 1:1 vinegar-to-water spray for all-purpose cleaning. For delicate surfaces, start more dilute (1:2) and adjust based on surface response.
Try a 1 to 1 ratio, and if surfaces react badly, dilute further to 1 to 2.
How should I store homemade vinegar cleaners?
Store in clearly labeled containers away from children and pets, in a cool, dark place. Do not store in metal containers since acids can corrode metal.
Label and store in a safe place away from kids, in a non-metal container.
Watch Video
The Essentials
- Decide between buying cleaning vinegar or using a DIY dilution.
- Test on surfaces to prevent damage and verify compatibility.
- Never mix vinegar with bleach or ammonia for safety.
- Label containers clearly and store safely.
- Opt for store-bought cleaning vinegar when ease and consistency matter.