Pool and Clean: Step-by-Step Home Pool Maintenance
Learn how to pool and clean your swimming pool with a practical, step-by-step approach. From daily skim-and-check routines to seasonal balancing, Cleaning Tips shows you a safe, efficient routine for clearer water and healthier swimmers.

By the end of this guide you’ll understand how to pool and clean your swimming pool effectively, from daily skim-and-check routines to seasonal maintenance. You’ll learn a practical, repeatable schedule that aligns chemical balance, filtration, and surface cleaning. We’ll cover essential tools, safety reminders, and step-by-step actions you can perform without professional help. The goal: clearer water, healthier bathers, and fewer costly repairs.
Why Regular Pool Maintenance Matters
According to Cleaning Tips, proactive maintenance is more than a chore—it’s a health and cost-saving habit. A well-maintained pool reduces the likelihood of algae blooms, cloudy water, and equipment wear. Regular upkeep also minimizes chemical waste and helps you spot issues before they become expensive repairs. Homeowners and renters who commit to a simple routine report clearer water, better sanitizer efficacy, and fewer emergency calls to service technicians. Remember, a consistent schedule beats intensive, sporadic cleaning. By investing a small amount of time weekly, you protect your investment and create a safer swimming environment for your household.
Pool Types and Cleaning Impacts
Different pool surfaces and finishes respond to cleaning methods in distinct ways. Vinyl liners require gentler brushing to prevent scuffing, while concrete and plaster surfaces tolerate more robust brushing but need extra care to avoid etching. Fiberglass shells resist staining but can show etching from improper chemical balance. Understanding your pool type helps you choose compatible tools and schedules, reducing wear and keeping water chemistry stable. When in doubt, test a small area first and adjust your technique before scaling up.
Essential Tools and Supplies
A practical cleaning kit keeps you ready for routine tasks without running to the store after every session. Key items include a skimmer net, a telescoping pole, a pool brush with the right bristle type, a vacuum head compatible with your pool floor, a sturdy leaf rake, a test kit for pH and sanitizer, and chemical adjustments suitable for your system. Store chemicals in a cool, dry place and label containers clearly. Having a dedicated caddy or bucket speeds up your workflow and reduces cross-contamination.
Daily Quick Check Routine
Start each day with a quick visual check: water clarity, surface debris, skimmer baskets, and pump noise. A minute or two of inspection can prevent bigger issues. If you notice a slick film, scum line, or unusual odors, mark the date and plan a deeper check. Routine checks keep you ahead of problems and help you schedule richer maintenance when needed.
Skimming Debris and Surfaces
Skimming the surface removes leaves, bugs, and floating debris before it dissolves or sinks. Do this before brushing or vacuuming to reduce gritty residue. Move slowly, working from the perimeter toward the center, and empty the skimmer basket as needed. Don’t forget to skim windy corners and steps where debris tends to accumulate.
Brushing Walls and Floor
Brushing disrupts biofilm and algae on the vertical walls and pool floor, making chemicals more effective. Use a gentle back-and-forth pattern for vinyl and fiberglass; use firmer strokes for concrete but avoid harsh scrubbing that could gouge the surface. Target corners, ladder rails, and the waterline where scum often hides. Regular brushing supports long-term clarity and reduces buildup that complicates vacuuming.
Vacuuming Techniques for Different Shapes
Vacuuming removes settled dirt and algae that brushing can’t lift. Choose a manual or automatic vacuum that fits your pool’s shape. For irregular or multi-level designs, divide the surface into manageable zones and vacuum systematically. Pause to clean the vacuum head and filter connections to maintain suction and prevent clogging.
Weekly Water Testing and Quick Adjustments
Weekly water testing ensures balance among pH, total alkalinity, and sanitizer levels. Record results and make small adjustments rather than large jumps. If test results show persistent issues, back up to the previous step and re-check brushes, skimmers, and filter cleanliness. Consistent testing keeps water comfortable and safe for swimmers.
Chemical Balance Essentials
pH affects comfort, sanitizer efficiency, and scale formation. Aim for a pH in the recommended range and monitor total alkalinity to stabilize pH changes. Sanitize with your preferred method (chlorine, bromine, or salt systems) and follow label directions for dosage and contact time. Periodic shocking may be required in high-use periods or after rainfall.
Filtration, Circulation, and Debris Management
A clean filter and good circulation are the backbone of water clarity. Backwash or clean sand, cartridge, or DE filters as recommended, and ensure the pump and skimmer are free of obstructions. Poor circulation allows dead zones where debris and algae accumulate, so run the pump long enough for a full turnover cycle and consider booster steps during heavy debris events.
Seasonal Maintenance and Winterizing Tips
Seasonal maintenance minimizes spring-start headaches. For off-season pools, protect surfaces and equipment by lowering water levels safely, balancing chemistry, and covering the pool if appropriate. In regions with freezing temperatures, winterizing is essential to prevent damage to plumbing and equipment. Note climate-specific steps and consult local guidance if you’re unsure.
Common Pitfalls and Quick Fixes
Common mistakes include over-cleaning with aggressive brushes, shocking too frequently, and ignoring filter maintenance. A rushed cleaning plan leads to imbalanced chemistry and cloudy water. If you encounter persistent issues, revisit your test results, verify equipment operation, and consider a staged approach rather than rushing to fix everything at once.
Tools & Materials
- Skimmer net(For removing surface debris before deeper cleaning)
- Telescoping pole(Extends reach to all pool areas)
- Pool brush(Choose bristle type by pool surface (vinyl/fiberglass/concrete))
- Vacuum head(Suitalbe for your pool type (automatic or manual))
- Leaf rake(Useful for heavy debris weeks)
- Test kit (pH, sanitizer, alkalinity)(Liquids or strips; keep stored away from sun)
- Pool chemicals (sanitizer, pH adjusters)(Follow label directions; store safely)
- Backwash hose or connection(Only if you have a sand/DE filter)
- Gloves and safety goggles(Protect hands and eyes when handling chemicals)
Steps
Estimated time: 2-4 hours
- 1
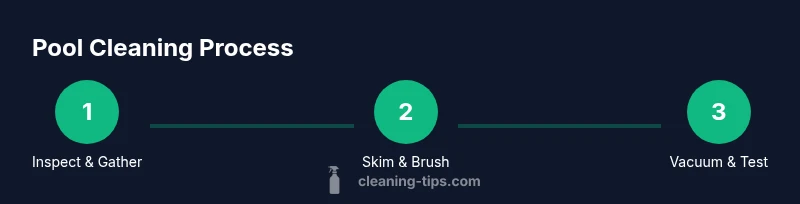
Inspect and gather
Before you begin, inspect equipment, gather tools, and read labels on chemicals. Confirm you have enough water, electricity safety, and a clear workspace. This upfront check saves time and prevents mid-clean interruptions.
Tip: Check chemical labels for any incompatibilities with your pool type. - 2
Skim the surface
Use a skimmer to remove leaves and floating debris. Work in slow, deliberate strokes along the surface, then set debris in a bucket or trash; empty the skimmer basket when full.
Tip: Skim before brushing to prevent redeposited debris. - 3
Brush walls and floor
Light to firm brushing depending on surface. Focus on coves, waterline, and corners to disrupt biofilm and loosen algae.
Tip: Always brush in a pattern that covers every area gradually. - 4
Vacuum the pool
Attach the vacuum to the pole and target one zone at a time. Ensure suction is steady and adjust as needed to avoid losing debris.
Tip: If you have an automatic cleaner, run it after manual vacuuming for best results. - 5
Test water chemistry
Check pH, alkalinity, and sanitizer. Record results to track changes and guide adjustments.
Tip: Don’t overcorrect—small, incremental changes keep chemistry stable. - 6
Adjust pH and alkalinity
Make minor pH or alkalinity adjustments per test results. Stable pH improves sanitizer effectiveness and swimmer comfort.
Tip: Buffer changes with careful, gradual dosing over several hours. - 7
Sanitize and shock
Dose sanitizer per your system type and consider periodic shocking after heavy use or rain. Allow time for sanitizer to recirculate before swimming.
Tip: Never mix different sanitizers; always follow label directions. - 8
Backwash/clean filter
Clean or backwash your filter according to type (sand, cartridge, DE). A clean filter improves circulation and water clarity.
Tip: Backwash frequency depends on pool use and filter type. - 9
Circulate and retest
Run the pump to promote circulation for several hours, then retest water. Rebalance if needed.
Tip: Retest after any significant chemical change. - 10
Skimmer and basket maintenance
Clean skimmer and pump baskets to maintain optimal flow and prevent clogs.
Tip: Keep a spare basket handy for quick swaps. - 11
Seasonal prep
Prepare for seasonal changes; adjust chemicals for weather patterns and usage. Consider covering the pool when not in use.
Tip: Record seasonal adjustments for next year. - 12
Document and schedule next cleaning
Log chemicals, test results, and maintenance steps. Schedule the next cleaning to maintain consistency.
Tip: Set reminders for weekly tests and monthly filter checks.
Questions & Answers
How often should I test my pool water?
Test water at least weekly and after heavy rainfall or heavy use. Record results and adjust chemicals gradually to maintain a stable balance. Regular testing helps catch imbalances before they cause cloudy water or skin irritation.
Test water at least weekly, especially after rain or heavy use, and adjust chemicals gradually to keep the balance steady.
Do I need a professional to winterize my pool?
Winterizing depends on climate and pool type. In colder regions, professional help can ensure proper drainage and cover installation. In milder climates, homeowners can perform basic measures like lowering water level and balancing chemicals.
Winterizing depends on your climate; you can often handle basic steps, but a pro helps with complex setups.
Which sanitizer is best for my pool: chlorine, bromine, or salt?
All sanitizer options are viable with proper maintenance. Chlorine is common and cost-effective; bromine performs well in heat; salt systems generate chlorine on-site. Your choice should consider pool usage, climate, and maintenance preferences.
Chlorine is common and affordable, bromine works well in heat, and salt systems generate chlorine on-site.
Can I swim while balancing chemicals?
You should avoid swimming during chemical balancing and shocking. Wait for test results to stabilize before re-entering the pool. Always follow label instructions for safe chlorine or sanitizer levels.
Wait until the water is balanced before swimming and follow the product directions for safety.
How often should I backwash a sand filter?
Backwash when the pressure rises by 8-10 psi above the clean pressure or when flow slows. Frequency depends on usage and filter type. After backwashing, recheck the system to ensure proper circulation.
Backwash when the pressure rises enough above normal, then recheck flow to ensure good circulation.
What maintenance schedule is best for above-ground pools?
Above-ground pools benefit from a regular weekly routine: skim, brush, vacuum, test water, and adjust chemicals. Seasonal checks and filter maintenance help prevent leaks and extend life. Customize the plan to your pool size and usage.
Stick to a weekly routine and seasonal checks to keep an above-ground pool in good shape.
Watch Video
The Essentials
- Develop a consistent weekly cleaning routine
- Balance water chemistry before adding sanitizer
- Regularly clean filters for optimal circulation
- Skim, brush, and vacuum in sequence for best results
- Test water weekly and adjust in small increments