Pool Clean: A Practical DIY Guide for a Sparkling Pool
Learn a practical, step-by-step approach to pool cleaning—from skimming and brushing to water chemistry and seasonal care. Practical tips, tools, and safety for homeowners and renters.

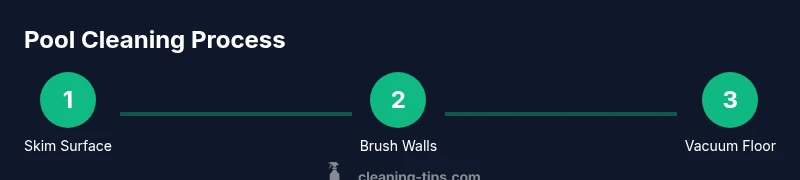
With this guide, you will learn how to perform a complete pool clean, including debris removal, brushing, vacuuming, and water chemistry checks. You’ll need basic tools like a skimmer, a pool brush, a vacuum, and a tester kit. Follow the step-by-step routine weekly to keep water clear, safe, and inviting for swimmers.
What pool clean means and why it matters
A truly clean pool is more than sparkling water; it’s a reliable, healthful, and enjoyable extension of your outdoor living space. When we talk about pool clean, we mean a consistent routine that keeps debris out, surfaces scrubbed, and water chemistry balanced. The Cleaning Tips team has found that regular debris removal, surface brushing, and timely chemical adjustments prevent algae outbreaks, reduce cloudy water, and protect the pool’s equipment. This isn’t just about looking good—clean water helps swimmers stay safer and reduces the frequency of emergency maintenance.
Your pool type (above-ground vs. in-ground, vinyl vs. plaster) influences how you clean, but the core principles stay the same. Start by removing loose leaves, insects, and hair from the surface. Then, rinse and scrub where deposits form, especially on walls and floors where algae tend to cling. Finally, monitor and adjust chemistry so sanitizer levels are effective without causing irritation. Consistency matters: a steady routine reduces the workload later and keeps your equipment performing efficiently. According to Cleaning Tips, starting with a clean pool area reduces staining and simplifies maintenance. By adopting a predictable schedule, you’ll see clearer water, fewer chemical spikes, and a more enjoyable swimming environment.
This guide focuses on practical actions you can perform with common tools, whether you own a small backyard pool or manage a larger outdoor setup. You’ll gain confidence in knowing what to do, when to do it, and how to adapt the routine to seasonal changes. A clean pool is safer for kids and pets, and easier on your wallet over the long run.
Water chemistry essentials for a safe pool
Water chemistry is the backbone of pool safety and aesthetics. The goal is to maintain water that is neither harsh to swimmers nor hostile to your equipment. The basics you’ll manage are pH, total alkalinity, sanitizer (chlorine or non-chlorine alternatives), and stabilizers. Regular testing helps you catch drift early before it becomes costly to correct. A balanced pool water environment reduces skin irritation and eye redness, preserves liner integrity, and ensures filters run efficiently. In outdoor pools, you’ll also track stabilizer (cyanuric acid) levels to protect sanitizer from sunlight.
Key targets (typical residential ranges): pH 7.2–7.8, free chlorine 1–3 ppm, total alkalinity 80–120 ppm, cyanuric acid 30–50 ppm. If your pool reads outside these ranges, small, incremental adjustments are usually safer than large swings. Always recheck after adding chemicals and wait the recommended time before re-testing to let the water circulate. When unsure, rely on a dedicated tester kit rather than color-changing strips alone, and follow manufacturer directions for each chemical.
Seasonal shifts matter. Summer heat increases evaporation and chemical demand, while in winter you may reduce circulation. Cleaning Tips analysis shows that adjusting chemistries in line with usage, weather, and bather load yields more stable water and reduces wasted chemicals. Keep a simple log of test results to spot trends and guide future adjustments. A calm, methodical approach to chemistry yields consistent, healthy water year-round.
Skimming and surface debris removal techniques
Skimming is the first line of defense against cloudy water and clogged filters. Begin each cleaning cycle by removing leaves, insects, and floating debris from the surface. Use a telescoping pole and a lightweight skimmer net; work across the surface in wide, smooth motions to prevent stirring up settled debris. If you notice pollen or tiny particles, skim repeatedly until the surface stays clear. For best results, perform a quick skim every few days during heavy leaf fall and more frequently in windy, wooded areas.
Floating debris can also seed algae if left unchecked. After skimming, inspect skimmer baskets and clean them. Clean baskets improve suction and flow, helping your circulation system operate efficiently. If your pool has an oversized surface area or trees nearby, you may want to increase skim sessions during peak seasons. A clean surface reduces strain on your filtration system and makes it easier to spot issues like discoloration or cloudiness early. The result is water that looks inviting and swims clean and fresh.
Brushing and vacuuming strategies for all surfaces
Brushing is essential for dislodging algae and dirt from walls and floors, particularly in plaster and fiberglass pools. Use a nylon brush for vinyl liners and a stainless steel brush for concrete surfaces, applying even pressure from the waterline down to the floor. Divide the pool into sections and brush each area methodically—vertical surfaces first, then the floor. Brushing helps fluorescent the efficiency of sanitizers and prevents stubborn buildup at the waterline.
Vacuuming removes what brushing loosens and what skimmers miss. Manual vacuuming requires a vacuum head, hose, and a telescoping pole. Align the hose so that the intake sits on the pool’s bottom and travels evenly across the floor. If you have an automatic or robotic cleaner, program it to cover the entire pool during off-peak hours or when the water is still warm. After vacuuming, rinse the vacuum head to prevent residue buildup.
When brushing and vacuuming, avoid sudden, sweeping motions that may stir up cloudy water. Instead, work in small, deliberate strokes and allow the filter to capture suspended particles. Regular brushing and vacuuming reduce the frequency of backwashing, save energy, and ensure better clarity. The payoff is a brighter pool with improved circulation and healthier water chemistry.
Filtration maintenance and equipment care
A clean pool relies on both the chemistry and the filter’s ability to remove contaminants. Backwash or clean the filter according to your system’s design (sand, cartridge, or diatomaceous earth). A well-maintained filter is essential to keep water clear and the pump running efficiently. Check the pressure gauge and backwash when it rises by 8–10 psi above the clean-start pressure, or as your manufacturer recommends. For cartridge filters, remove and rinse the cartridge thoroughly; for sand or DE filters, follow backwash steps and replace media as needed.
Pumps and skimmers should be checked regularly for leaks, worn gaskets, and clogged impellers. If you hear unusual noises, inspect the pump basket and clean out any debris. Don’t run the pump dry or without water; doing so can damage seals and reduce efficiency. Regular filter maintenance often translates into lower chemical demands since clean filters improve circulation. A simple habit—check filter pressure weekly—can catch problems before they affect water quality.
Keep chemicals stored properly away from sunlight and heat. Always add chemicals to water, never water to chemicals, and follow label directions to avoid dangerous reactions. By combining attention to filtration with chemical balance, you improve clarity, safety, and comfort for swimmers.
Seasonal maintenance and safety considerations
Pools require changing routines with the seasons. In warm months, you may need more frequent skimming and testing due to higher sanitizer demand and evaporation, while in cooler months, you can scale back the routine but still perform essential tasks. Safety should guide every step: store chemicals in a cool, dry place, away from children and pets; never mix chemicals, and wear protective gear when handling sanitizers. If you see sudden changes in water color, strong chemical odors, or persistent cloudy water, pause and consult a professional.
Winterizing a pool in freezing climates involves lowering the water level and protecting lines from freezing, but the exact steps depend on your local climate and pool type. Regular maintenance helps prevent costly repairs and extends equipment life. Building a habit of routine checks, seasonal adjustments, and early problem-solving is the most effective defense against costly surprises. Cleaning Tips emphasizes that a proactive plan reduces stress and makes pool ownership more enjoyable.
Building a simple weekly maintenance plan you can actually follow
A practical weekly plan aligns with your pool’s size, type, and usage. A straightforward approach can look like this: Day 1 skim and brush; Day 3 test chemistry and adjust; Day 5 vacuum and backwash/check filter; Day 7 re-test water and record results. If you swim more often, you may adjust the cadence to shorter intervals. The key is consistency: even a small daily or weekly routine keeps water quality steady and reduces the need for drastic chemical changes. Keep a simple notebook or digital log of test results, chemical additions, and observations like cloudiness or algae patches. This habit helps you detect trends and tailor your routine as seasons shift and family usage changes.
Tools & Materials
- Skimmer net(For removing floating debris; handle 18-24 inches or longer)
- Telescoping pool pole(Extendable to reach walls and floor)
- Pool brush (nylon or stainless)(Choose based on pool surface (nylon for vinyl; stainless for concrete))
- Vacuum head and hose(Manual or automatic vacuum system compatible with your pool type)
- Vacuum plate or skimmer adaptor(Helpful for direct vacuum into the skimmer)
- Water testing kit (test strips or liquid kit)(Readings for pH, chlorine, alkalinity, and stabilizer)
- Chlorine sanitizer (granules or tablets)(Follow label instructions; store safely)
- pH increaser and pH decreaser(Used to balance pH to 7.2–7.8)
- Alkalinity increaser(Often used to stabilize pH and prevent swings)
- Cyanuric acid stabilizer(Helps protect sanitizer from sun in outdoor pools)
- Pool shock (calcium hypochlorite or liquid shock)(Used for heavy contamination or algae treatment)
- Goggles and protective gloves(Protect eyes and skin from chemicals)
- Storage container for chemicals(Keep chemicals organized and away from kids)
Steps
Estimated time: 1-2 hours
- 1
Gather tools and prep area
Collect your skimmer, brush, vacuum, test kit, and chemicals. Clear the deck, turn off the pump if you’re doing heavy suction work, and place items within easy reach to avoid multiple trips. This prep minimizes interruptions and helps you stay organized.
Tip: Lay out items in the order you’ll use them to speed up the routine. - 2
Skim the surface
Use the skimmer net to remove leaves and floating debris. Work in wide passes, moving steadily to avoid stirring up settled debris. Skimming first prevents debris from sinking and clogging the filter.
Tip: If debris is heavy, skim twice: once for large items, and again for finer particles. - 3
Test and balance water chemistry
Test pH, alkalinity, and sanitizer levels. If pH is outside 7.2–7.8, adjust slowly with pH increaser or decreaser. Balance alkalinity first, then adjust pH, then sanitize to target ranges. Allow circulation for 20-30 minutes before re-testing.
Tip: Make small adjustments and re-test; large swings require more time to stabilize. - 4
Brush walls and floor
Brush vertical surfaces first, then horizontal surfaces. Use long, even strokes to dislodge algae and dirt from the surface. Brushing helps sanitizer reach those areas more effectively.
Tip: Use a circular pattern on corners and gradual sweeps on flat surfaces. - 5
Vacuum the pool
Vacuum slowly along the floor toward the main drain or skimmer. Maintain steady suction and move in overlapping passes to avoid missing spots. A good vacuum removes sediment that brushing alone can’t dislodge.
Tip: If suction drops, check hose connections and clean the skimmer basket. - 6
Backwash/clean the filter
Backwash a sand or DE filter or clean a cartridge filter according to your equipment’s instructions. A clean filter improves circulation and reduces wasted chemicals. If you backwash, rinse the laterals and re-test water after re-circulation.
Tip: Don’t over-backwash; excessive backwashing can waste water and return contaminants. - 7
Re-test and finalize chemistry
Test water again after filtration and adjust sanitizer, pH, and alkalinity as needed. Ensure the levels align with the targets for stable water quality. Mark your log with the results and any adjustments.
Tip: Keep a simple log; it helps track trends over weeks and seasons. - 8
Document and plan next maintenance
Record results and schedule the next cleaning cycle. If you notice recurring issues (cloudy water, persistent algae), consider adjusting your routine or scheduling a professional check.
Tip: Set a recurring reminder on your phone or calendar.
Questions & Answers
How often should I perform a pool clean and balance chemicals?
Most residential pools benefit from a weekly clean that includes skimming, brushing, vacuuming, and a chemistry check. During hot spells or heavy use, increase the cadence. Regular testing helps you adjust promptly and maintain safe, sparkling water.
Most pools benefit from a weekly clean with a chemistry check; adjust the cadence during hot weather or heavy use.
Can I swim after adding chlorine or other chemicals?
Only swim after the chemical levels have fallen within the recommended range stated on the product label. Run the pump to circulate, re-test, and wait until the water is balanced and safe.
Swim only after your water is balanced and safe as per the chemical label and test results.
What should I do if algae becomes visible in the pool?
Increase filtration and chemistry adjustments, brush affected areas, and consider a pool shock if recommended by your product instructions. Persistent algae may require professional assistance.
Brush the algae, adjust chemistry, and consider a shock if instructions suggest; seek help if it persists.
Is it better to hire a professional for pool cleaning?
For complex systems, large pools, or persistent problems, a professional can diagnose equipment issues and optimize chemistry. For most homeowners, a solid weekly DIY routine covers regular maintenance.
Pros can help with complex setups or ongoing issues; for most, a weekly DIY plan works well.
How long do pool filters last and when should I replace media?
Filter lifespans vary by type: cartridge filters typically last 1–2 years with good maintenance, sand filters last 5–7 years with proper backwashing, and DE filters can last 2–3 years. Replace media as specified by the manufacturer and monitor pressure indicators.
Filter life depends on type; follow manufacturer guidance and monitor pressure to know when to replace media.
Watch Video
The Essentials
- Establish a regular pool clean routine (skim, brush, vacuum).
- Balance water chemistry before increasing sanitizers.
- Maintain filtration and inspect equipment weekly.
- Document results to spot trends and seasonal needs.