Soft Wash Roof Clean: DIY Guide for Safe Roof Care
Learn how to safely perform a soft wash roof clean using low-pressure spray and gentle cleaners. This guide covers gear, steps, and maintenance for a healthier roof.

With these steps, you can safely perform a soft wash roof clean using a low-pressure rinse and milder detergents designed for roofing. This method minimizes damage to shingles, reduces irrigation run-off, and preserves warranties. Gather the right tools, follow the sequence below, and avoid high-pressure washing that can strip granules or seep under flashing.
What is a soft wash roof clean and when to use it
A soft wash roof clean is a cleaning method that uses low-pressure water and specialized solutions to remove algae, moss, dirt, and staining from roof surfaces. Unlike traditional pressure washing, it relies on detergents and wetting agents that saturate the roofing materials and bonds to contaminants, allowing them to be rinsed away with a gentle spray. This approach minimizes the risk of granule loss on asphalt shingles, avoids lifting or splitting shingles, and reduces water infiltration around flashing and gutters. Homeowners may choose soft washing for roofs that show moss, lichen, dark streaks, or general grime, especially on aging roofs or those in shady, moist climates. Before you begin, check your warranty and the roof manufacturer’s guidance; some roofs require specific cleaners or professional service. For safety and environmental reasons, plan to do this on a dry, cool day, and avoid direct sunlight when applying cleaners, which can cause rapid drying and streaking. The Cleaning Tips team notes that following the recommended dilution ratios and rinse times is essential to prevent residue that can attract new dirt or harm plants nearby. If you’re unsure about your roof’s material or slope, consult a professional rather than attempting a DIY solution.
Benefits of soft wash for roofs
Choosing a soft wash approach offers several advantages over high-pressure methods. The technique is gentler on roofing materials, helping preserve granules on asphalt shingles and maintaining the roof’s appearance over time. The cleaners used in a soft wash are designed to break down algae, moss, and organic stains at the molecules level, which means you often get longer-lasting results with less physical abrasion. Eco-friendly detergents reduce environmental impact by minimizing run-off and preventing chemical exposure to surrounding gardens. Because the spray is low-pressure, the risk of water intrusion around flashing, seams, and vent pipes is lower, provided you stay within recommended nozzle pressures. A properly executed soft wash can also improve the roof’s microbial balance, which helps slow future growth and keeps gutters clearer between maintenance cycles. According to Cleaning Tips, using biodegradable cleaners and adhering to manufacturer guidance can yield dependable results without compromising roof integrity or nearby plant life. This method is particularly effective on shaded roofs and surfaces with persistent dark streaks, but always check the material compatibility before proceeding.
Roof suitability check and risks
Not every roof is a good candidate for a soft wash. Asphalt shingles with missing granules, cedar shakes, or delicate clay tiles may require alternative approaches. Metal roofs generally tolerate soft washing well, but coatings and finishes can be affected by cleaners if not properly chosen. Always perform a small test patch on an inconspicuous area to observe color change, streaking, or any adverse reaction. Review warranty documents; some manufacturers restrict cleaning methods or specify approved products. If you notice extensive damage, loose flashing, or widespread moss that could loosen under cleaning, pause and consult a professional. Take photos before starting to document condition for insurer or contractor references. Handling ladders, electrical lines, and wet surfaces introduces fall and electrocution risks, so plan your route and use a spotter when possible. Cleaning Tips analysis shows that preparation reduces downtime and increases success rates when tackling roof cleaning projects.
Prep, tools, and protective gear
Successful soft wash starts with thorough prep. Clear the area of toys, planters, and vehicles nearby to avoid chemical exposure. Protect surrounding vegetation with poly sheeting and dampen soil to limit vapor escalation. Gather tools such as a low-pressure sprayer, a telescoping extension wand, a garden hose with a gentle spray nozzle, and biodegradable neutral pH cleaner formulated for roofs. Wear eye protection, chemical-resistant gloves, and non-slip footwear; a lightweight respirator is optional but can help in poorly ventilated areas. Keep a helper on hand to manage hoses and watch for trip hazards. If you must access the roof from a ladder, ensure it’s stable and have a second person hold the ladder during ascent and descent. After cleaning, rinse plants and landscape features with clean water to minimize chemical exposure. The Cleaning Tips team emphasizes selecting products designed for roof cleaning and avoiding chlorine bleach or heavy degreasers that can damage shingles or metal components.
Step-by-step overview (high-level sequence)
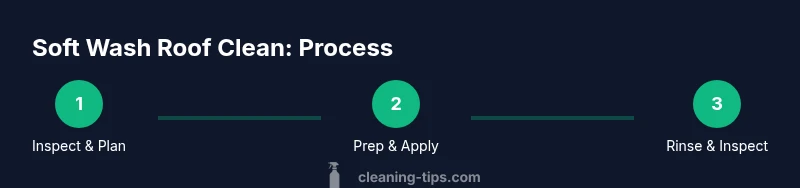
Here’s the general flow you’ll follow in a safe soft wash roof clean: assess conditions and plan safety, prep tools and area, apply a diluted cleaner, let it dwell, gently rinse with low pressure, inspect for missed spots, re-treat if necessary, and clean up. Start at the eaves and work toward the ridge to minimize standing water on any one area and to ensure runoff moves away from doors and windows. Always confirm dwell time on the product label, and avoid sun exposure that can cause rapid drying and uneven results. This overview aligns with step-by-step instructions in the dedicated steps section and keeps you focused on safety and effectiveness throughout the process.
Maintenance after a soft wash roof clean
Post-clean maintenance helps protect your roof and extend the cleaner’s effects. Inspect after 24–48 hours for any missed growth or streaking, and re-apply only as needed following label guidance. Monitor for re-growth of moss or algae and consider an optional preventive spray for the upcoming season. Keep gutters clear of debris and rinse the surrounding landscape with clean water after a cleaning to flush residual cleaners away from plant roots. Consider scheduling semiannual or quarterly inspections depending on climate and tree cover. A tidy roof enhances curb appeal and may reduce the likelihood of costly repairs in the future, especially when combined with routine moss and lichen control.
Safety considerations and warnings
Safety cannot be overstated when soft washing a roof. Always work with a partner, use a stable ladder or roof access system, and avoid working in wet or windy conditions. Do not exceed manufacturer-recommended dilution or spray pressure; even at low pressure, overly strong solutions can harm plant life or cause surface discoloration. Never spray directly onto electrical fixtures, vents, or skylights, and avoid walking on slick surfaces. If you notice damaged shingles, loose flashing, or structural concerns, halt work and seek professional help. Read material safety data sheets for all cleaners and store chemicals away from children and pets. Following best practices reduces risk and yields better long-term outcomes for roof health.
Troubleshooting common roof cleaning issues
If you encounter streaking or uneven color, pause and re-check your dwell times and rinse pattern. Heavy moss may require longer dwell times or a second pass on affected areas, but avoid aggressive brushing that can lift shale granules. If plants nearby show signs of chemical exposure, rinse more thoroughly and consider using alternative products or shielding strategies. For persistent stains, test a gentler solution on a small area first or consult a professional for advice.
Tools & Materials
- Low-pressure garden sprayer (1-2 gallon)(Adjustable nozzle; wide spray pattern)
- Telescoping extension pole(Reach eaves without excessive reaching)
- Garden hose with gentle spray nozzle(Low psi; fan spray)
- Biodegradable roof cleaning detergent (neutral pH)(Specifically for roofs; avoid chlorine)
- Ladder or roof access system(Stable, with spotter if possible)
- Personal protective equipment (gloves, goggles, non-slip shoes)(Splash protection; slip resistance)
- Plant protection plastic sheeting or tarps(Optional for landscaping protection)
- Gutter scoop or brush(Clear debris after cleaning)
- Mild algae/moss remover (optional)(Use sparingly for heavily infested areas)
Steps
Estimated time: 90-150 minutes
- 1
Inspect roof and plan safety
Walk the perimeter to assess moss, stains, and shingle condition. Identify weak spots, plan ladder access, and designate a supervisor or helper. Check the weather forecast and ensure the roof is dry before starting.
Tip: Always test on a small patch first to gauge reactions. - 2
Assemble and prep equipment
Set up your sprayer, extension wand, and hose. Confirm cleaner dilution according to label instructions and verify all connections are tight to avoid leaks. Place protective coverings for plants and outdoor furniture.
Tip: Keep a spare nozzle at hand in case of clogging. - 3
Wet the roof surface
Pre-wet the surface with a broad spray to reduce friction and help with even cleaner distribution. This step also stabilizes temperature and minimizes penetration into vulnerable underlayment.
Tip: Work from the bottom up to prevent runoff from creating streaks. - 4
Apply diluted cleaner
Spray the cleaner evenly across the roof, prioritizing shaded areas where growth tends to be thicker. Avoid spraying directly into vents or exhausts. Keep the cleaner away from siding and landscaping.
Tip: Maintain a consistent pace to avoid pooling. - 5
Allow dwell time
Let the cleaner sit for the recommended dwell time, usually 5–15 minutes depending on product. Do not let it dry on the surface, which can leave residues and streaks.
Tip: If plants are nearby, monitor for any signs of damage and rinse promptly if needed. - 6
Rinse with low pressure
Rinse from the eaves toward the ridge using a gentle spray. Use wide patterns and avoid direct blasts that could dislodge shingles. Pause to inspect for missed spots and re-apply if necessary.
Tip: Keep the nozzle at a distance of 6–12 inches from the surface. - 7
Inspect and re-treat if needed
Walk the roof to review the cleaned areas. Treat stubborn stains or moss with a second application, following label directions. Re-check flashing and seals for water intrusion.
Tip: Don’t over-treat the same area in a single pass. - 8
Clean up and store materials
Rinse all tools, tidy cords, and store cleaners in a cool, dry place. Remove plant coverings and wash any watering zones that may have come into contact with cleaning solutions.
Tip: Dispose of rinse water away from edible plants and water sources.
Questions & Answers
Is soft wash roof clean safe for asphalt shingles?
Yes, when done with proper dilution and low pressure, soft washing is generally safe for asphalt shingles. Always follow manufacturer guidance and avoid aggressive cleaners that can strip sealants or damage granules.
Yes, as long as you use the right dilution and low pressure and follow the manufacturer’s guidance.
Can I DIY, or should I hire a pro for soft washing a roof?
DIY is possible for small, simple roofs with careful preparation and safety. For larger roofs or steeper pitches, or if you’re unsure about material compatibility, hiring a professional reduces risk and often yields better results.
DIY is possible for simple roofs, but for larger or risky jobs, a pro is safer.
What cleaners are safe for roofs?
Use biodegradable, neutral pH roof cleaners designed specifically for roof surfaces. Avoid chlorine bleach, ammonia, and high-alkaline products that can damage shingles and nearby vegetation.
Biodegradable, neutral pH cleaners designed for roofs are safest; avoid bleach and harsh chemicals.
How long does it take for a roof to dry after a soft wash?
Drying time varies with weather but generally ranges from a few hours to a full day. Cooler, shaded days may take longer; ensure the roof is dry before walking on it again.
Most roofs dry in a few hours to a day, depending on weather.
Will soft washing permanently remove moss and algae?
Soft washing removes existing growth, but new growth can return, especially in shaded, damp areas. Regular maintenance and preventive measures help keep it at bay.
It removes existing growth, but new growth can return without ongoing maintenance.
What should I do with plants near the cleaning area?
Protect plants with coverings and rinse thoroughly if any cleaner comes into contact. Avoid spraying directly onto plants whenever possible.
Protect plants with coverings and rinse if cleaners touch them.
Watch Video
The Essentials
- Use low-pressure spray to protect shingles
- Choose biodegradable cleaners for eco safety
- Rinse thoroughly to prevent residue and staining
- Plan safety and warranty checks before starting