Windows Disk Clean: How to Free Up Space on Windows
Learn how to reclaim disk space on Windows with built-in tools, safe deletion practices, and automation tips. This Cleaning Tips guide walks you through Disk Cleanup, Storage Sense, and routine maintenance.

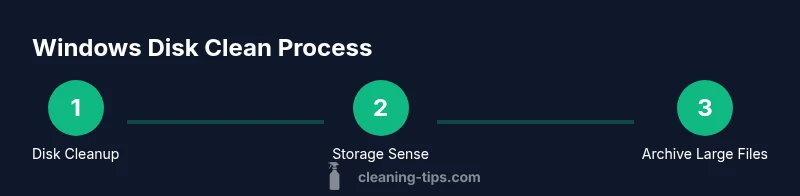
Windows disk clean involves reclaiming space by removing unnecessary files and apps, cleaning caches, and organizing data. Start with built-in tools like Disk Cleanup and Storage Sense, then uninstall unused programs, clear temporary files, and archive large files. You’ll need a Windows PC with admin rights and a backup plan before deleting data.
Why Windows disk clean matters
A cluttered drive can slow boot times, reduce app performance, and make it harder to install important updates. The Cleaning Tips team found that many Windows devices accumulate recoverable space over time, especially in system caches, temporary files, and old restore points. By regularly performing a disk clean, you maintain smoother operation, quicker searches, and more room for new files.
Beyond speed, freeing space helps with reliability. When drives get cramped, background processes can frantically swap data in and out of memory, leading to fragmented reads and longer load times. A practical approach is to treat your disk like a filing cabinet: delete what you don’t need, move large but infrequently used files off the drive, and keep a healthy buffer of free space—ideally 10-20% on most consumer drives. Following a regular cleanup cadence reduces the risk of unexpected outages during software updates and essential backups.
For homeowners and renters using Windows, a routine disk clean also supports better energy efficiency. Less data movement means the drive runs cooler and quieter, which translates to longer hardware life and reduced wear on components. With a little planning, you can reclaim gigabytes without sacrificing personal data you truly rely on.
Essential Windows tools for disk cleaning
Windows ships with powerful built-in utilities designed to minimize risk while reclaiming space. Disk Cleanup helps you target temporary files, system files, Recycle Bin contents, and old download leftovers. Storage Sense, a newer automation feature, can periodically remove older items and manage locally available cloud content when space gets tight. Accessing these tools is straightforward but often underutilized; many users forget that these tools can be scheduled to run automatically, reducing manual work.
Disk Cleanup: Open the Start menu, search for Disk Cleanup, select a drive (usually C:), and scan. The tool lists file categories with estimated sizes, allowing you to pick exactly what to delete. Storage Sense: Go to Settings > System > Storage, then enable Storage Sense and customize what to delete and when. For both tools, always review what will be deleted to avoid removing personal files or critical data. Cleaning Tips analysis shows these built‑in options deliver safe, effective space reclamation when used with care and a plan to back up important items.
As you become more comfortable, you can combine Disk Cleanup and Storage Sense with simple manual steps. For instance, you can periodically clear the Downloads folder, empty the Recycle Bin, and remove old browser caches. The goal is a systematic workflow that respects your data and keeps your device optimized.
How to identify big space hogs and safe deletions
Start by inspecting what’s consuming space. In Windows 10/11, you can use Settings > System > Storage to see a breakdown by category (Apps & features, System & reserved, Other). Focus on large apps you rarely use, obsolete installers, and media you can archive. After each cleanup, recheck the storage chart to quantify gains and spot new culprits.
Safe deletions include: temporary files from apps (temporary internet files, cache data), old Windows update files, and duplicate downloads. Be mindful with “Large files” identified by the system; review each file’s purpose before removing. For personal data, consider moving photos, videos, and documents to an external drive or cloud storage before deletion. If you’re unsure about a file’s importance, back it up first before deleting anything.
Another guidepost is the Recycle Bin: if you rarely empty it, you’re leaving space reclamation on hold. Regularly emptying the bin prevents stale data from creeping back onto your drive. By methodically reviewing categories each month, you’ll keep space available for essential software and updates without losing important data.
Step-by-step cleanup routine (non-sequential overview)
A practical approach combines automated tools with manual cleaning. First, run Disk Cleanup to target temporary files and system caches. Then, activate Storage Sense to automate future cleanups. Next, review apps and features, removing those you no longer use. Finally, move large media to external storage or cloud and set up a routine to repeat monthly. The following strategy provides a frame for a repeatable workflow that fits most home computers.
Pro tip: keep a backup copy of large files before deletion, and test your most critical applications after cleanup to confirm nothing essential was removed.
Automating cleanup for ongoing maintenance
Automation is the friend of a lazy cleaner and a disciplined user. Enable Storage Sense to run automatically when disk space is low, and schedule Disk Cleanup to run after major Windows updates or on a recurring monthly basis. Create a small maintenance window (e.g., 15-30 minutes on a weekend) to perform a quick audit of large files, old backups, and unused apps. Automation minimizes manual effort and ensures you don’t drift back into a cluttered drive state. Cleaning Tips suggests pairing automation with a quarterly manual review to catch space hogs that automated rules might miss.
Additionally, consider setting up a routine archiving plan: move large media to a network drive or cloud storage, and keep only the most recent files on the local drive. This keeps data accessible while freeing space for new work. A consistent approach reduces the chance of sudden disk pressure during busy periods.
When to consider a larger cleanup or upgrade
If your drive is consistently crowded despite cleanup, it may be time to consider a larger cleanup or hardware upgrade. Evaluate whether you’re running a traditional hard disk drive (HDD) or a solid-state drive (SSD). Upgrading to an SSD with more capacity can dramatically improve performance, especially on older machines. For laptops with limited upgrade paths, external drives or network storage provide cost-effective relief. In some cases, a reinstallation of Windows can reclaim a significant amount of space by removing bloatware and resetting configuration to default, but this should be a measured decision after backing up data and verifying product keys. The Cleaning Tips team notes that a thoughtful, staged approach—clean, archive, upgrade—often yields the best balance of performance and cost.
Quick maintenance checklist
- Run Disk Cleanup and Storage Sense monthly.
- Review Apps & features and remove unused programs.
- Empty Recycle Bin and Downloads folders routinely.
- Move large files to external storage or cloud services.
- Back up important data before deleting anything.
- Check for updates after cleanup to ensure stability.
- Consider an upgrade if space issues persist after a thorough cleanup.
Tools & Materials
- Windows PC (Windows 10/11)(Admin access recommended for certain changes)
- Disk Cleanup utility(Built-in tool for removing temporary files and system caches)
- Storage Sense(Automates cleanup based on space thresholds)
- External storage or cloud backup(Optional for archiving large files)
- Backup software or cloud account(Recommended before deleting or moving large data)
Steps
Estimated time: 30-60 minutes
- 1
Open Disk Cleanup
Click the Start button, search for Disk Cleanup, and launch it. Choose the drive you want to clean (usually C:). This step initializes the cleanup and shows you what types of files can be removed.
Tip: If prompted, choose to clean up system files to gain access to more categories. - 2
Review file types
In the Disk Cleanup dialog, review options such as Temporary Internet Files, Recycle Bin, and Thumbnails. Deselect anything you’re unsure about to avoid deleting personal data.
Tip: Use the 'Clean up system files' option to access additional categories like Windows Update files. - 3
Run Disk Cleanup
Select the categories to delete, then click OK and confirm. The tool will remove the selected files and present a summary of space reclaimed.
Tip: For a bigger win, include previous Windows Update files and Temporary Windows installation files if you’re comfortable with potential rollback limitations. - 4
Enable Storage Sense
Go to Settings > System > Storage and turn Storage Sense on. Configure it to run automatically at a space threshold or on a schedule.
Tip: Set it to delete temporary files after 30 days and keep at least 10-20% free space. - 5
Audit apps and large files
Open Settings > Apps > Apps & features to uninstall rarely used programs. Use Settings > System > Storage > This PC (C:) > Other to identify large items.
Tip: Uninstall tools you no longer need; consider moving media to external storage before deleting locally. - 6
Archive or relocate data
Move large files (photos, videos, installers) to an external drive or cloud storage to reclaim space while preserving access if needed.
Tip: Create a small folder structure on the external drive for easy retrieval. - 7
Verify stability and back up
Restart your computer and verify that critical apps run normally. Back up important data before making space-heavy changes.
Tip: Keep at least one recent backup of essential files in a separate location.
Questions & Answers
What is Disk Cleanup in Windows?
Disk Cleanup is a built-in Windows tool that removes temporary files, system caches, and other non-essential data to reclaim disk space. It helps improve performance without impacting your personal files when used carefully.
Disk Cleanup is a Windows tool that helps you reclaim space by removing temporary files and caches without deleting your personal files.
Which files should I delete safely?
Safe deletions include temporary Internet files, caches, old update backups, and files in the Recycle Bin. Always review each item to avoid removing anything important, and back up data if you’re unsure.
Safe deletions are temporary files, caches, and old updates. Review carefully and back up if unsure.
Will cleaning my disk delete personal files?
When used correctly, Disk Cleanup targets cache and temporary data, not your personal documents. However, review prompts before deleting to avoid removing essential files.
No, cleaning typically removes temporary data, but you should review what’s selected before deleting.
How often should I run disk clean?
A monthly quick cleanup is a good baseline. If you frequently install and uninstall software or work with large media, consider biweekly cleanups.
Try a monthly cleanup, and do more often if you install or move a lot of data.
Is Storage Sense the same as Disk Cleanup?
Storage Sense is an automation feature that periodically frees space by deleting unneeded files. Disk Cleanup is a manual tool for targeted cleanup. Using both provides ongoing maintenance.
Storage Sense automates cleanup, while Disk Cleanup handles specific cleanup tasks manually.
What if I need more space after cleanup?
If space remains tight, consider moving media to external storage, upgrading to a larger SSD, or using cloud storage for large files.
If space is still tight, move files off the drive or upgrade storage.
Watch Video
The Essentials
- Free up disk space improves performance.
- Use built-in tools first before third-party apps.
- Back up before deleting or relocating files.
- Automate routine cleanup to maintain disk health.
- Assess hardware needs if space issues persist.