Clean Before Moving In: The Ultimate New-Home Prep Guide
Learn how to clean before moving in with a practical, room-by-room plan, essential supplies, and a realistic timeline. Start fresh, reduce allergens, and ensure move-in readiness for homeowners and renters.

Goal: you’ll clean before moving in to establish a fresh, healthy home from day one. This guide provides a room-by-room plan, a practical supply list, and a realistic timeline to finish a thorough deep-clean before your furniture arrives. Following these steps helps reduce allergens, improve indoor air quality, and make your new space feel instantly livable from the moment you unlock the door.
Why cleaning before moving in matters
According to Cleaning Tips, cleaning before moving in sets a foundation for a healthier home and a smoother transition. When you start fresh, you reduce dust, mold spores, and lingering odors that movers may carry through the house. A deliberate pre-move cleaning also helps you spot maintenance issues before clothes and furniture arrive, saving time and money later. This practice creates a move-in condition that supports better air quality and fewer post-move chores. The goal is a move-in-ready space where you and your family can begin settling in without the distractions of dirt, bacteria, or hidden grime. By prioritizing a clean start, homeowners and renters can enjoy immediate comfort and avoid drafty, cluttered first weeks. The Cleaning Tips team emphasizes a structured approach to cleaning before moving in, so you stay organized and reduce back-and-forth tasks once boxes arrive. Remember: a clean space makes it easier to assemble furniture, unpack efficiently, and maintain routines from day one. When you commit to clean before moving in, you also create a healthier environment for children, pets, and anyone with allergies. The payoff is tangible: less stress, more control, and a home that feels welcoming from the moment keys exchange hands.
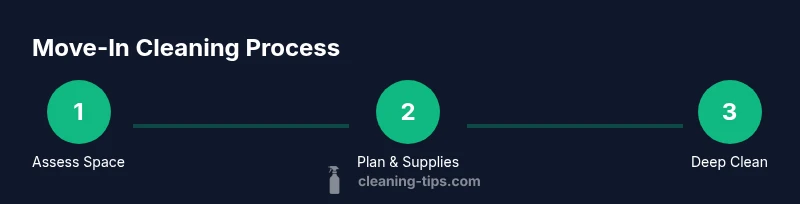
Create a move-in cleaning plan
A solid plan maps out priorities, order, and time so you don’t miss critical tasks. Start by surveying the entire space: note any areas with water stains, musty odors, or visible grime. Break the project into zones (entry, kitchen, living areas, bedrooms, bathrooms) and assign realistic time windows for each. Set a “depth” target for each room: surface wipe-downs, deep-clean surfaces, and a final sanitizing pass. A good plan also includes a contingency for unexpected issues like trapped dust behind cabinets or stubborn soap scum in the bathroom. At this stage, decide whether you’ll tackle the job in one long day or several shorter sessions. Cleaning Tips analysis shows that a well-planned approach reduces duplication of effort and helps keep supplies organized. Finally, create a simple checklist you can tick off as you progress. A clear plan minimizes stress and makes the entire process feel doable—even with a busy move schedule.
Room-by-room cleaning checklist
This section provides a practical, room-by-room approach. Start with the entry and neutral areas to set a clean baseline, then move through each space with a consistent system. For every room, begin with decluttering and dusting high to low, then clean vertical surfaces, followed by floors. Use the keyword clean before moving in as a reminder to address overlooked spots first, such as baseboards, window sills, and behind doors.
- Entryway and living room: wipe light fixtures, sweep or vacuum corners, clean window sills, vacuum upholstery if present, and mop hard floors. Check for pet hair, allergens, and cobwebs in corners.
- Kitchen: wipe cabinets inside and out, sanitize countertops, clean sink and faucet, run a quick oven and range hood wipe, and wipe down the fridge shelves if accessible. Don’t forget small appliances and the microwave interior.
- Bedrooms: vacuum or sweep floors, wipe baseboards, wash or replace air filters if applicable, and clean closet shelves.
- Bathrooms: scrub toilets, showers, sinks, and grout; clean mirrors; wipe faucets; and sanitize high-touch surfaces.
- Utility areas and laundry: wipe surfaces, clean the washing machine door seal, and check for mold in damp corners.
- Windows and doors: wash interior windows, wipe door frames, and remove stamps or stickers from hardware.
Pro-tip: approach each room with a consistent sequence (dust, wipe, sanitize, sweep/mop) and use the same cleaning products across rooms to maintain a uniform standard. Remember to clean before moving in to prevent spreading dirt to freshly cleaned spaces. The room-by-room system minimizes backtracking and ensures no corner is left untreated.
Kitchen and appliances care
The kitchen often contains stubborn soils from transit and settling dust. Start with a thorough wipe-down of all surfaces, including cabinet interiors if accessible. Remove items from shelves and wipe each shelf; this helps eliminate food dust and packaging debris that can attract pests. Clean the sink, faucet aerator, and drain to remove any built-up grime that could harbor mold or bacteria. For appliances, remove debris behind the fridge and stove if you can access it safely, wipe the exterior surfaces, and run dishwasher-safe components through a quick rinse. A critical part of clean before moving in is ensuring the oven, stove, and hood are free of grease and dust. If you have a refrigerator, remove shelves and drawers, wash with mild soap, and dry completely before reassembly. This practice ensures you start with a sanitary kitchen, reduces odor carryover to your new home, and makes unpacking faster once you’re ready to cook. A note on safety: never mix cleaners in a way that could release harmful fumes; use one product at a time and ventilate the space.
Bathrooms and moisture management
Bathrooms are high-traffic zones with moisture risk and mold potential. Begin by cleaning all surfaces: toilets, basins, tubs or showers, and mirrors. Scrub grout lines with a gentle brush and your chosen cleaner, paying attention to corners where moisture collects. Replace or clean caulking if needed to prevent leaks. After cleaning, run exhaust fans or open windows to reduce humidity. A key part of clean before moving in is drying surfaces thoroughly to prevent mold growth behind tiles and under sinks. Inspect under sinks for leaks and fix promptly to avoid water damage. If you find a persistent musty odor, identify the source—often hidden dampness behind walls, under cabinets, or in crawl spaces—and address it with proper ventilation and moisture control devices.
Floors, windows, and air quality
Floor care sets the tone for a clean home. Vacuum carpets and rugs thoroughly, including edges and under furniture if possible. For hard floors, sweep, dust mop, and mop with a suitable cleaner that won’t leave streaks. Windows deserve attention: wash glass, wipe sills, and clean tracks. This reduces dust infiltration and improves natural light. Air quality is an essential, ongoing consideration; during cleaning, prioritize ventilation and consider using low-VOC cleaners. If anyone in the home has allergies or sensitivities, choose fragrance-free products and keep windows open during the cleaning window. Clean before moving in not only reduces mess but also improves the air you breathe from day one. Finally, inspect for any damage or moisture signs around baseboards, door frames, and corners, and address them before you move your belongings in.
Move-in safety and final touches
Before you declare the space ready, perform a brief safety check: test smoke and carbon monoxide detectors, confirm outlet function with simple devices, and ensure all lighting is operational. Gather the cleaning tools you’ll keep for ongoing maintenance (a small kit for touch-ups, microfiber cloths, and a spray bottle with your daily cleaner). Place trash bags, spare rags, and a spare set of gloves in a corner so you can quickly address any spill during the actual move. Finally, reset high-traffic zones with a light surface wipe and a quick vacuum or sweep to remove stray dust that accumulated during moving. A consistent, room-by-room approach makes the move-in process smoother and faster, ensuring you start with a pristine environment that supports healthier living and easier unpacking. The aim is a confident, move-in-ready space that welcomes you from the first step through the door.
Authoritative sources
- This guide references authoritative sources on indoor air quality, mold prevention, and safe cleaning practices to support best practices for clean before moving in. For more information, see the following resources:
- https://www.epa.gov/indoor-air-quality-iaq
- https://www.cdc.gov/mold/cleanup.html
- https://www.hsph.harvard.edu/
Tools & Materials
- All-purpose cleaner (gentle, non-toxic)(Choose scent-free if possible)
- Disinfectant suitable for home use(Optional for bathrooms/kitchen high-touch areas)
- Glass cleaner(For mirrors and glass surfaces)
- Microfiber cloths (assorted sizes)(Lint-free, washable)
- Sponges and scrub brushes(Non-abrasive on delicate surfaces)
- Buckets and mop(Avoid mixing incompatible cleaners)
- Broom, dustpan, and vacuum(Vacuum before mopping to capture dust)
- Rubber gloves(Protect hands from cleaners)
- Old towels or rags(For quick wipe-ups and drying)
- Trash bags (heavy-duty)(Label and separate recyclables)
- Mask for dust and odors(Helpful for heavy dust days)
- Caulk and sealant (optional)(If you find leaks or mold-prone gaps)
- Step ladder(Access high shelves and light fixtures)
Steps
Estimated time: 4-6 hours
- 1
Assess the space and build a plan
Walk through every room, note problem areas, and set a realistic cleaning order. Create a simple checklist you can follow and reference the plan throughout the day to stay on track.
Tip: Take photos of any issues (water stains, mold, broken seals) for reference and repair when you move in. - 2
Declutter and organize first pass
Remove debris, unneeded items, and packing materials so you can clean without obstacles. This step reduces dirt spread during subsequent cleaning.
Tip: Keep a dedicated bin for items to donate or discard; this speeds up disposal later. - 3
Dust and wipe from top to bottom
Start with ceiling corners, light fixtures, and shelves, then wipe walls, doors, and baseboards. Finish with furniture and floor areas to capture settled dust.
Tip: Use microfiber cloths to trap dust effectively and prevent spreading it to other rooms. - 4
Kitchen cleaning pass
Deep-clean cabinets, wipe countertops, and clean sinks. Clean exterior of appliances and, if accessible, interiors of microwave and fridge shelves before restocking.
Tip: Don’t forget the range hood and behind the stove where grease often accumulates. - 5
Bathrooms: sanitize and deodorize
Scrub toilets, sinks, tubs, and showers. Check grout lines and reseal if needed. Finish with mirrors and fixtures.
Tip: Ventilate during cleaning to reduce moisture and prevent mold growth. - 6
Floor care and windows
Vacuum carpets, mop hard floors, and wash interior windows. Remove pet hair and test corners for hidden dust.
Tip: Avoid mixing vinegar with bleach; stick to compatible cleaners to protect surfaces. - 7
Final safety check
Test smoke/CO detectors, ensure outlets work, and verify lighting. Replace or clean air filters if present.
Tip: Keep a small toolkit handy for quick fix-ups during move-in. - 8
Final walk-through and touch-ups
Do a last pass for stubborn spots, wipe handles, and ensure every room feels refreshed. Ready for furniture and boxes.
Tip: Document any remaining issues for ongoing maintenance after move-in.
Questions & Answers
Do I need to do a deep clean before moving in, or is a surface clean enough?
For most move-ins, a thorough clean before moving in is worth the effort. A deep clean helps remove hidden dust, mold risk, and lingering odors that surface cleaning might miss. If the space looks relatively clean, you can scope for high-priority areas first and expand as needed.
A thorough clean before moving in is worth it. Start with high-priority areas, then expand as needed to ensure no hidden grime remains.
What order should I clean in for efficiency?
Clean from top to bottom and from outside in: ceilings and light fixtures first, then walls, windows, and finally floors. This minimizes re-dropping dirt onto cleaned surfaces and keeps the process efficient.
Clean from top to bottom, then floors to minimize re-dirtying surfaces.
Should I hire a professional cleaner for moving in?
Hiring a professional cleaner can be worthwhile for large homes or if you’re on a tight schedule. If you hire, focus on bathrooms, kitchen, and hard-to-clean areas first, and plan a light touch-up yourself for cost savings.
A professional can handle big areas; you can do touch-ups to save costs.
How long does a typical move-in cleaning take?
A standard 1,500–2,000 square-foot home usually takes about 4–6 hours for a thorough clean with good planning and a full supplies kit. Smaller spaces may take less time, while larger homes may need more than one day.
Most standard homes take about 4 to 6 hours with a full kit.
What about odors from new paint or new carpet?
Ventilate aggressively during and after cleaning. Use low-VOC products when possible, and run exhaust fans to reduce lingering odors. If odors persist, consider a temporary air purifier to improve indoor air quality.
Ventilate well and consider a purifier if odors linger after cleaning.
How often should I repeat this process after moving in?
Set a regular cleaning cadence: a quick weekly surface wipe, a deeper monthly scrub, and seasonal deep cleans. This keeps dust and allergens down and preserves the home’s condition.
Keep a routine: weekly surface wipes, monthly deep cleans, seasonal deep cleans.
Can I use the same cleaners in every room?
While a versatile all-purpose cleaner covers many surfaces, some areas like glass, wood, or stainless steel may need specialized products. Check labels and use surface-appropriate cleaners to prevent damage.
Use surface-appropriate cleaners to avoid damage, even if you start with a common cleaner.
What if I encounter mold during cleaning?
Address visible mold promptly using appropriate cleaners and remove moisture sources. If mold covers a large area or recurs, consult a professional for assessment and remediation.
Tackle small mold spots with proper cleaners and ventilation; seek help for larger areas.
Watch Video
The Essentials
- Plan and schedule upfront to avoid backtracking.
- Start with top-down cleaning to capture settled dust.
- Room-by-room approach speeds up the process and reduces waste.
- Safety first: check detectors and ventilation during cleaning.
- A clean before moving in yields immediate comfort and healthier air.