Ultimate Floor Clean Guide: Step-by-Step Home Care for Health
Learn to floor clean effectively on hardwood, tile, and laminate. This step-by-step guide covers tools, methods, safety, stain removal, and maintenance for a healthier home.

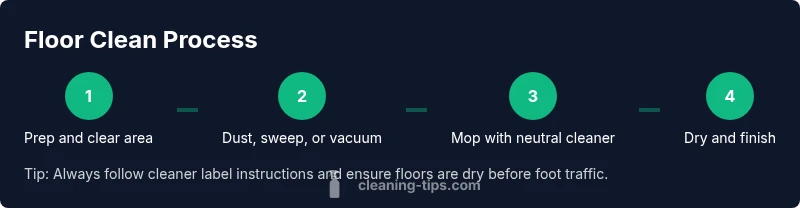
To floor clean effectively, start by clearing the area and removing loose debris. Choose a cleaner appropriate for your floor type, then sweep or vacuum thoroughly. Mop with properly diluted solution using a microfiber mop, working in straight lines. Allow floors to dry completely before walking, and repeat this routine at least once a week for best results.
Why floor clean matters
According to Cleaning Tips, a regular floor clean reduces dust, allergens, and residue that can mar surfaces over time. The goal isn't perfection, but consistent maintenance that preserves finish and improves indoor air quality. In homes, floors bear the most traffic and collect the most grime, from dirt tracked in on shoes to spills from cooking and pets. A routine floor clean minimizes deep cleaning later and extends the life of different floor materials. This simple habit pays off through cleaner air, a more pleasant living space, and lower long-term maintenance costs. Tailoring your approach to each floor type and setting a realistic cleaning frequency helps you stay consistent and avoid missed spots across rooms.
Pro tip: Break a large area into 2–3 zones and tackle each zone in a single session to avoid fatigue and ensure thorough coverage.
Assessing your floor type
Different floor types require different care. For hardwood, attention to moisture and the right cleaner is essential; for laminate, use milder cleaners to protect the wear layer; vinyl and linoleum tolerate damp cleaning but benefit from non-abrasive formulas; ceramic or porcelain tile with sealed grout can handle mild cleaners, while stone floors may need pH-neutral solutions and careful sealing status checks. Before you begin, identify the floor material in each room, check manufacturer guidelines if you have them, and test any cleaner in a hidden area to verify compatibility. This floor clean approach minimizes damage and preserves the surface finish over time.
Key distinction: Wood floors dislike standing moisture; tile floors benefit from grout attention; stone floors may require sealing compatibility checks.
Cleaning plan by floor type
Create a plan that aligns with each surface. Hardwood and sealed wood floors respond best to a neutral pH cleaner and a damp microfiber mop, avoiding excess water. Laminate floors appreciate light damp mopping with a laminate-safe cleaner. Ceramic and porcelain tile clean well with a diluted all-purpose cleaner; use a grout brush for joints. Vinyl floors tolerate most cleaners, but avoid wax buildup, which can cause slipperiness. Stone floors demand pH-neutral products and manufacturer-approved sealant use. Always start from the farthest corner and work toward the exit, so you don’t re-soil cleaned areas.
Note: Rotate cleaning products between rooms only when necessary to prevent cross-contamination of residues.
Routine maintenance and scheduling
Establish a practical maintenance cadence. In busy homes, quick 15–20 minute sessions two times per week can keep floors looking good, with a deeper clean every 2–3 weeks. If you have pets, children, or high-traffic entryways, consider increasing frequency or incorporating spot-clean checks between full cleans. Keep a compact kit in each living zone—microfiber cloths, a mild cleaner, and a spray bottle—to handle spills promptly before they set. Cleaning Tips analysis shows that predictable, regular routines reduce buildup and make the overall floor clean easier and faster over time.
Actionable plan: Create a shared calendar and assign touchpoints for each zone to maintain momentum.
Deep cleaning and stain removal
Some stains and grime require targeted actions. For grout lines, apply a baking soda paste and scrub with a soft brush, then rinse and dry thoroughly. On sealed stone or tile, use a pH-neutral cleaner and avoid acidic or alkaline formulas that can etch the surface. For stubborn scuffs on vinyl or laminate, apply a non-abrasive cleaner and rub gently with a microfiber pad. If you spot mineral buildup on stone surfaces, a diluted cleaner following manufacturer guidance works best. Dry floors completely after deep cleaning to prevent moisture damage and slip hazards.
Reminder: Always rinse and dry after any cleaning step that leaves film on the surface.
Safety, eco-friendly options, and storage
Protect people and floors by ventilating the room, wearing gloves, and avoiding mixing cleaners. Opt for eco-friendly, neutral pH cleaners when possible to minimize residue and improve indoor air quality. Store cleaning products in a cool, dry place and clearly label each bottle. Test any new cleaner on a small area first, especially on delicate surfaces. For greener floor care, consider baking soda and water paste for light stains and rinse well after use.
Caution: Do not mix bleach with ammonia or vinegar; it can release hazardous fumes.
Tips for room-specific floor care
Living rooms with wood floors benefit from occasional conditioning or polishing as recommended by the manufacturer. Kitchens with tile or vinyl may collect grease near countertops—use a kitchen-safe cleaner and rinse thoroughly. Bathrooms require prompt spill cleanup to prevent mineral buildup; dry floors after cleaning to maintain traction. Hallways and entryways take the most abuse from outdoor grit, so a sturdy doormat and regular brisk vacuuming help reduce wear. Tailor your approach to each room to maximize results and extend floor life.
Pro tip: Maintain a small “spill station” near high-traffic zones for quick action.
],
toolsMaterials
Tools & Materials
- Broom(For dry cleanup before wet cleaning)
- Vacuum cleaner(HEPA if possible; avoid for water-sensitive floors)
- Mop with microfiber pad(Prefer microfiber for better particle pickup)
- Mop bucket with wringer(Needed if using traditional mop)
- Neutral pH floor cleaner(Avoid ammonia or bleach on sensitive floors)
- White vinegar (optional)(Eco-friendly deodorizing option; avoid on stone without guidance)
- Soft-bristle scrub brush(Grout and textured surfaces)
- Microfiber cloths(Drying and spot-cleaning tools)
- Gloves(Hands protection during cleaning)
Steps
Estimated time: 60-75 minutes
- 1
Clear the area and prep
Move furniture, remove rugs, and pick up loose items from the floor. This reduces obstructions and helps you clean thoroughly. Gather your tools and tidy the workspace to set the stage for an effective floor clean.
Tip: Work in sections to avoid missing spots; start from the farthest corner. - 2
Choose your cleaner and mix correctly
Select a cleaner appropriate for your floor type and follow dilution directions on the label. Using too much cleaner can leave residue and attract more dirt. If you're unsure, use a neutral pH cleaner.
Tip: Avoid mixing cleaners; this can produce harmful fumes. - 3
Dust, sweep or vacuum the area
Remove loose dirt and debris with a broom or vacuum before mopping. Dusting first prevents dirt from smearing across the surface when you mop. Empty the vacuum bag or canister to maximize suction.
Tip: Use a crevice tool for edges and corners. - 4
Mop with proper technique
Dampen the mop lightly and clean in straight lines or a figure-eight pattern depending on room shape. Rinse the mop frequently and wring out excess moisture to avoid puddles. For textured floors, use a microfiber pad that lifts particles rather than pushing them around.
Tip: Work in a methodical grid to ensure even coverage. - 5
Rinse, dry, and ventilate
Rinse with clean water or a clear water rinse if required by your cleaner. Dry with a clean cloth or allow air drying while the room is ventilated. Keep doors open or use fans to speed up drying and prevent slip hazards.
Tip: Never leave standing water on hardwood or stone. - 6
Inspect and maintain
Check for dull spots, residue, or moisture after cleaning. Reassess furniture placement and consider periodic polishing or sealing if required for wood floors. Schedule the next floor clean based on traffic and use.
Tip: Create a simple maintenance calendar and place it where you see it daily.
Questions & Answers
How often should I floor clean?
Most homes benefit from a weekly floor clean, with spot-cleaning as needed.
Aim for a weekly floor clean and tidy spills as soon as they happen.
Can I use vinegar on all floor types?
Vinegar works for vinyl and tile but should be avoided on certain wood and stone finishes unless diluted and approved by manufacturer.
Vinegar can be risky on wood or stone; test first.
What’s the best cleaner for hardwood floors?
Use a neutral pH cleaner designed for wood floors, and avoid excess moisture.
Use a wood-safe, neutral cleaner with minimal water.
How do I clean grout effectively?
Apply a baking soda paste with a soft brush, let sit, then scrub and rinse.
A baking soda paste with a grout brush works well.
Is steam cleaning safe for floors?
Steam can loosen dirt but may damage sensitive finishes; check manufacturer guidance.
Steam cleaning can be risky for wood; verify before using.
Should I mop before vacuuming?
Vacuum or sweep first to remove loose dirt before mopping.
Always start with vacuuming or sweeping.
Watch Video
The Essentials
- Choose the right cleaner for your floor type
- Sweep or vacuum before mopping
- Mop with correct dilution and technique
- Dry floors completely to prevent slips
- Create a weekly floor clean schedule