Hair Color Guide: Clean or Dirty Hair Before Coloring?
Explore whether clean or dirty hair yields better color results, with practical tips for DIY and professional coloring, scalp care, and long-lasting shade.

Coloring works best when the hair is not freshly washed but not heavily oily either. In most cases, aim for slightly dirty hair—about 1 day since your last shampoo—so natural oils protect your scalp and help color cling evenly. If you have an oily scalp or product buildup, a light wash 4–6 hours before coloring is acceptable, then avoid additional oil.
Why cleanliness matters for color uptake
In practice, the cleanliness of your hair affects how evenly color absorbs and how long it lasts. When hair is freshly washed, the cuticles lie flat and oils are minimal, which can lead to faster color saturation but also more shedding and possible uneven results if the product sits on an oil-free surface. According to Cleaning Tips, hair color success hinges on balancing scalp protection with pigment penetration. For most people, color systems perform best when hair is neither extremely dirty nor squeaky clean. A light layer of natural oil can act as a buffer, reducing irritation and helping color stay put on the mid-lengths to ends. However, if you struggle with heavy product buildup, flakes, or an oily scalp, you may want to adjust the plan. In these cases a light wash 12–24 hours before coloring—or even coloring on slightly dirty hair—often yields more predictable results. Always follow the product’s instructions, and consider a patch test to rule out an adverse reaction.
How the wash affects color absorption: clean vs dirty hair
Color molecules need to penetrate the hair cuticle and bind to the cortex. When hair is very clean, the lack of oils can leave the cuticle margins more open during processing, which sometimes leads to brighter hue but can also cause uneven saturation if the product sits on a bare surface. Slightly dirty hair has a natural oil film that helps pigment adhere more evenly and reduces the likelihood of color pooling at the roots. The difference is subtle and product-dependent. Every color line has its own recommended prep; always check the instructions. For colorists, starting with a day-old wash can create predictable outcomes; for at-home users, follow the label and run a strand test to confirm. In humid climates or with hard water, the hair’s porosity and residue can affect how quickly the dye processes. The goal is to find a balance for your hair type and the shade you’re aiming for.
Color type differences: permanent, semi-permanent, and temporary
Permanent color generally demands thorough saturation and a strong deposit of pigment. Semi-permanent formulas lean more on the cuticle’s openness and can sometimes tolerate a touch more oil without compromising results. Temporary color, which sits on the surface, often looks best on hair that isn’t heavily oiled, as oils can dilute the coating. Always tailor your approach to the dye type you chose and test a small strand before full application. The right prep helps minimize staining on the scalp and ensures even coverage throughout the hair shaft.
Preparing hair before color: wash timing, scalp protection, and de-greasing
Before you start, decide whether you’ll color on slightly dirty hair or after a gentle wash. If you plan to color on dirty hair, skip washing on the day of the appointment and apply a thin barrier of petroleum jelly around the hairline to protect the skin. If you prefer a clean canvas, wash with a mild shampoo 12–24 hours before the color and avoid heavy conditioners at the root area. In both cases, avoid conditioning the scalp directly right before coloring, as residual conditioner can interfere with pigment uptake. Patch testing remains essential to catch irritations before applying color more broadly.
Handling oily scalp and buildup: when to wash and what to skip
An oily scalp or product buildup can hinder even color absorption. If you wake up feeling slick, a light wash 12–24 hours before coloring is acceptable, but avoid washing immediately before processing if your kit instructs otherwise. Use a clarifying shampoo only if you frequently use heavy styling products, and never wash with hot water right before applying dye, as it can strip oils too aggressively. In crowded climates or with mineral-rich water, consider a chelating shampoo a day before the color to reduce mineral buildup that can affect shade accuracy.
Understanding porosity and hair health in relation to cleanliness
Hair porosity influences how quickly color penetrates the cuticle. High-porosity hair tends to accept color quickly but may wash out faster, so a slightly dirty base can help even deposition. Low-porosity hair often resists penetration, so more processing time and a clean canvas may be preferred. The cleanliness level interacts with porosity—oily residues can either help seal pigment or hinder initial penetration—depending on the product. If you’ve recently straightened, bleached, or chemically treated hair, treat it as high-porosity with extra caution and consider strand testing to confirm the timing.
Timing scenarios: 24 hours since last wash vs. several days of natural oils
If your last wash was within 24 hours, you’re likely still close to clean hair, which some formulas tolerate well. Wait at least 24 hours if you’re using aggressive bleach or high-ink colors, as fresh color chemistry benefits from a small protective oil layer. For those with naturally oily scalps, a light wash 4–6 hours before coloring is sometimes appropriate, especially with temporary dyes. In dry climates or with hard water, hair can behave differently, so a quick strand test is your best predictor of how the color will take.
Salon vs DIY: what to expect when hair cleanliness is a factor
In a salon, a professional colorist can adapt the plan on the fly, balancing your scalp comfort with pigment uptake. They may choose a slightly dirty base for some formulas to achieve even saturation and reduce scalp irritation. At home, read the product’s prep instructions closely, perform a strand test, and follow a consistent sectioning pattern for even coverage. If your hair is unusually oily or heavily styled, opting for a professional service can reduce the risk of uneven results.
Post-color care: protecting color after applying color to hair that was dyed on dirt
After you color, rinse with cool water to help close the cuticle and seal pigment. Use a color-safe shampoo and conditioner, and avoid washing every day if possible to extend the shade life. The natural oils that you kept during the coloring process may continue to play a role in longevity, so a balanced routine that avoids harsh cleansers around the scalp can help. If you notice rapid fading, consult the product guidance or consider a touch-up schedule that aligns with your lifestyle and climate.
Troubleshooting common issues tied to cleanliness during coloring
If color looks uneven, recheck your sectioning and timing, and consider a strand test to confirm whether the oil layer affected diffusion. If staining occurs at the hairline or ears, use petroleum jelly as a barrier and apply dye sparingly near sensitive areas. For extremely oily scalps, a gentle wash with a clarifying formula a day before processing can help remove residues that interfere with pigment binding. If you experience persistent irritation or adverse reactions, seek professional advice promptly.
Quick reference: personalized scenarios and guidance on wash timing
- Freshly washed hair (same day): acceptable for lighter shades and direct dyes with no oils on the scalp. - Hair that smells like styling products: consider a light wash to remove residue and then proceed according to the dye’s instructions. - Very oily hair: prefer a light wash 4–6 hours before coloring and use a barrier cream at the hairline. - Chemically treated hair: treat as high-porosity and strand-test before committing to full color. - Humid climates: factor in faster processing and potential dilution; adjust time accordingly.
Tools & Materials
- Color kit (permanent or semi-permanent)(Includes color cream, developer, and gloves)
- Gloves(Disposable, latex-free preferred)
- Mixing bowl(Non-metallic)
- Application brush(For even saturation)
- Sectioning clips(To create clean parts)
- Petroleum jelly or barrier cream(Protect hairline and ears)
- Old towel or cape(Prevent staining clothes)
- Old shirt or cape(Protect clothing)
- Timer(Track processing time)
- Aluminum foil (optional)(For root masking or split sections)
- Cotton pads or cotton swabs(Clean edges and wipe spills)
- Clarifying shampoo (optional)(Use before if buildup is heavy)
Steps
Estimated time: 45-90 minutes
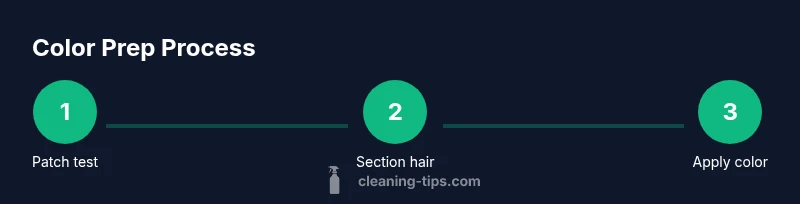
- 1
Perform patch and strand test
Mix a small amount of dye and apply to a tiny strand. Wait the recommended time, then rinse. Check for color shift or an adverse reaction before proceeding.
Tip: A patch test helps prevent surprises and protects sensitive skin. - 2
Decide wash timing based on product and scalp
Choose whether to color on slightly dirty hair or after a gentle wash 12–24 hours prior. Follow the dye’s instructions and consider your scalp sensitivity and porosity.
Tip: If in doubt, err on the side of leaving a light oil film on your scalp for protection. - 3
Section hair into four equal parts
Part hair from the temples to the crown, clip into four sections for even coverage. This helps prevent missed patches and uneven saturation.
Tip: Use firm but gentle tension to avoid stretching the hair shaft. - 4
Apply color from roots to mid-lengths
Start at the roots, working toward the mid-lengths. Maintain a consistent amount of product and use long, smooth strokes to ensure even distribution.
Tip: Keep hair coated evenly but avoid drips onto the scalp. - 5
Process color for the recommended time
Follow the product’s processing time. If your hair is highly porous, monitor closely and rinse once the timer ends.
Tip: Set a timer to prevent over-processing and uneven results. - 6
Rinse, shampoo, and condition
Rinse with lukewarm water until the water runs clear; then shampoo with a color-safe formula and condition thoroughly. Avoid hot water which can lift pigments.
Tip: Cool or lukewarm water helps seal the cuticle for longer-lasting color.
Questions & Answers
Should I wash my hair before coloring?
Generally, color performs best on hair that is not freshly washed. A light wash or coloring on slightly dirty hair often yields more even results. Always follow the specific product instructions and perform a strand test.
Typically, you want hair that isn't freshly washed. A light wash or coloring on slightly dirty hair can help with even results, but follow the product's directions and test a strand first.
Can I color over oily hair?
Oily hair can affect pigment uptake. If the scalp is very oily, a light wash 12–24 hours before coloring is acceptable for many formulas. Use barrier cream and avoid applying product directly to irritated skin.
Oily hair can hinder color uptake. A light wash 12–24 hours before coloring often works, and protect the hairline with barrier cream.
What if my hair is very porous or damaged?
Porous or damaged hair absorbs dye quickly and may fade faster. In these cases, strand-test first, consider longer processing times, and avoid over-washing after coloring to preserve the shade.
Porous or damaged hair can take color quickly and fade sooner. Test first and avoid excessive washing after coloring.
Is it safer to go to a salon if my scalp is sensitive?
If you have scalp sensitivity, a salon consultation can tailor the preparation and reduce irritation. Professionals can adjust washing, barrier protection, and processing times to minimize discomfort.
Yes, a salon can tailor prep and processing to protect a sensitive scalp.
Can color look different if I color on dirty hair?
It can, depending on the dye type and porosity. Slightly dirty hair may deposit pigment more evenly, but heavy oil or buildup can cause uneven results. Strand testing helps you predict the outcome.
Yes, different conditions can change how color looks; test a strand first.
What should I do if color stains the skin around my hairline?
Wipe the skin with a damp cloth or cotton pad during processing and apply a thin barrier like petroleum jelly before applying dye. If staining occurs, use a gentle oil-free cleanser after rinsing.
If staining occurs, wipe with a damp cloth and apply barrier cream next time to minimize it.
Watch Video
The Essentials
- Start with slightly dirty hair for most color jobs.
- Patch tests reduce risk of adverse reactions.
- Follow product instructions for timing and application.
- Post-color care extends shade life.