How to Dry Clean at Home: Step by Step Guide
Learn how to dry clean at home safely with kits and simple steps. Cleaning Tips shows practical, fabric-conscious guidance for refreshing clothes without full immersion.

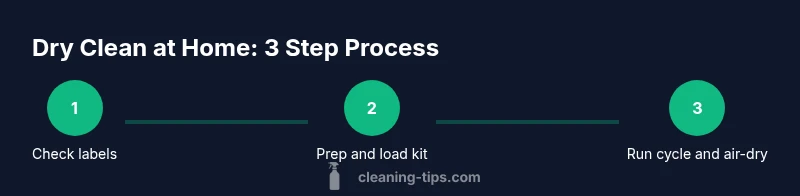
According to Cleaning Tips, you can dry clean at home by using a dedicated dry-cleaning kit, checking fabric care labels, spot-treating stains, and following the kit’s cycle in a garment bag. Prepare your workspace, read the instructions, and air the garment afterward to prevent wrinkles.
What at-home dry cleaning actually involves
At-home dry cleaning uses a specialized kit to refresh fabrics without full immersion in water. It is not the same as professional dry cleaning, which uses larger machines and solvents. Instead, a kit provides a closed environment in which soils are loosened and soils are removed by solvent-activated cloths inside a garment bag. The process is designed for light soils, delicate fabrics, and items that label as dry clean only but are not severely soiled. According to Cleaning Tips, home dry cleaning relies on safer, kit-based solvents and care instructions to minimize fabric stress while restoring look and feel. Always read garment labels first and treat stains before the cycle so results are consistent. Prepare a clean workspace, and work in a well-ventilated area to avoid solvent odors building up. Finally, air the garment after the cycle to reduce wrinkles and allow any remaining solvent to evaporate.
Fabric suitability: what can and can't be dry cleaned at home
Not every fabric is suitable for at-home dry cleaning. Generally, polyester blends, cotton blends, synthetic knits, and many synthetics respond well to kit-based cleaning and can be refreshed without water. Delicate fabrics like silk, satin, or beaded garments require extra caution; colorfast testing and a conservative approach are essential. Wool and heavy wool blends may be treated only if labeled for dry cleaning and you are confident the cycle chosen is gentle. If a garment bears a 'Dry Clean Only' label, home cleaning may still be possible for light soils, but heavier soils, oil stains, or strong odors are better left to a professional. Based on Cleaning Tips research, always prioritize the garment’s fiber content and label recommendations to decide if home dry cleaning is appropriate.
Choosing a kit and setting up your workspace
Selecting a reputable home dry-cleaning kit is your first step. Look for kits that provide a clearly labeled cycle, solvent-activated cleaning cloths, and a stain-removal option. Set up your workspace in a well-ventilated area, away from heat sources and potential ignition. Gather your garment(s), the bag, and all kit components so you can move from prep to finish without searching for tools. Prepare a clean, flat surface to lay garments after drying. Cleaning Tips recommends keeping fabrics away from direct sunlight during storage, and using a garment bag to minimize dust and wrinkling.
Pre-cleaning checks: labels, stains and colorfastness
Before any cleaning, read the garment care label carefully. Identify fiber content, finish, and any special instructions like “no heat,” “hand wash only,” or “dry clean only.” Conduct a colorfast test by dabbing a hidden seam with a small amount of stain remover from the kit and press lightly with a clean white cloth to see if color transfers. If color bleeds, avoid the process or use a gentler method. Keep embellishments, zippers, and hems secured to prevent snagging inside the bag. Finally, brush off loose dirt and lint so soils have a chance to disengage during the cycle.
Stain handling and spot testing
Stains should be treated before the cycle begins. Apply the kit’s stain remover to the affected area, working from the outside toward the center. Use a light tapping motion rather than vigorous rubbing to avoid spreading the stain. For oil-based stains, follow the kit’s specific guidance; for water-based stains, a combination of spot treatment and light air drying can help. Always perform a second colorfast test after applying stain remover to verify the fabric won’t blot or fade.
Running the kit cycle: cycle choices and timing
Place the garment in the provided bag or pouch and add the kit’s cleaning cloths as directed. Do not overcrowd the bag; clothes need space to move to prevent rubbing against other fabrics. Select the cycle or setting that matches the garment’s care label and the kit’s instructions, usually a low-heat or air-dry option. Start the cycle and monitor for unusual smells or excessive solvent vapors. If something seems off, stop the cycle and reassess.
Post-cleaning care: drying, steaming, storage
After the cycle completes, remove the garment promptly and lay it flat on a clean surface or hang it on a hanger to air-dry completely. Avoid direct heat during drying, as it can cause shrinkage or fabric distortion. If needed, use a garment steamer on a low setting to release wrinkles. Once fully dry, store the garment in a breathable bag or a closet to maintain freshness and prevent re-soiling. Keep solvents away from heat sources and ensure good ventilation in the storage area.
Common pitfalls and safety reminders
Always operate the kit exactly as the manufacturer instructs. Ventilate the area, keep solvents away from flames, and store all containers out of reach of children and pets. Do not mix different solvents or household cleaners, and never pour leftover solvent down the drain without consulting the kit’s directions. If a stain remains or the fabric shows any sign of damage (pilling, color change, or distortion), discontinue use and seek professional help.
Alternatives and professional services when needed
Home dry cleaning is convenient for light refreshment or delicate fabrics, but not a substitute for all cleaning needs. For heavily soiled garments, strong odors, or fabrics labeled strictly ‘dry clean only’ that show heavy wear, professional cleaning in a controlled, solvent-based environment is recommended. Compare costs and turnaround times, and consider alternating between at-home refreshes and periodic professional services to extend garment life.
Tools & Materials
- Home dry-cleaning kit (solvent-based)(Includes cleaning cloths, solvent, stain remover, and instructions)
- Clean garment bags or old pillowcase(Breathable bag helps fabrics move and dry evenly in the cycle)
- Stain remover pen or spot treatment(Use on stains before cycling; test first on hidden area)
- Lint roller or soft brush(Remove surface dust and lint before cleaning)
- Clothes dryer with low-heat setting or air-dry option(Follow kit instructions; avoid high heat on delicate fabrics)
- Timer or clock(Helpful to track cycle duration)
- Protective mat or towels(Place under the bag to catch drips)
Steps
Estimated time: 60-90 minutes
- 1
Read labels and spot-test
Inspect the garment label for fiber content and any special care instructions. Test the stain remover on an inconspicuous area to ensure colorfastness before treating the stain.
Tip: If color transfers, abort the cleaning, as damage may occur. - 2
Pre-treat stains
Apply a small amount of stain remover to the stained area. Gently blot from the outside in to lift soils without spreading the stain.
Tip: Avoid aggressive rubbing; this can spread the stain or damage fibers. - 3
Prepare kit and garment
Open the kit and lay the garment flat. Place the item in the included bag and add the cleaning cloths as directed by the instructions.
Tip: Do not overcrowd the bag; fabrics need space to move. - 4
Load and seal the cycle
Seal the bag according to the kit’s directions and place it in the dryer or machine on the appropriate low-heat setting.
Tip: Silk and wool generally require lower heat or no heat; always follow labels. - 5
Monitor and finish cycle
Run the cycle as prescribed and check for unusual smells or signs of solvent buildup. If you notice anything off, stop and reassess.
Tip: Short cycles are safer for delicate fabrics; you can repeat if necessary. - 6
Air-dry and store
Remove the garment promptly and air-dry on a hanger or flat surface away from direct heat. Store in a breathable bag when fully dry.
Tip: Avoid over-drying, which can cause stiffness and wrinkles.
Questions & Answers
Is home dry cleaning safe for all fabrics?
Not all fabrics are suitable. Check fiber content and label; some delicate fibers should not be cleaned at home.
Not all fabrics are safe to clean at home; always check the label.
Can I reuse the solvent from a kit?
No. Use fresh kit materials per the instructions to avoid residue and fabric damage.
No, you should not reuse solvent; follow the kit's instructions.
How long does a home dry-cleaning cycle take?
A typical cycle plus prep and air-drying is a short process, but always refer to the kit’s timing for your garment.
Cycle time varies with the kit, but plan for the cycle plus prep and air-drying.
What if a stain remains after using a kit?
Spot-treat again or consider professional cleaning for persistent stains or delicate fabrics.
If the stain remains, try spot-treating again or seek pro help.
Can home dry cleaning replace washing clothes?
No. It’s for refreshing and light soils; heavy soils require washing or professional cleaning.
It's not a substitute for washing; use it for refreshing.
Are there safety concerns with home dry-cleaning kits?
Keep solvents away from children and pets; ventilate and follow warnings on the kit.
Follow the manual, ventilate, and keep solvents away from kids.
Watch Video
The Essentials
- Check garment labels before starting
- Use a dedicated home kit and follow instructions
- Spot-treat stains prior to cycling
- Air-dry and store properly to prevent wrinkles