Cat Ears Clean: Safe, At-Home Ear Care for Cats
Learn a safe, step-by-step method to clean your cat's ears at home with the right tools and safety tips. This Cleaning Tips guide helps owners protect ear health without stressing pets.

Safety first: cleaning a cat ears clean should be gentle and minimal. This guide shows a safe, step-by-step method to clean a cat's ears using correct tools, a calm approach, and warning signs to stop. Do not insert objects deep into the ear canal; if your cat shows distress, seek a vet.
Why Ear Care Matters for Cats (cat ears clean)
According to Cleaning Tips, ear health is a critical part of a cat's overall well-being. Regular care helps prevent otitis externa, odor, and discomfort that can lead to behavioral changes such as decreased activity or irritability. When you start a cat ears clean routine, you reduce the risk of infections and build trust with your pet. This guide focuses on a safe, calm approach to ear cleaning that respects the delicate anatomy of a cat's ear. We'll cover what tools you need, how to inspect the ears, and how to perform a gentle cleaning that respects the delicate anatomy of a cat's ear. By following these steps, homeowners and renters can maintain cleanliness and comfort, supporting long-term ear health. In many homes, a simple, regular cat ears clean routine can prevent minor irritations from escalating into painful infections that require veterinary care. Cleaning Tips analysis shows that consistent, gentle care reduces stress for both cat and owner, reinforcing trust and cooperation during grooming.
Top Tools and Materials for Cat Ear Cleaning
- Cat-safe ear cleaning solution (non-irritating and label-appropriate for cats)
- Cotton balls or gauze pads
- Soft towel or non-slip mat
- Treats or calming aid (optional but helpful)
- Gloves (optional for hygiene)
- A helper to steady the cat (optional)
- A timer or clock to track waiting times (optional)
Notes: Always choose products labeled safe for cats and follow the label directions to keep the cat ears clean without irritation.
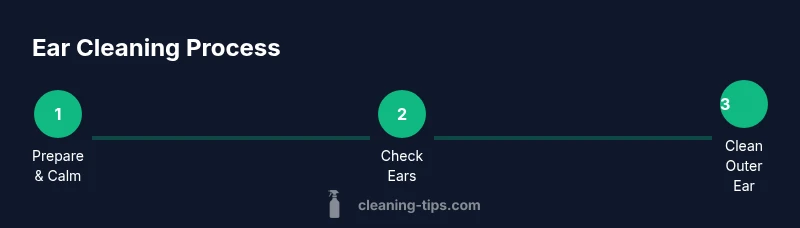
Step-by-Step Process Overview
This section outlines the core steps you will perform in sequence. Each step below is a standalone action that you can complete in under a minute, followed by a short wait or observation period. The full process typically takes about 20-40 minutes depending on your cat's temperament and health. The goal is to achieve a clean outer ear without inserting anything into the ear canal. See the detailed Step-by-Step section for exact actions, tips, and safety warnings. This overview helps you mentally prepare and pace the session to reduce stress for both you and your cat.
Step 1: Prepare the Environment and Your Cat
Before you begin, create a calm, safe environment. Choose a quiet room, turn off loud distractions, and lay a towel on a stable surface. If your cat is anxious, consider a harness or gentle restraint technique and have a helper ready. Warm, dim lighting and soft praise help reduce stress. The cat ears clean routine starts here, with you setting the tone for cooperation. Remember to keep cleaners away from other pets to avoid fear responses. This prep minimizes stress and makes the procedure smoother for both of you.
Step 2: Inspect Ears for Health Before Cleaning
Gently examine the outer ear for redness, swelling, discharge, or a foul odor before introducing any cleaner. Use a damp cotton ball to wipe away surface dirt and wax only from the visible, outer portion. If you notice dark debris, swelling, or a strong odor, stop and seek veterinary evaluation. Do not attempt to flush or probe the canal; a professional should assess any concerns. The safety of your cat ears clean routine depends on recognizing signs that require professional care.
Step 3: Clean Outer Ear Safely
Apply a small amount of cat-safe ear cleaner to the outer ear canal opening (as per product directions). Gently massage the base of the ear for 20-30 seconds to help loosen wax and debris. Use a fresh cotton ball or gauze to wipe away loosened material from the outer ear; repeat as needed until the area looks clean. Avoid inserting anything deep into the ear canal. If your cat tolerates it, a calm voice and slow movements improve cooperation. This step is where most beginners make mistakes, so keep the actions light and patient.
Step 4: Dry, Soothe, and Monitor After Cleaning
Pat the outer ear dry with a clean cotton ball or cloth; do not rub aggressively, which can irritate the skin. Offer a treat and gentle praise to reward cooperation and reinforce positive associations with ear care. Monitor your cat for the next 24-48 hours for redness, itching, discharge, or continued head shaking. If you notice any persistent symptoms, contact a veterinarian promptly. A calm, positive approach helps ensure the cat ears clean process remains a routine you both tolerate and enjoy.
Common Mistakes and Red Flags to Stop Immediately
Common mistakes include inserting cotton swabs into the ear canal, using alcohol-based cleaners, and cleaning too frequently. These actions can cause injury or discomfort and worsen problems. Red flags include persistent redness, swelling, foul odor, discharge, head shaking, or scratching at the ear. If you observe any of these signs, stop cleaning and seek veterinary attention. Remember: never force a cleaning; if your cat resists, pause and resume later or consult a professional.
Authority Sources
- According to Cleaning Tips, respected veterinary sources emphasize using pet-safe products and avoiding deep canal cleaning. See the following for additional guidance:
- AVMA: https://www.avma.org/resources/pet-owners/petcare/ear-infections-cats
- Merck Vet Manual: https://www.merckvetmanual.com/cat-owners/ear-disorders/overview
- PetMD: https://www.petmd.com/cat/conditions/ears
Tools & Materials
- Cat-safe ear cleaning solution(Non-irritating, follow product directions for cats.)
- Cotton balls or gauze pads(Use for outer-ear cleaning; avoid deep insertion.)
- Soft towel or non-slip mat(Protect surfaces and keep your cat comfortable.)
- Treats or calming aid(Optional but helpful for cooperation.)
- Gloves(Optionally maintain hygiene.)
- Helper(An extra person can stabilize the cat.)
Steps
Estimated time: 20-40 minutes
- 1
Gather supplies and prep space
Collect all items before starting and set up a quiet, comfortable area. Lay a towel on a stable surface and reduce distractions to keep your cat relaxed. This preparation minimizes stress and helps you maintain control throughout the process.
Tip: Have everything within arm’s reach; a calm environment improves safety. - 2
Secure your cat and position safely
Gently position your cat on the towel, with a helper if possible. Use a calm, steady hold to minimize movement without causing fear. Comfort and restraint reduce the risk of sudden moves that could injure your cat or you.
Tip: Speak softly and avoid sudden movements to maintain cooperation. - 3
Apply ear cleaner to the outer ear
Following the product directions, apply a small amount of ear cleaner to the visible part of the ear canal. Do not insert deeply. A brief, gentle massage helps loosen wax around the entrance.
Tip: Keep the nozzle away from the ear canal and avoid over-wetting. - 4
Wipe away debris from the outer ear
Use a fresh cotton ball or gauze to wipe away loosened debris from the outer ear. Repeat with a new pad as needed until the area looks clean. Do not probe into the canal.
Tip: Work slowly from the outer edge toward the canal opening. - 5
Dry and monitor after cleaning
Pat the outer ear dry with a clean cloth or cotton ball. Offer a treat and observe your cat for 24-48 hours for any redness, discharge, or continued scratching.
Tip: Look for signs of irritation or infection that warrant veterinary advice. - 6
Document results and plan follow-up
Note what you did, what you observed, and when you plan a follow-up cleaning if needed. Regular, gentle cleanings may be incorporated into a broader ear care routine as advised by your vet or Cleaning Tips.
Tip: Regular records help you notice changes over time.
Questions & Answers
How often should I clean my cat's ears?
Clean only as needed based on your cat's ear appearance and vet guidance. Over-cleaning can irritate the skin and disrupt natural defenses. If you notice consistent wax, odor, or discharge, consult a veterinarian rather than guessing a schedule.
Clean only as needed; if in doubt, ask your vet before the next cleaning.
Can I use cotton swabs to clean my cat's ears?
No. Cotton swabs can push debris deeper or injure the ear canal. Use cotton balls or gauze only on the outer ear and as directed by the ear cleaner.
Avoid swabs—stick to outer-ear wiping with cotton balls.
What are signs of an ear infection in cats?
Look for persistent redness, swelling, odor, discharge, head shaking, or scratching at the ear. If any signs occur, seek veterinary evaluation rather than attempting home remedies.
Watch for redness, discharge, or head shaking; see a vet if you notice any signs.
Is it safe to clean both ears in one session?
Yes, if your cat remains calm and cooperative. Take breaks as needed to prevent stress, and never rush the process.
If your cat gets stressed, pause and resume later.
What should I do if I notice redness or bleeding?
Stop cleaning immediately and seek veterinary care. Do not attempt to clean further until evaluated by a professional.
Stop and call your vet if you see redness or bleeding.
What if my cat resists cleaning?
Take short breaks, use treats, and keep sessions very brief. Consider professional grooming or veterinary assistance if resistance continues.
If your cat resists, pause and try again later, or seek a professional.
Watch Video
The Essentials
- Prepare the space and tools before starting.
- Never insert objects into the ear canal.
- Use only cat-safe ear cleaners and wipe the outer ear gently.
- Reward your cat to make ear care a positive experience.
- Monitor for signs of infection and seek vet care if needed.