How to Clean Your Dog's Ears Safely: Step-by-Step Guide
Learn to safely clean your dog's ears at home with this practical guide from Cleaning Tips. Tools, step-by-step routines, safety tips, and vet guidance included for a healthy, happy pup.

Learn how to clean your dog’s ears safely at home to support comfort and health. This quick guide covers what you’ll need, the proper technique, and warning signs that require a vet. With careful steps, you can reduce irritation, prevent infections, and keep your pet happier and more cooperative during cleaning.
Understanding ear health in dogs
Maintaining a clean ear dog starts with understanding canine ear anatomy and common issues. The outer ear, ear canal, and eardrum can be affected by wax buildup, moisture, and seasonal allergies. Regular care helps reduce the risk of infections and irritation. According to Cleaning Tips, a routine that is gentle, consistent, and age-appropriate supports long-term ear health. Noticeable signs of trouble include scratching at the ears, head shaking, or unusual odor. Always approach ear care calmly to minimize stress for you and your dog.
Tools and supplies for safe ear cleaning
Having the right tools makes ear cleaning safer and more comfortable for your pet. Use a dog-specific ear cleaner, soft gauze or cotton balls, a clean towel, and optionally a grooming glove for gentle handling. Avoid cotton swabs inserted into the ear canal. Gloves help keep hands clean, while a towel keeps your dog from slipping. For rewards, keep small treats handy to reinforce calm behavior during the process.
Step-by-step routine overview
A consistent routine is easier for dogs to tolerate than sporadic sessions. Start with a calm, well-lit environment, stationary and secure your dog with a relaxed posture. Work slowly, validating with gentle praise and small treats. Use only products approved for canine ears and follow the product instructions for dosage and duration. The goal is gentleness, not speed, to minimize stress and prevent injury.
Safety, warnings, and when to pause
Never insert objects deep into the ear canal. If you notice bleeding, foul odor, swelling, or severe redness, stop immediately and seek veterinary guidance. If your dog shows signs of dizziness or continual head shaking, discontinue cleaning and consult a professional. Ear conditions can worsen quickly; early intervention helps protect your dog’s hearing and comfort.
Training your dog for ear care
Training makes ear cleaning a positive experience. Pair the activity with treats, praise, and short practice sessions. Start with just handling the outer ear, gradually progressing to cleaning motions as your dog remains calm. Consistency outweighs intensity: shorter, frequent sessions reduce anxiety and build a cooperative routine.
Aftercare and ongoing maintenance
After cleaning, wipe away any visible residue from the outer ear and check for redness or irritation daily. Keep ears dry after baths or swimming and dry thoroughly if moisture is detected. Schedule regular cleanings based on your dog’s breed, floppy ears, and lifestyle, adjusting frequency to prevent buildup and discomfort.
Tools & Materials
- Dog-specific ear cleaner(Choose a veterinary-approved formula suitable for canine ears.)
- Gauze or cotton balls(Use for gentle wiping; do not insert into the canal.)
- Towel or mat(Provides a stable, comfortable surface and helps contain slips.)
- Gloves (optional)(Protects hands during the cleaning process.)
- Treats (reward rewards)(Positive reinforcement to encourage cooperation.)
Steps
Estimated time: 15-25 minutes
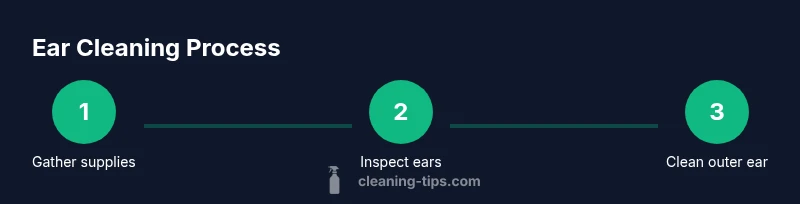
- 1
Gather supplies and prepare your dog
Lay out all materials within reach and place your dog in a comfortable, secure spot. Have towels ready and ensure the room is calm. Greet your dog softly to reduce stress before starting.
Tip: Use a familiar, quiet area to help your dog relax. - 2
Inspect ears for signs of trouble
Gently lift the ear and look for redness, discharge, or foul odor. If you notice anything abnormal, pause and consult a vet before proceeding.
Tip: Don’t force the dog’s head or squeeze the ear canal. - 3
Apply ear cleaner and massage the base
Apply the cleaner to the ear canal or outer ear as directed by the product. Gently massage the base of the ear for 20–30 seconds to help loosen debris.
Tip: Keep head steady; avoid tilting the head too far to prevent spills. - 4
Wipe away debris from outer ear
Use gauze or cotton balls to wipe away softened debris from the outer ear and canal entrance. Do not insert into the canal; focus on reachable areas.
Tip: If debris resists, reapply cleaner and retry after a short pause. - 5
Dry the ear and observe for reaction
Carefully dry the outer ear with a clean cloth and monitor for irritation or changes in behavior over the next 24 hours.
Tip: A small amount of moisture is normal; seek vet help if moisture persists. - 6
Record routine and when to contact a vet
Keep a simple log of cleaning frequency and any signs of trouble. If issues arise, contact your veterinarian for guidance.
Tip: Documentation helps determine if cleaning frequency should change.
Questions & Answers
Is it safe to clean my dog's ears at home?
Yes, for healthy dogs and within scope. Use a canine ear cleaner, clean outer ear only, and avoid deep canal cleaning. If you notice signs of infection, consult a veterinarian before proceeding.
Yes, you can clean at home if you use the right cleaner and focus on the outer ear; stop if you see infection signs and ask a vet.
How often should I clean my dog's ears?
Frequency depends on breed, ear shape, and activity. Floppy-eared dogs or active dogs in humid areas may need more frequent care. Start with monthly cleanings and adjust based on ear health observations.
Frequency depends on your dog’s needs—start with monthly checks and adjust as needed.
What if I see redness or discharge after cleaning?
Discontinue cleaning and seek veterinary advice if redness or discharge appears. These can be signs of infection or irritation that require professional assessment.
If you notice redness or discharge, stop cleaning and contact your vet.
Can I use human ear drops on my dog?
Human ear drops are not recommended for dogs. Use a product formulated for canine ears and follow label directions or your veterinarian’s guidance.
Don’t use human ear drops on dogs; pick canine-specific products and follow instructions.
Which ear cleaner should I use?
Choose a canine ear cleaner approved by your vet. Look for mild, pH-balanced formulas free of irritants and fragrances that can irritate sensitive ear tissue.
Use a vet-approved canine ear cleaner and avoid harsh ingredients.
When should I see a vet for ear issues?
Seek veterinary care if there is persistent redness, swelling, bad odor, discharge, pain, or if cleaning does not improve symptoms within a week.
If symptoms persist or worsen, see your veterinarian promptly.
Watch Video
The Essentials
- Establish a calm, positive cleaning routine
- Use canine-specific ear cleaner and outer-ear wipes
- Never insert objects into the ear canal
- Watch for warning signs and seek vet care when needed