How to Clean a Dog Ear: Safe Step-by-Step Guide
Learn to safely clean a dog's ears with vet-approved methods, tools, and warning signs. This guide covers preparation, technique, safety notes, and maintenance for healthier ears.

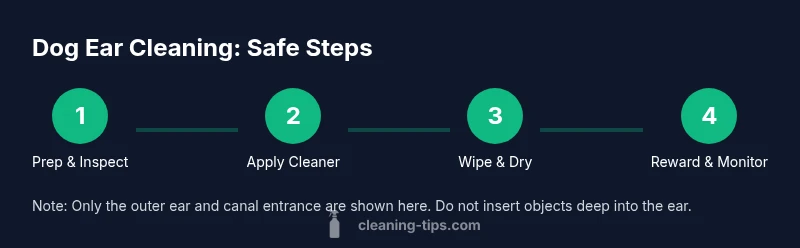
To safely clean a dog ear, gather vet-approved ear cleaner, cotton balls, and treats, then follow these steps: inspect for redness or discharge, apply cleaner, gently massage the base of the ear, wipe away debris, and let your dog shake. Repeat only as needed, and stop if pain or odor persists.
Why ear health matters for dogs
When you learn how to clean a dog ear, you’re not just removing wax—you’re protecting your dog from discomfort, infections, and hearing issues. Healthy ears support your dog’s balance, comfort, and willingness to engage in daily activities. Regular, gentle cleaning also gives you a chance to notice changes in texture or smell that could signal a problem early. According to Cleaning Tips, routine ear care lowers the risk of infections and keeps dogs more comfortable during walks, naps, and play. This section explains the why behind the task and sets expectations for what a typical cleaning session looks like for most dogs.
Safety first: red flags that require a vet
Cleaning a dog ear is safe when done correctly, but certain signs mean you should pause and consult a veterinarian. If you notice persistent redness, swelling, discharge, a strong odor, or your dog shows obvious pain during cleaning, stop and seek professional care. Puppies or dogs with a history of ear problems may require a different approach or medicated cleaners prescribed by a vet. Based on Cleaning Tips analysis, infections can escalate quickly if left unchecked, so early evaluation is key.
Tools and materials you’ll need
Gather only vet-approved supplies to protect your dog’s ears. Essential items include a canine ear cleaner specifically formulated for dogs, soft cotton balls or gauze, towels or a washable mat, and plenty of tasty rewards to keep your dog calm and cooperative. Optional items like gloves or a second person can help with difficult sessions. Always read and follow product instructions and avoid home remedies that you’re not sure about.
Understanding ear anatomy and common issues
A dog’s ear structure includes the outer ear (pinna) and the ear canal, which leads to sensitive inner tissues. Clean only the outer ear and the entrance of the canal; never push objects deep inside, as this can cause damage. Common issues seen with dogs include wax buildup, moisture-related yeast infections, mites, and irritation from allergies. Early signs to watch for include head shaking, scratching at the ear, and redness around the ear flap.
Preparing your dog and workspace
Create a calm, well-lit space where you can comfortably sit with your dog. Have supplies within arm’s reach and place a towel on the floor to catch any cleaner or wax. Speak softly, offer treats, and avoid rushing. A patient approach reduces stress for both you and your dog, and it makes the cleaning process safer and more effective.
Step-by-step overview
Here is a high-level sequence you’ll follow during a typical cleaning session: 1) inspect the ears for obvious signs of irritation; 2) apply the cleaner to the outer ear; 3) gently massage the base of the ear to loosen wax; 4) wipe away debris with a cotton ball; 5) allow the dog to shake off excess liquid and dry; 6) repeat only if needed and never over-clean; 7) reward your dog and re-check the ears afterward. This overview helps you prepare for the detailed steps below and ensures you maintain a safe, effective pace. (Note: the full step-by-step details are in the separate block.)
Aftercare and maintenance
After cleaning, monitor ears at least once a week for the first month, then adjust frequency based on your dog’s ear condition, breed, and allergies. Keep the fur around the ears trimmed if needed to improve airflow and reduce moisture buildup. If you see persistent signs of infection or if cleaning reveals debris you cannot remove safely, schedule a vet appointment. Regular ear checks, combined with good drying and storage of supplies, help prevent recurring problems. The Cleaning Tips Team also recommends making ear care a standard part of your dog’s hygiene routine and consulting your veterinarian for personalized guidance.
Quick routines to reduce stress during ear cleaning
To make ear cleaning a positive routine: use gentle, slow movements; keep sessions short; pair the activity with high-value rewards; maintain a calm voice; and start with a quick check and only progress to cleaning if your dog is comfortable. A calm, consistent routine makes future cleanings easier and reduces fear or resistance.
Common mistakes to avoid
Avoid inserting objects into the ear canal; never use cotton swabs inside the canal; do not force the cleaner if your dog resists; avoid cleaning when your dog is sick or in pain; never rely on home remedies you’re unsure about; if in doubt, ask your vet to demonstrate the proper technique.
Tools & Materials
- Vet-approved canine ear cleaner(Formulated for dogs; follow label directions.)
- Soft cotton balls or gauze(For outer-ear wiping; avoid pushing into canal.)
- Towels or washable mat(Protect surfaces and keep dog comfortable.)
- Treats or praise(Positive reinforcement to reduce stress.)
- Gloves (optional)(For cleanliness if desired.)
Steps
Estimated time: 30-45 minutes
- 1
Prepare the space and your dog
Set up a calm, well-lit area and gather all supplies within reach. Let your dog sniff the materials and offer a few minutes of quiet bonding to reduce anxiety before you begin.
Tip: Keep sessions short at first and reward calm behavior. - 2
Check ears for signs of trouble
Gently lift the ear and inspect the outer area for redness, swelling, or discharge. If you see concerning signs, do not proceed with cleaning and consult a vet.
Tip: Use a flashlight to look for hidden redness or odor. - 3
Apply ear cleaner to the outer ear
Tilt the head slightly, pull the ear flap to expose the entrance, and apply the cleaner per label directions. Do not insert the nozzle deep into the canal.
Tip: Aim at the opening of the ear rather than deep into the canal. - 4
Massage the base of the ear
Gently massage the base of the ear for 15–30 seconds to loosen wax and debris. This helps the cleaner travel through the canal without forcing it in.
Tip: If your dog shows discomfort, pause and reposition your grip. - 5
Wipe away debris from the outer ear
Use a clean cotton ball or gauze to wipe away loosened wax and fluid from the outer ear. Avoid pushing into the canal.
Tip: Use a fresh cotton ball for each ear to prevent cross-contamination. - 6
Let your dog shake and dry
Allow your dog to shake their head first, then gently blot the outer ear with a towel to dry. Do not restrain excessively during shaking.
Tip: Keep your face away to avoid accidental nicks from sudden head movement. - 7
Reward and re-check
Offer a treat and praise after cleaning. Re-check the ears after a day or two for signs of improvement or new issues.
Tip: Take a photo to compare changes over time.
Questions & Answers
How often should I clean my dog's ears?
Most dogs benefit from cleaning every few weeks to monthly, depending on breed, ear shape, moisture levels, and allergies. Some dogs with chronic ear issues may require more frequent checks or veterinary-cleaned ears. Always tailor frequency to your dog and consult your vet if you notice changes.
Most dogs do well with ear cleaning every few weeks to a month, but talk to your vet to adjust based on your dog’s needs.
Can I use human ear drops on dogs?
No. Human ear drops are formulated for human ear structures and can irritate a dog’s ear. Use a canine ear cleaner recommended by your veterinarian and follow the label directions.
No—use canine ear cleaners approved by your vet.
Are cotton swabs safe for dogs?
Cotton swabs should not be inserted into the ear canal. They can push debris deeper or cause injury. Use cotton balls or gauze to gently wipe the outer ear.
Avoid cotton swabs—they can push debris deeper or bruise the ear.
What if cleaning reveals an infection?
If you notice persistent redness, odor, discharge, or pain, stop cleaning and contact your veterinarian. Infections may require medication or professional cleaning.
If you see infection signs, stop cleaning and contact your vet for treatment.
Is it okay to clean inside the ear canal?
Only the outer ear and entrance should be cleaned. Do not insert tools or liquids deep inside the canal, as this can damage sensitive structures.
Stick to the outer ear; don’t insert anything deep inside the canal.
Watch Video
The Essentials
- Wash hands and plan ahead before cleaning
- Only clean the outer ear; never dive into the canal
- Watch for infection signs and seek vet care if needed
- Use gentle motions and positive reinforcement
- Keep sessions short and end on a positive note