How to Clean a Coil in an AC Unit: Step-by-Step Guide
Learn how to safely clean an AC coil with a practical, step-by-step approach. This guide covers safety, tools, methods, and maintenance to improve efficiency and airflow in your home HVAC system.

Step-by-step, you will learn how to safely clean an AC coil, whether it's in the indoor air handler or outside condenser. This guide covers turning off power, choosing the right cleaning method, and careful brushing or rinsing to remove dirt without damaging fins. Following Cleaning Tips guidance helps homeowners protect efficiency and extend coil life.
Why Cleaning a Coil in an AC Unit Matters
A dirty coil restricts airflow, reduces cooling efficiency, and forces your compressor to work harder. Over time, this can raise energy bills and shorten equipment life. According to Cleaning Tips, routine coil maintenance helps sustain optimal heat transfer and indoor air quality. Coil dirt accumulates on the fins, creating a barrier that slows heat exchange and lowers AC performance. By cleaning coils, you improve airflow, restore cooling capacity, and potentially reduce repair costs. In both central air systems and packaged units, clean coils chill the refrigerant more efficiently and protect the system from frost buildup in humid climates. Regular attention, especially after heavy dust seasons, keeps your HVAC running smoothly.
Understanding why coils get dirty—dust, pollen, mold spores, and moisture—helps you plan a cleaning schedule that fits your home environment. Homes with pets or high pollen counts will see grime accumulate more quickly. A clean coil improves heat transfer, which means less energy use and steadier indoor temperatures.
Safety and Preparation
Safety is the foundation of any coil cleaning project. Turn off power to both the outdoor condenser and the indoor air handler at the service disconnect, and if possible, at the main breaker. Put on protective eyewear and gloves, and consider a lightweight mask to keep dust out of your lungs. Keep children and pets away from the workspace, and ensure you have a dry, stable surface to work from. Read the cleaner's label for any special warnings, and never spray cleaners onto electrical components. The goal is to prevent accidental shock, chemical splash, and water intrusion into the cabinet.
Accessing the Coil: Indoor vs Outdoor
Evaporator coils (usually inside the air handler) live behind an access panel. Condenser coils (in the outside unit) sit behind a grille with protective fins. Use a flashlight to inspect both coil types for heavy dirt, algae, or pollen buildup. Handle fins with care—bent fins reduce airflow and efficiency. If you notice oil stains or refrigerant leaks, stop and call a professional. Note the drain pan position and surrounding wiring to avoid splashes or misrouting of condensate lines during cleaning.
Cleaning Methods: Foam Cleaners, Sprays, and Dry Brushing
Choose a non-acid, HVAC-rated coil cleaner suitable for your unit. Foam cleaners cling to the coil and lift debris as they sit; spray cleaners work similarly, with a lighter rinse. A soft nylon brush or plastic spatula helps dislodge stubborn dirt without bending fins. For light dust, a dry brush or compressed air can suffice, but avoid high-pressure water that damages delicate fins. Always follow product dwell times and rinse directions to protect coil integrity and nearby components.
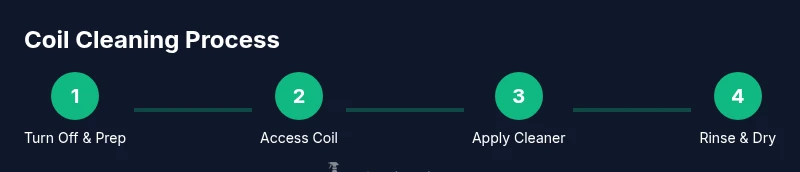
Step-By-Step Visual Guide Overview
This section provides a concise visual roadmap that aligns with the detailed steps in the dedicated STEP-BY-STEP block. Plan the cleaning in a clean, shaded area and ensure the unit has cooled down. Start with safety checks, move to access and inspection, then apply cleaner, scrub gently, rinse, and dry before reassembly. A calm, methodical approach reduces the risk of damage and ensures a thorough clean.
Aftercare and Maintenance Tips
After cleaning, inspect fins for straightness and use a fin comb to correct any bends. Check the condensate drain line for blockages and ensure the drain pan is clear. Reinstall access panels securely and test the system with the thermostat set to cooling. Schedule coil inspections at least once a year, or more often in dusty or humid environments. Keep the surrounding area clean to minimize rapid re-dirt from settling on the coil.
Tools & Materials
- Safety goggles(Protect eyes from debris and cleaner splashes)
- Nitrile gloves(Guard hands from cleaners and dirt)
- Non-acid HVAC coil cleaner(Aluminum-safe; follow label directions)
- Soft nylon brush(Gentle bristles to avoid fin damage)
- Spray bottle with water(Rinse and dilute cleaner as needed (low pressure))
- Garden hose with adjustable nozzle(Use at low pressure; avoid direct high-pressure spray on fins)
- Screwdriver or access panel tool(Gain safe access to coils)
- Flashlight(Inspect coils and fins up close)
- Aluminum fins comb(Straighten bent fins after cleaning)
- Microfiber cloth(Dry surfaces and wipe drips)
Steps
Estimated time: 60-90 minutes
- 1
Power down and verify safety
Turn off the AC at the breaker and unplug if possible. Confirm no sound or vibration when you toggle the switch. This prevents shocks and unpredictable activations during cleaning.
Tip: Use a non-contact voltage tester to confirm circuitry is dead. - 2
Access the coil
Remove the access panel on the air handler or condenser to expose the coil. Use the flashlight to clearly view fins and dirt buildup. Set tools nearby so you can work without leaving the area.
Tip: Be gentle with the protective fins to avoid permanent bending. - 3
Inspect and plan cleaning
Look for heavy dirt, mold, or algae. Decide whether to use foam cleaner or spray and plan your rinse direction from top to bottom to minimize recontamination.
Tip: If you see obvious damage or refrigerant signs, stop and call a pro. - 4
Apply cleaner
Apply cleaner evenly from the top of the coil downward, allowing dwell time per product instructions. Do not spray cleaner directly onto electrical components.
Tip: Avoid oversaturation; short, controlled applications work best. - 5
Gently agitate debris
Use a soft nylon brush to loosen dirt and debris without bending fins. Work in steady, short strokes to lift buildup.
Tip: Move in the direction of the fins to minimize damage. - 6
Rinse and inspect
Rinse with a low-pressure spray, starting from the top and moving downward. Check fins for remaining dirt and ensure no cleaner remains behind.
Tip: Keep electrical areas dry; never aim water at connectors. - 7
Dry and reassemble
Dry the coil and surrounding area completely before reattaching panels. Ensure there is no moisture on electrical parts.
Tip: A microfiber cloth can speed up drying on accessible surfaces. - 8
Test the system
Power the unit back on and run a short cooling cycle to verify proper operation and airflow. Listen for unusual noises and watch for water drainage.
Tip: Check the condensate line for dripping and ensure no leaks occur.
Questions & Answers
Can I clean an AC coil myself or should I hire a professional?
DIY coil cleaning is possible for accessible coils if you follow safety steps and use the right cleaners. If you have sealed systems, refrigerant lines, or extensive damage, a professional should handle it.
Yes, you can clean some coils yourself if you follow safety steps, but hire a pro for sealed systems or extensive damage.
What type of cleaner should I use on coil fins?
Use a non-acid HVAC coil cleaner that is safe for aluminum fins. Avoid household cleaners with corrosive ingredients that could damage the fins.
Choose a dedicated HVAC coil cleaner that’s non-acid and safe for aluminum fins.
Is it safe to rinse the coil with water?
Rinse with a low-pressure spray and avoid spraying electrical components directly. Keep water away from motors and electrical connections.
Yes, with low-pressure water and careful aim away from electrical parts.
How often should I clean AC coils?
Frequency depends on environment. In dusty or humid climates, clean pipes and coils every 6-12 months. In low-dust homes, annually may suffice.
Typically every 6 to 12 months depending on dust and humidity.
What if fins are bent or damaged?
Use a fin comb to straighten bent fins. If damage is severe, the coil may need replacement by a professional.
Straighten with a fin comb; call a pro if fins are severely damaged.
Can I use a garden hose to clean the outside coil?
A garden hose with a gentle spray can help an outdoor coil, but avoid high pressure that can bend fins. Do not spray water into the electrical box.
Yes, but use low pressure and keep water away from electrical boxes.
Watch Video
The Essentials
- Power down before starting any cleaning.
- Use the right cleaner and soft brushes to protect fins.
- Avoid high-pressure rinsing near electrical parts.
- Dry thoroughly before reassembly to prevent moisture damage.
- Schedule regular coil maintenance for efficiency.