How to Clean AC Coils: A Practical Homeowner Guide
Learn a safe, step-by-step method to clean evaporator and condenser coils, improve efficiency, and extend your AC's life with practical tips for DIY homeowners.

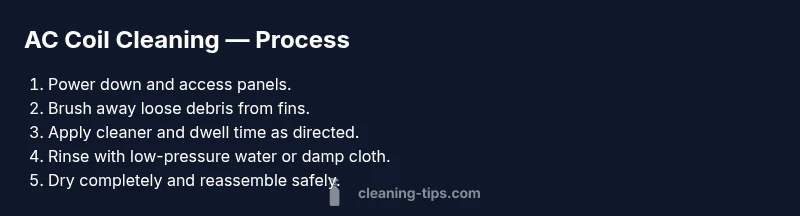
Power down your HVAC unit and remove access panels. Brush away loose debris, apply a coil cleaner (no-rinse preferred) or mild detergent, and let it sit for 5-10 minutes. Rinse gently with low-pressure water or a damp cloth, then dry completely before reassembly. Avoid bending fins and always follow cleaner's instructions.
Why clean AC coils matter
Keeping coils clean is essential to maintain efficient cooling and healthy indoor air. The evaporator coil inside the air handler extracts heat and moisture from indoor air, while the outdoor condenser coil releases that heat to the outside. When either coil is dirty, the system works harder, increasing energy use, reducing airflow, and accelerating wear. Regular cleaning helps restore heat transfer efficiency, prevent ice formation on the evaporator, and minimize dust circulated through living spaces. Learning how to clean ac coils safely protects your investment and helps maintain comfort. In dusty or industrial environments, dirt can accumulate quickly, making timely maintenance even more valuable. As you plan a cleaning session, remember that the goal is to remove loose debris, prevent chemical buildup, and avoid damaging the delicate fins that guide airflow.
How dirt and grime affect performance
Over time, dust, pollen, and grease settle on both evaporator and condenser coils, reducing surface area for heat exchange. The result is a longer run-time and higher energy use, plus potential humidity issues as moisture reclaim slows. Cleaning coils removes these barriers, restoring airflow and improving efficiency. Cleaning Tips analysis shows that regular coil care correlates with steadier temperatures and quieter operation. However, avoid aggressive scrubbing that can bend fins; use soft brushes and manufacturer-approved cleaners. If you notice ice on the evaporator, unusual noises, or ice formation, shut the system down and inspect for airflow obstructions before reigniting. For best results, couple coil cleaning with cabinet and filter maintenance, and schedule professional inspection if you detect refrigerant leaks or persistent malfunctions.
Safety first: risks and precautions
Safety is paramount when cleaning coils. Power must be off at the breaker before starting, and you should never spray water directly onto electrical components. Wear eye protection, gloves, and a mask if dust is heavy or mold is suspected. Keep kids and pets away from the work area and ensure proper ventilation when using cleaning solutions. If you have an indoor evaporator coil behind a sealed access panel, avoid forcing panels or disassembly beyond what is specified by the manufacturer. Use a non-corrosive coil cleaner or mild detergent; avoid bleach or solvents that can damage coatings and produce harmful fumes when heated. After cleaning, dry the coil completely and reassemble panels securely to maintain system integrity.
Tools and cleaners: what you’ll need
- Soft-bristle brush for brushing debris from fins
- No-rinse coil cleaner or mild detergent
- Damp microfiber cloth or sponge
- Spray bottle for applying cleaner
- Non-contact voltage tester to confirm power is off
- Safety goggles and work gloves
- Optional: low-pressure garden hose for rinsing outside coils
- Optional: screwdriver for panel removal
Having these ready before you start helps the process go smoothly and minimizes risks.
Indoor vs outdoor coil care differences
Indoor evaporator coils live inside the air handler and are more susceptible to dust, pet dander, and mold in humid environments. Outdoor condenser coils face weather, pollen, and environmental debris; they collect more leaves, grass clippings, and dirt. The cleaning approach is similar, but you may need to account for outdoor exposure by inspecting for pests and ensuring outdoor panels are properly sealed after cleaning. In both cases, avoid high-pressure sprays that can bend fins and always follow the cleaner’s label instructions.
Maintenance cadence and planning
A proactive maintenance plan can keep your system efficient and prolong its life. Consider inspecting coils at least once a year, with more frequent cleanings in dusty areas or where there is heavy vegetation nearby. Pair coil cleaning with regular filter changes and cabinet cleaning, and schedule a professional check if you notice persistent poor cooling, unusual noises, water leaks, or refrigerant odors. The goal is consistent airflow and steady cooling performance, not reactive fixes. The Cleaning Tips team emphasizes building coil maintenance into your routine to prevent inefficiency and costly repairs.
Tools & Materials
- No-rinse coil cleaner(Biodegradable preferred; follow label for dwell time)
- Soft-bristle brush(For fins; avoid metal bristles that can bend fins)
- Damp microfiber cloth(Wipe away cleaner and debris gently)
- Spray bottle(For applying cleaner in a controlled mist)
- Non-contact voltage tester(Confirm power is off before touching components)
- Safety goggles(Protect eyes from debris and cleaner splashes)
- Work gloves(Hand protection and grip)
Steps
Estimated time: 30-60 minutes
- 1
Power down and access panels
Turn off power at the breaker and remove access panels to expose the coils. Confirm no voltage using a tester before touching components.
Tip: Double-check that the system is completely de-energized. - 2
Inspect coils and remove debris
Look for loose dirt, leaves, and debris on the fins. Gently brush away loose material without bending fins.
Tip: Work from the top down to avoid redistributing dirt. - 3
Apply cleaner and dwell time
Apply coil cleaner evenly across the coils, following the product dwell time. Do not soak electrical parts.
Tip: If using no-rinse cleaner, ensure it covers all surfaces. - 4
Rinse coils lightly
Rinse with a low-pressure spray or damp cloth to remove cleaner and dirt. Avoid strong jets that bend fins.
Tip: Keep nozzle at a safe distance to protect fins. - 5
Dry and reassemble
Allow coils to dry completely before reassembling panels. Ensure seals are intact to prevent air leaks.
Tip: Use a dry cloth to speed up evaporation. - 6
Test system & monitor
Restore power and run the unit. Check for proper airflow, cooling, and any unusual sounds or ice formation.
Tip: If performance is unchanged, consider professional inspection.
Questions & Answers
How often should I clean AC coils?
Frequency depends on environment; dusty or dirty spaces may require more frequent cleaning. In many homes, yearly cleaning is common.
Coil cleaning is usually done yearly, more often if the area is dusty.
Can I use household cleaners on coils?
Yes, use coil cleaners or mild detergents; avoid harsh chemicals that can damage fins or refrigerant lines.
Yes, a mild cleaner is typically fine if used as directed.
Is cleaning indoor evaporator coils safe for allergies?
Cleaning reduces dust and mold buildup when done properly and with good ventilation.
Cleaning can help reduce allergens if done carefully.
What are signs coils need cleaning?
Reduced cooling, higher energy use, visible dirt on coils, or ice buildup indicate cleaning is needed.
If you notice reduced cooling or frost, it's time to check coils.
Can I power wash coils?
Power washing is not recommended for delicate fins and coil coatings; use gentler cleaning methods.
Avoid power washing; use gentler methods.
Watch Video
The Essentials
- Power down before touching coils
- Use coil cleaner and follow dwell times
- Rinse gently to protect fins
- Dry completely before reassembly