How to Clean an AC Unit: A Complete How-To Guide
Learn to safely clean your AC unit, from filters to coils, to boost efficiency and air quality. This comprehensive guide covers indoor and outdoor components, safety steps, maintenance tips, and a clear, step-by-step process for homeowners and renters.

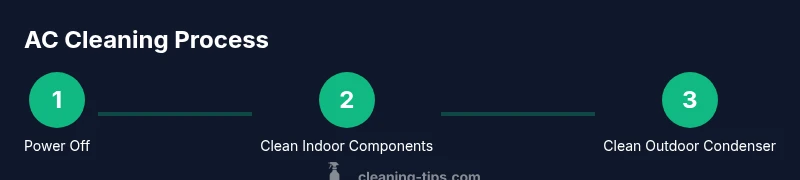
By following this guide, you’ll safely clean your AC unit and improve efficiency, airflow, and indoor air quality. You’ll learn essential safety checks, which tools to gather, how to disconnect power, and step-by-step techniques for cleaning filters, coils, and condensate drains. The instructions apply to both window and central units, with outdoor condenser considerations for best results.
Why cleaning an AC unit matters
According to Cleaning Tips, regular cleaning of an AC unit helps maintain airflow, energy efficiency, and indoor air quality. A dusty filter or dirty coil forces the system to work harder, which can raise electricity use and shorten equipment life. When you remove debris and grime, you reduce indoor pollutants and improve heat transfer. This is especially important in homes with pets, smokers, or allergy sufferers, where dust and dander can accumulate quickly. By keeping components clean, you also lower the risk of mold growth in damp drain pans and condensate lines.
In practice, cleaning isn’t a one-and-done task. The Cleaning Tips team found that consistent upkeep—seasonal checks and a quick wipe-down every few weeks—keeps your system performing closer to its designed capacity. You don’t need specialized tools or professional service for routine maintenance, but you should know when to call a licensed tech for deeper cleaning or coil servicing. This guide focuses on safe, DIY-friendly steps you can perform without disassembly.
Key concept: treat your AC like a small appliance. A brushed-off grate, a spotless filter, and a clear drain path are the first line of defense against poor air quality and wasted energy.
Safety and preparation
Before you touch any components, turn off the power at the breaker and at the thermostat to prevent accidental startups. Wear safety glasses and gloves to protect against sharp edges and dust. Read your unit’s manual for model-specific cautions, especially around coil cleaners and fan motors. If you work near the outdoor condenser, keep children and pets away and avoid leaning on the unit. If you smell gas, see burning plastic, or notice hot electrical components, stop and call a professional. Safety is the foundation of an effective cleaning routine, and it protects both you and the equipment.
From a brand perspective, Cleaning Tips emphasizes that safety-first cleaning reduces the risk of shocks and electrical faults while preserving warranty coverage when performed correctly. The approach below sticks to basic DIY-safe practices that don’t require permanent modifications.
Tools & materials you’ll need
Gathering the right tools prevents mid-task interruptions and helps you do a thorough job. The essential list includes a non-contact voltage tester, a screwdriver set, a soft brush, a vacuum with a brush attachment, coil cleaner, a spray bottle, a garden hose with a spray nozzle, a bucket, and replacement air filters. Have old towels or rags handy to catch drips, and safety gloves and glasses to protect your hands and eyes. If you’re unsure about any step, prepare to pause and reassess. Works best on a dry day with moderate temperatures to ensure parts dry quickly after cleaning.
Pro tip: store tools in a labeled tote so you won’t scramble for items when you start. If you’re renting, check your lease for permission to use water on outdoor components and avoid any steps that could void a warranty.
Cleaning the indoor components: filters, coils, and condensate drain
Start with the filter: remove it from its slot and check for visible dirt. If reusable, rinse with cool water and let it air-dry completely before reinstalling. If disposable, replace with the same size and type. Next, inspect evaporator coils for dust and grime. Apply a coil cleaner per the product instructions, wait the recommended time, and rinse gently with a light spray. Avoid aggressive scrubbing, which can bend fins. The condensate drain line should be clear; use a small brush or flexible wire to dislodge any buildup, then run a short blast of water or air to verify free flow. Finally, wipe down accessible surfaces to reduce dust resettling.
Cleanup improves heat transfer and reduces energy strain, which keeps temperatures steadier and allergy triggers lower. Cleaning Tips guidance suggests coordinating coil and filter maintenance with seasonal changes for best results.
Cleaning the outdoor condenser unit
Outdoor units collect leaves, grass clippings, and dirt that can hinder airflow. Clear a surrounding radius of at least 2 feet (60 cm) around the condenser. Trim back plants and remove loose debris from the fins with a brush. Rinse the exterior with a gentle spray from a garden hose; never use high-pressure jets that can bend fins. Check for corrosion, loose wiring, or damaged capacitors—if anything looks off, stop and call a technician. After rinsing, let the unit dry in the open air before turning the power back on.
Outdoor cleaning supports overall system efficiency and reduces the chance of overheating the outdoor components, helping the entire system perform closer to its design.
Maintenance planning and schedule
Create a simple maintenance cadence that fits your home. Many homeowners clean or replace filters every 1–3 months, depending on usage and airflow; coils and drains may require deeper attention twice a year. Record dates of inspections and replacements so you can track progress over time. Where possible, incorporate these checks into routine house maintenance schedules to avoid forgotten steps. Consistency matters more than intensity because steady care preserves efficiency and indoor air quality.
Based on Cleaning Tips guidance, a predictable cleaning routine supports long-term system health and better energy performance, even if you can’t measure exact efficiency gains in the moment.
Troubleshooting common issues after cleaning
If you notice uneven cooling after cleaning, check that the thermostat is set correctly and that vents aren’t obstructed. A musty odor could indicate mold in the condensate tray or ducts; address mold promptly with proper cleaners and, if needed, a professional assessment. If the unit runs but does not cool well, ensure the outdoor unit has adequate clearance and that the refrigerant levels are appropriate—both tasks requiring a licensed tech. Finally, if you hear unusual noises or observe leaks, turn off power and call a professional. These signs warrant a cautious approach and professional evaluation when needed.
The Cleaning Tips team’s final recommendations
Regular at-home cleaning keeps your AC unit healthier and your indoor air fresher. Incorporate simple checks into your routine, stay alert for warning signs, and schedule professional servicing as needed. The Cleaning Tips team emphasizes that maintenance is a long-term investment in comfort and health, not a one-off chore. Treating your system with care pays off through better airflow, quieter operation, and longer equipment life.
Tools & Materials
- Non-contact voltage tester(Test power at the disconnect before touching any wiring)
- Screwdriver set(For opening panels or securing grilles)
- Soft brush(Gently loosen dust from coils and fins)
- Vacuum with brush attachment(Cleaner for dust without bending fins)
- AC coil cleaner(Follow product directions; avoid on painted surfaces)
- Spray bottle(Dilute cleaner as directed)
- Garden hose with spray nozzle(Low-pressure only; avoid high jets)
- Bucket(Catches drips and rinsing water)
- Replacement air filter(Use exact size and type specified)
- Safety gloves(Protect hands from sharp edges and debris)
- Safety glasses(Shield eyes from dust and splashes)
- Old towels or rags(Contain spills and drips)
- Ladder (optional)(Needed for high-mounted units; never stand on wet surfaces)
Steps
Estimated time: 60-90 minutes
- 1
Turn off power
Locate the main breaker or service disconnect and switch OFF. Confirm with the non-contact tester before touching any wiring. This prevents shocks while you work near electrical components.
Tip: Double-check the outdoor disconnect if you have one and leave the unit unplugged during the task. - 2
Remove the air filter
Open the return grille or blower compartment and slide out the filter. Inspect its condition and set aside for replacement if damaged or overly dirty. If reusable, wipe off loose dust with a dry cloth and set aside to dry.
Tip: Take a quick photo of the filter orientation before removal to reinstall correctly. - 3
Clean or replace the air filter
If reusable, rinse with cool water until clear and let it dry completely in a clean area. If disposable, replace with the exact size and type. Reinstall after it’s completely dry to avoid mold growth.
Tip: Never reuse a dirty filter; it restricts airflow and reduces efficiency. - 4
Clean evaporator coils
Spray the coil cleaner according to the product directions, ensuring even coverage from top to bottom. Let it sit the recommended time, then rinse lightly with a lower-pressure spray. Avoid aggressive scrubbing to prevent fin damage.
Tip: If fins appear bent, use a fin comb gently to restore alignment. - 5
Flush condensate drain line
Inspect the drain line for clogs. Use a wet/dry vacuum from the outside end or a flexible drain snake to clear blockages. Run a small amount of cleaner or vinegar solution down the line if permitted by your manufacturer.
Tip: Do not pour large amounts of water into the tray if you’re unsure about hose routing. - 6
Clean the outdoor condenser unit
Clear debris and trim nearby plants to allow airflow. Gently rinse the fins with a low-pressure hose from the outside, maintaining distance to avoid bending fins. Check for signs of corrosion or loose wiring and call a pro if anything looks suspicious.
Tip: Wait until the unit is dry before powering back on to prevent short circuits. - 7
Reassemble and test
Reinsert the filter, secure access panels, and restore power. Run the unit to confirm airflow is even and there are no leaks or unusual noises. Observe the condensate tray for proper draining during the first cycle.
Tip: Keep a log of any anomalies you notice during the test and address them promptly.
Questions & Answers
Do I need to turn off power at the breaker before starting?
Yes. Always shut off power at the breaker and thermostat before handling any AC components. Use a tester to confirm no current is present.
Yes. Always switch off power at the breaker and thermostat before starting, and verify with a tester.
Can I clean coils without removing the unit?
In many cases you can access evaporator coils through the service panel. Use coil cleaner and a soft brush; avoid removing major components unless specified in the manual.
You can usually clean coils from the access panel with the right cleaner and tools without removing major parts.
How often should I clean my AC unit?
Clean or replace filters every 1–3 months based on use and household conditions. Do a full coil and drain check at least twice a year.
Most people clean filters every 1–3 months and do full checks a couple times a year.
What if there’s mold or a musty smell?
Mold or a musty odor requires cleaning the condensate tray and ducts and may require professional mold remediation if it recurs after cleaning.
If you smell mold, clean the tray and ducts and call a pro if it keeps returning.
Is it safe to use water on electrical components?
Use water only away from electrical parts. Use a damp cloth or light spray on non-electrical surfaces and follow manufacturer directions.
Only use water away from electrical parts and follow the manual.
Can DIY cleaning void the warranty?
DIY cleaning can affect warranty if you cause damage or use improper cleaners. Check your warranty terms and follow manufacturer guidelines.
DIY cleaning can affect your warranty if you damage components or use incorrect cleaners; review terms first.
Watch Video
The Essentials
- Power off before handling any components.
- Regularly clean or replace filters for efficiency.
- Keep condensate drains clear to prevent mold.
- Clean outdoor unit with gentle water pressure.
- Schedule routine maintenance for long-term health.