How to Clean Evaporator Coils: Step-by-Step Guide
Learn to safely clean evaporator coils in HVAC or refrigeration systems. This guide covers safety, tools, steps, and maintenance tips to improve efficiency.

Learn how to safely clean evaporator coils to restore cooling efficiency and reduce energy use. This guide covers safety steps, the tools you need, and a step-by-step method for both HVAC and refrigerator coils, plus tips for avoiding damage and when to call a pro.
What is an evaporator coil and why clean it?
An evaporator coil is a key component in many cooling systems, absorbing heat from indoor air (or a refrigerated compartment) as refrigerant passes through. Over time, dust, pet hair, and grease can accumulate on the fins, reducing airflow and energy efficiency. When coils are dirty, the system has to work harder to reach the desired temperature, which can lead to higher energy bills and uneven cooling. Cleaning evaporator coils helps restore airflow, improve efficiency, and extend equipment life. In homes, you might encounter coils in an indoor air handler (for central AC or heat pumps) or a back- or under-panel coil behind a refrigerator. Before you begin, identify the coil location and consult the user manual to confirm cleaning compatibility. According to Cleaning Tips, routine coil maintenance is a smart practice for a healthier, more efficient home environment, especially in dusty or pet-friendly households.
This guide focuses on practical, safe cleaning practices you can perform without professional equipment, while clearly noting when a pro is advisable. We’ll distinguish between HVAC/air-handler coil cleaning and refrigerator evaporator coil care, then walk through a step-by-step plan, required tools, and maintenance tips. By understanding what you’re cleaning and why it matters, you’ll reduce risk and get more reliable cooling year-round.
Safety first: power, access panels, and precautions
Safety is non-negotiable when working near electrical components and refrigerant lines. Begin by turning off power to the unit at the breaker, and if feasible, switch off the thermostat to prevent the system from restarting during maintenance. If the equipment has a disconnect switch, use it. Wear PPE: nitrile gloves to protect your hands and ANSI-rated safety goggles for eye protection. Keep the area dry to avoid slips, and never work on live electrical parts or in a flooded space. Remove any pets or children from the room and avoid standing water near the unit. If you encounter visible refrigerant leaks or corroded components, stop and call a qualified technician. According to Cleaning Tips analysis, following basic safety steps reduces risk and supports a successful cleaning outcome.
When to clean evaporator coils and common symptoms of buildup
If you notice reduced airflow, longer cooling cycles, frost or condensation on the coil, or an unexplained rise in energy bills, it may be time to clean. In humid climates or homes with pets and dust, coils can accumulate grime faster. Visual checks during routine maintenance can catch buildup early—look for visibly dirty fins, dark greasy residues, or a noticeable drop in cooling performance. For refrigerators, excessive frost or ice buildup on the evaporator may indicate other issues; do not force defrost cycles if you suspect a mechanical fault. Regular cleaning can help sustain efficiency and airflow, and it aligns with best practices recommended by Cleaning Tips.
Cleaning methods: cleaners, tools, and approach
You have options for coil cleaning depending on the unit and access. Foaming coil cleaners designed for evaporator coils are common and generally safe if used as directed. A soft brush can help loosen grime without bending fins, while a vacuum with a brush attachment can remove loose dust before applying cleaner. If you choose to rinse, ensure the unit allows water exposure and that you rinse only the coil surface, not electrical connectors or fan motors. Always follow the cleaner’s label directions and avoid harsh solvents that may damage coatings or fins. A gentle approach minimizes risk and preserves coil integrity, which Cleaning Tips emphasizes as essential for long-term performance.
HVAC coil cleaning: a practical overview (no disassembly required for most homes)
Begin by powering down the system and exposing the coil area. Vacuum loose debris from the coil and surrounding area to prevent pushing dirt into the system. Apply a foaming coil cleaner from top to bottom, allowing the foam to dwell for the recommended time. Gently agitate stubborn grime with a plastic brush, then rinse or wipe as permitted by the cleaner and equipment design. Dry thoroughly and reassemble any access panels before restoring power. If you detect damaged fins or persistent moisture, adjust the plan or call a technician.
This overview sets up the formal, step-by-step process that follows, helping you approach the job with confidence and care.
Refrigerator evaporator coil: special considerations
Refrigerator coils are often located behind a rear access panel or inside the freezer compartment. Cleaning them requires careful handling to avoid damaging insulation or frost buildup on doors. Unplug the unit, carefully remove the interior panels, and use a soft brush or a mild coil cleaner designed for appliances. Do not soak electrical components or let water pool around the motor. If frost buildup is extensive or if you see signs of a refrigerant issue, contact a qualified technician. The goal is to remove white dust and grease without compromising the coil or insulation.
Drying, draining, and reassembly tips
After cleaning, ensure the coil and surrounding components dry completely before powering the unit back on. Check the condensate drain for blockages and clear any obstructions to prevent water backups. Reassemble panels carefully, securing screws and ensuring gaskets seal properly. A quick test run can verify airflow and cooling performance. If you notice leaks, abnormal sounds, or insufficient cooling after reassembly, stop and reassess before using the system.
This section complements the step-by-step instructions by focusing on post-cleaning care to prevent reoccurrence of issues and to maintain efficiency.
Maintenance schedule and prevention strategies
To keep evaporator coils performing well, plan a routine maintenance schedule tailored to your environment. In dusty or high-humidity homes, visual checks every 1-2 months plus a formal cleaning every 6-12 months can be effective. In low-dust environments, a biannual check may suffice. Use high-quality air filters, seal leaks around ductwork, and keep the space around the unit clean to minimize dirt ingress. Document the date of each cleaning and note any recurring issues, such as frost or reduced airflow, so you can adjust frequency as needed. Cleaning Tips’s guidance supports building a proactive, sustainable maintenance habit that protects your cooling system.
Tools & Materials
- Safety gear (gloves, eye protection)(Nitrile gloves, ANSI-rated safety goggles)
- Vacuum with brush attachment(HEPA-filtered preferred to trap fine dust)
- Foaming evaporator coil cleaner(Follow label directions; use non-acid cleaners where required)
- Soft nylon brush(Plastic bristles; avoid metal to prevent fin damage)
- Plastic fin comb (optional)(Used to straighten bent fins)
- Microfiber cloths(For wiping and drying surfaces)
- Low-pressure spray bottle or gentle rinse method(Only if unit design allows rinsing)
- Drying towels or fan(Helps speed up drying and prevent moisture damage)
Steps
Estimated time: 60-120 minutes
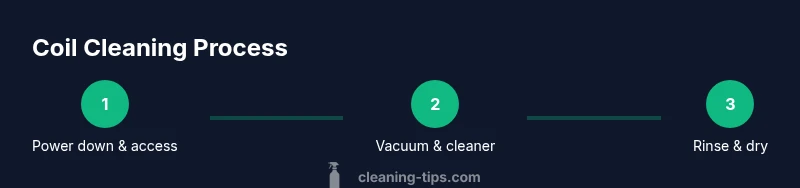
- 1
Power down and access panel removal
Turn off power to the unit at the breaker and thermostat. Remove the access panel to expose the evaporator coil, keeping track of screws and fasteners. If you’re unsure about safety, consult the manual before proceeding.
Tip: Lockout/Tagout is recommended; never bypass safety devices. - 2
Vacuum loose debris from coils
Use a vacuum with a brush attachment to remove loose dust from the coil fins and surrounding area. Work in short, overlapping strokes to prevent pushing debris into the unit. Be careful not to bend the delicate fins.
Tip: Keep the vacuum nozzle at a slight angle and maintain gentle suction to avoid damage. - 3
Apply foaming coil cleaner
Apply the foaming coil cleaner according to the product label, starting at the top of the coil and working downward. Allow the foam to dwell for the recommended time to loosen grime. Avoid letting cleaner dry on fins.
Tip: Keep the fan from spinning during cleaning and maintain a 6–8 inch spray distance. - 4
Gently agitate stubborn grime
Use a soft brush or plastic comb to loosen stubborn buildup, working with the direction of the fins to avoid damage. Do not use metal tools that could bend fins. Repeat as needed until surface appears clean.
Tip: A fin comb can help restore bent fins after cleaning. - 5
Rinse or wipe (as allowed)
If the unit’s design permits rinsing, use a low-volume spray to rinse the coil surface. Otherwise, wipe with a damp microfiber cloth. Keep water away from electrical components and the motor.
Tip: Direct runoff toward the drain pan and away from electrical parts. - 6
Dry and reassemble
Allow the coil and cabinet to dry completely before reattaching panels. Reinstall screws securely and check gaskets for a proper seal. Ensure there is no moisture remaining on exposed wiring.
Tip: A small fan can speed up drying and reduce downtime. - 7
Reconnect power and test
Restore power and run the system briefly to confirm proper airflow and no unusual noises. Check the condensate drain for proper operation and ensure water exits through the pan. If there are leaks, power down again and reassess.
Tip: Monitor for frost formation in the next few cycles—if it reappears, professional service may be needed. - 8
Document maintenance
Record the cleaning date, any observations (fins bent, unusual noises, frost), and the cleaning products used. Set reminders for the next cleaning based on environment and usage.
Tip: Keeping a maintenance log helps you time future cleanings consistently.
Questions & Answers
Can I use a garden hose to rinse evaporator coils?
Only if the unit’s design allows it and you can avoid exposing electrical components. Use low pressure and keep water away from motors and connectors. When in doubt, wipe with a damp cloth instead.
Rinse only if the unit allows it and you can keep water away from electrical parts; otherwise wipe with a damp cloth.
Is cleaning evaporator coils safe for my unit?
Yes, when you follow the manufacturer’s instructions, use the correct cleaner, and avoid soaking electrical components. If you notice damage or signs of a refrigerant leak, stop and call a professional.
It’s safe if you follow the manual, use the right cleaner, and avoid electrical parts; contact a pro if you see damage.
How often should evaporator coils be cleaned?
Frequency depends on environment. In dusty or humid areas, visual checks every 1–2 months and a full cleaning every 6–12 months are reasonable. Adjust based on observed performance.
Check monthly in dusty spaces and plan a deep clean every 6 to 12 months, adjusting for conditions.
What’s the difference between cleaning HVAC coils and refrigerator coils?
HVAC coils typically reside in the air handler and may tolerate foaming cleaners, while refrigerator coils are often behind panels and require careful handling to avoid moisture and frost issues. Always consult the manual.
HVAC coils are in air handlers and may use foaming cleaners; fridge coils are behind panels and need careful handling.
What are signs that my evaporator needs cleaning?
Persistent frost on the coil, reduced airflow, longer cycles, or a sudden rise in energy bills can indicate buildup. If you detect frost after cleaning, there may be another issue.
Frost, weak airflow, longer cooling cycles, or higher energy use signal a cleaning or system issue.
Should I hire a professional for evaporator coil cleaning?
If you face refrigerant concerns, extensive frost, or complex access, a licensed HVAC technician is advisable. For routine maintenance and minor buildup, DIY cleaning can be appropriate with caution.
Call a pro if there are refrigerant concerns or complex access; otherwise DIY is possible with care.
Watch Video
The Essentials
- Power down before starting any cleaning
- Choose the right cleaner for the coil type
- Avoid bending fins with improper tools
- Dry thoroughly and test performance afterward