How to Get Rid of Cleaner App: A Practical Guide
Learn how to safely remove a cleaner app from Android or iOS, revoke permissions, and prevent future clutter with step-by-step instructions, tips, and trusted sources.

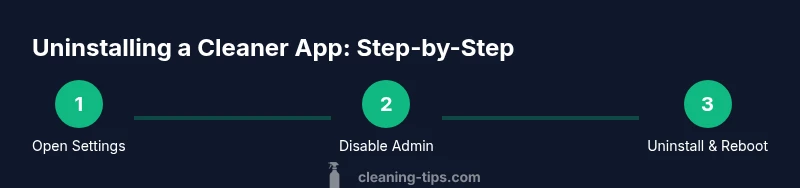
To get rid of a cleaner app, locate the program in your device’s settings, revoke any device administrator rights, then uninstall or disable it. On Android, open Settings > Apps, select the cleaner app, tap Uninstall or Disable, and revoke permissions. On iPhone or iPad, press and hold the app, choose Remove App, then confirm. If it won’t uninstall, try Safe Mode or factory reset as a last resort.
Why removing a "cleaner" app can be beneficial
According to Cleaning Tips, many cleaner apps promise quicker devices but often consume extra battery, slow performance, and demand excessive permissions. In practice, these apps can masquerade as legitimate maintenance tools while secretly collecting data or showing excessive ads. The goal of this guide is to help homeowners and renters regain control of their devices by identifying unnecessary bloatware, removing it safely, and adopting smarter in-device maintenance habits. We’ll cover the signs a cleaner app isn’t worth keeping, the steps to remove it on Android and iOS, and best practices to prevent future clutter. By understanding how these apps behave and why they linger, you can keep your phone lean, responsive, and more privacy-conscious.
A practical approach starts with a quick audit of your installed apps, followed by targeted removal and post-uninstall checks. Keep in mind that some devices may have preinstalled cleaners or admin-related features that complicate removal. The Cleaning Tips team recommends a calm, methodical process: identify, revoke, uninstall, verify, and monitor. This method minimizes the risk of residual data or unintended consequences after removal.
How to tell if you actually need a cleaner app
- Look at battery statistics and CPU usage: if the cleaner app shows unusually high background activity, it’s a red flag.
- Check permissions: access to contacts, location, or SMS is often unnecessary for cleaning tasks.
- Review user reviews and updates: if complaints about ads, data use, or poor stability appear, consider removal.
- Consider built-in tools: Android and iOS both include system maintenance features that don’t require third-party cleaners.
- Trust your intuition: if the app promises miracle speedups but demands invasive controls, it’s probably not worth keeping.
This audit sets the stage for a safe, effective removal. The goal is to reduce risk and avoid accidentally removing a legitimate utility or a critical system component.
Android removal: safe uninstall and cleanup
Android devices vary by vendor, but the core steps are consistent: locate the app in Settings, revoke admin rights if present, uninstall or disable, and clear residual data. Start by checking Settings > Apps or Apps & notifications. If the app has Device Administrator rights, disable those rights first, then uninstall. After removal, clear the app’s cache and data if an option exists, and reboot the device to ensure no background services linger. If the cleaner was installed as a system app, you may only disable it, not fully uninstall, depending on your device policy. Finally, review any auto-start settings and revoke permissions that aren’t needed anymore.
Practical tip: some cleaner apps install additional components that restart after reboot. Disable any related services and revoke permissions like location or background activity. A quick check of battery usage after removal confirms the app isn’t quietly running in the background.
iOS removal: safe uninstall and cleanup
On iPhone or iPad, removing a cleaner app is usually simpler but can still require careful steps if the app is part of a configuration profile or MDM. Start by locating the app on the Home screen, then press and hold the app icon until a menu appears, selecting Remove App and confirming. If the app reappears, check Settings > General > Profile & Device Management for any profile provisioning the cleaner app, and remove that profile if you’re comfortable doing so. In some cases, apps leave traces in Safari data or keyboard extensions; disable or delete these extensions from Settings > Safari > Extensions and Settings > General > Keyboard.
After removal, reboot the device and recheck for any creeping permissions or notifications from other apps that might have been tied to the cleaner. If you’re in a managed environment (work device), contact your IT administrator before making changes to profiles or device management settings.
Preventing future clutter: smarter habits
- Limit app installs to trusted sources and reputable developers. Read permissions carefully before installing. - Use built-in maintenance tools first: both Android and iOS include optimization features that don’t require third-party cleaners. - Periodically review installed apps (monthly or quarterly) and remove anything you no longer use. - Turn off auto-start or background refresh for apps that don’t need it; this reduces battery drain and data usage. - Enable app updates and security patches to keep your device resilient against poorly behaving cleaners.
A proactive approach reduces the chance you’ll accumulate unnecessary cleaners again. Regular audits also help identify apps that quietly degrade performance or privacy.
Troubleshooting: when removal isn’t straightforward
If you can’t uninstall a cleaner app, it may be embedded in a configuration profile, a device administrator, or part of a managed workspace. In such cases, consult the device’s official support resources or your IT administrator. As a last resort, factory resetting the device will erase the cleaner app, but it also erases personal data; back up important information first. If you suspect the cleaner is malicious, run a security scan with a trusted antivirus tool and review all installed profiles and MDM configurations.
Authority sources and trusted steps for reference
Guidance from major platforms helps ensure you remove safely and avoid bricking devices. Always prefer official support pages for your device and keep security-minded practices in mind. The following sources provide authoritative details on app removal, permissions, and device management.
What’s next: staying clean and organized
After removal, maintain a lean device by scheduling regular cleanups, staying aware of new app permissions, and keeping your device protected with current security updates. Clean device habits reduce the likelihood of recurring clutter and help preserve battery life and performance over time.
Tools & Materials
- Phone or tablet (Android or iOS)(Ensure you know the device passcode or biometric unlock.)
- Stable internet connection(Needed for checking settings and updating apps if required.)
- Access to device settings(Must be allowed by admin restrictions; disable restrictions if needed.)
- Backup option (cloud or computer)(Backup data before major changes or resets.)
- Optional computer or another device(Helpful if you’re managing apps via PC or enterprise tools.)
Steps
Estimated time: 15-30 minutes
- 1
Open device settings and locate the app
Begin by opening Settings on your device, then navigate to Apps or Applications. Scroll to find the cleaner app you want to remove. Confirm you’ve selected the correct app by checking its storage usage and permissions.
Tip: If you can’t find it, look under All apps or use the search function in Settings. - 2
Check for device admin or management rights
If the app has device administrator rights, you must revoke these before uninstall. Go to Settings > Security > Device Administrators (path may vary by device) and disable the app’s admin status.
Tip: Some work devices restrict admin removal; contact IT if needed. - 3
Uninstall or disable the app
Tap Uninstall (Android) or Remove App (iOS). If Uninstall isn’t available, choose Disable (Android) or Delete, then confirm. This step removes the core component and stops background services.
Tip: Sometimes you may need to run the uninstall twice if residual services restart. - 4
Revoke permissions and clear data
After uninstalling, revisit the app list to ensure no lingering permissions or data caches remain. If available, clear cache/data for related components and revoke any permissions tied to the app.
Tip: On Android, go to Storage & cache and clear data. On iOS, check Settings > Privacy afterward. - 5
Reboot the device
Restart your device to ensure all background processes stop and to refresh the system state after removal.
Tip: A quick reboot can reveal hidden persistence that uninstall didn’t remove. - 6
Verify removal and monitor performance
After reboot, open the app drawer or home screen to confirm the cleaner is gone. Check battery usage and memory performance to ensure improvements.
Tip: If performance remains degraded, recheck for related apps or profiles that might still be active. - 7
Handle stubborn or managed apps
If the app remains due to a profile or MDM, consult the device’s official support or your administrator for proper removal steps.
Tip: Do not modify or remove profiles without guidance on managed devices. - 8
Document the process for future reference
Keep a short note of where you found the app, permissions it had, and the steps you took to remove it. This helps with similar apps later.
Tip: Create a small checklist you can reuse for future cleanups.
Questions & Answers
Can a cleaner app be a system app or part of device management?
Sometimes cleaners come preinstalled or are installed as part of device management. If uninstall isn’t possible, try disabling or removing associated profiles or admin rights with caution. For work devices, consult IT.
Sometimes cleaners are part of the system or management settings. If you can’t uninstall, check for admin rights or profiles and ask IT if needed.
Will removing a cleaner app improve device performance?
Yes. Uninstalling unnecessary cleaners often reduces background activity, battery drain, and memory usage, leading to smoother operation.
Often yes. Removing extra cleaners can improve battery life and speed.
What if the app refuses to uninstall?
Try revoking admin rights, boot into Safe Mode, clear data, or reset app preferences. If still stuck, consult official support or consider a factory reset as a last resort.
If it won’t uninstall, revoke admin rights, boot in Safe Mode, and try again; last resort is a reset.
Should I use built-in cleaning tools instead?
Built-in tools are usually safer and privacy-friendly. Use them first, then consider third-party cleaners only if you trust the developer and permissions.
Yes. Start with built-ins; third-party cleaners require caution.
How can I tell if a cleaner app is malicious?
Watch for excessive permissions, aggressive ads, unexpected data usage, and alerts. Run security scans with trusted apps and review recent app activity.
Look for excess permissions, ads, or data use; scan with a trusted security app.
Is a factory reset ever necessary to remove a cleaner?
Only if the app is deeply integrated via profiles or the device won’t allow uninstall. Back up data first, then perform the reset if recommended by official support.
Only as a last resort after backing up data and confirming with support.
Watch Video
The Essentials
- Identify clutter: assess why the cleaner app is on the device.
- Revoke admin rights first, then uninstall or disable.
- Clear residual data and reboot to finalize removal.
- Prevention is easier: limit new cleaners and review permissions.
- If removal fails, use official support resources or reset as a last resort.