How to Clean Black Mold Safely: A Step-by-Step Guide
Learn how to clean black mold safely with a practical, step-by-step approach. This guide covers safety, surfaces, cleaning methods, and prevention to protect your home's air quality.

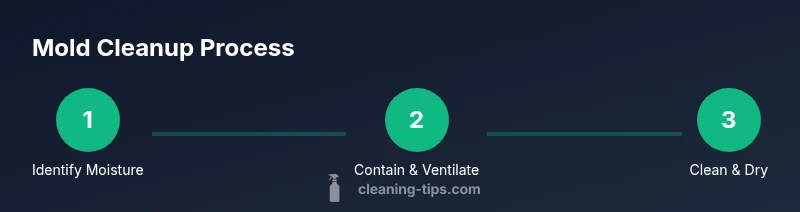
You will learn to safely identify, clean, and prevent black mold growth on common indoor surfaces. The guide emphasizes safety first, choosing appropriate cleaning methods for different materials, and recognizing when to call a professional. Prepare PPE, ensure ventilation, gather basic cleaning supplies, and follow the step-by-step plan to reduce mold and protect air quality.
What black mold is and why it matters
Black mold, often from the species Stachybotrys or related fungi, thrives in damp, poorly ventilated spaces. It can produce allergens, irritants, and potentially harmful mycotoxins. Visible colonies may appear as black, greenish, or gray patches on walls, ceilings, or around plumbing. For homeowners and renters, identifying moisture sources and controlling humidity are essential to prevent regrowth. Cleaning is a surface-level measure; ongoing moisture control is what stops it from returning. The Cleaning Tips team notes that addressing underlying moisture is as important as the cleaning itself to maintain healthy indoor air quality. Regular inspections of bathrooms, basements, kitchens, and laundry rooms help catch issues early.
Safety first: PPE and workspace preparation
Personal protective equipment (PPE) is the first line of defense when cleaning mold. Wear N95 or better respirators, gloves (nitrile or neoprene), and eye protection. Tape off the area with plastic sheeting to minimize spread, and open windows or use a fan to improve ventilation. Turn off fans or HVAC systems that could circulate spores to other rooms. If mold covers more than a small area (roughly 10 square feet), or if you have asthma, allergies, or a weakened immune system, seek professional help. Always read product labels and follow safety warnings to avoid chemical exposure.
Cleaning strategies by surface type
Nonporous surfaces (tile, glass, metal) are the easiest to clean with soap and water or a detergent solution. Porous materials (drywall, wood, fabric) absorb mold rapidly and may require removal and disposal if heavily affected. For nonporous surfaces, a diluted detergent solution or a mild bleach solution (following label directions) can help kill mold. On porous materials, consider discarding the affected item if contamination is significant or if removal is impractical. Always test a small hidden area first to check for discoloration or damage. Keep surfaces dry after cleaning to deter regrowth.
Step-by-step cleanup plan and when to stop
Begin by identifying and fixing the moisture source (leaky pipe, condensation, humidity). Then clean affected areas with a detergent solution and scrub thoroughly using a stiff brush. Rinse with clean water and dry completely. If you opt for a bleach solution on nonporous surfaces, apply the solution, wait 5–10 minutes, then rinse and dry. Avoid mixing chemicals and ensure good ventilation during cleaning. If you observe persistent odor, unusual staining, or symptoms worsen, stop and call a professional. Always document the area cleaned for your records and future maintenance.
Preventing future mold growth
Post-cleanup, maintain indoor humidity between 30-50% using dehumidifiers or air conditioners, especially in humid climates. Ensure bathrooms and kitchens have proper exhaust ventilation and fix leaks promptly. Regularly inspect areas around windows, roofs, and plumbing for signs of moisture. Use mold-resistant products where feasible and consider applying a mold-inhibiting sealant to susceptible surfaces after cleaning. By combining prompt moisture control with routine inspections, you reduce the likelihood of recurrence and improve indoor air quality.
When to call a professional
If mold covers more than 10 square feet, penetrates HVAC systems, or if you have underlying health conditions that could be worsened by mold exposure, professional remediation is advised. Professionals can safely contain the area, remove affected materials, and verify that air quality has returned to normal. Even for smaller areas, if you are unsure about the extent of contamination or how to properly ventilate, consult a licensed mold remediation specialist. This proactive step protects your health and your home in the long term.
Tools & Materials
- Personal protective equipment (PPE): N95 mask, gloves, eye protection(Ensure a proper fit; replace if torn)
- Detergent or mild soap(Use for initial cleaning on nonporous surfaces)
- Water(For dilution and rinsing)
- Stiff-bristled scrub brush(Clean textures and edges thoroughly)
- Non-ammonia cleaner(Alternative to bleach for some surfaces)
- Household bleach (optional, for nonporous surfaces)(Follow label directions; ensure ventilation)
- Plastic sheeting and painter's tape(Contain area and reduce cross-contamination)
- Disposable bags or sealed containers(Safe disposal of waste and contaminated materials)
- Dehumidifier or fan (portable)(Helps control humidity during and after cleanup)
Steps
Estimated time: 45-75 minutes (not including moisture source repair)
- 1
Identify moisture source
Locate the moisture cause (leak, condensation, or high humidity). Fixing this source is essential to prevent mold return. Document the area and plan for remediation before cleaning.
Tip: Addressing the root cause reduces recurrence risk. - 2
Put on PPE and seal the area
Wear an N95, gloves, and eye protection. Use plastic sheeting to isolate the contaminated zone and minimize spore spread to adjacent rooms.
Tip: Sealing helps maintain containment and improves cleanup effectiveness. - 3
Clean nonporous surfaces
Apply detergent solution to nonporous surfaces and scrub with a stiff brush. Rinse with clean water and dry completely.
Tip: Ventilate well to reduce inhalation exposure. - 4
Treat porous materials cautiously
Assess porous materials (drywall, insulation, fabric). If heavily contaminated, consider disposal. If light contamination, use detergent and allow to dry thoroughly.
Tip: Disposal may be safer than attempting restoration. - 5
Optional bleach treatment for nonporous areas
If using a bleach solution on nonporous surfaces, apply, wait 5-10 minutes, then rinse and dry. Never mix with ammonia or other cleaners.
Tip: Bleach is not always necessary and can damage some surfaces. - 6
Dry and monitor
Ensure the area is completely dry within 24-48 hours. Use a dehumidifier if needed and monitor for signs of return.
Tip: Drying promptly reduces mold regrowth risk.
Questions & Answers
What is black mold and should I be worried?
Black mold is a type of mold that thrives in damp spaces and can affect air quality. It may cause allergic reactions or irritation in sensitive individuals. If you see large growth or have health concerns, consult a professional.
Black mold grows where there is moisture and can affect air quality. If you notice symptoms or large growths, seek professional help.
Can I clean mold myself, or should I hire someone?
For small, contained areas and nonporous surfaces, DIY cleaning with proper PPE is usually fine. For large areas (over 10 square feet) or if mold persists, hire a licensed professional.
Small areas can be cleaned safely with PPE, but larger problems should be handled by experts.
What surfaces are safe to clean with bleach?
Bleach can be used on nonporous surfaces such as tile or glass, following label directions. Do not use on porous materials like drywall or wood that is damaged by moisture.
Bleach works on hard nonporous surfaces when used carefully according to label directions.
How can I prevent mold after cleaning?
Control humidity, fix leaks promptly, improve ventilation, and regularly inspect damp areas. Consider mold-resistant products in vulnerable spaces.
Keep humidity in check and fix leaks to prevent mold from returning.
When is it necessary to test air quality after cleanup?
Air quality testing is generally recommended if mold was widespread or if occupants have ongoing respiratory symptoms after cleanup.
Ask a professional about air quality testing if symptoms persist after cleanup.
What should I do with moldy materials I remove?
Place moldy materials in sealed bags before removal to prevent spore spread. Follow local disposal guidelines for hazardous materials.
Seal moldy items in bags before disposal and follow local rules.
Watch Video
The Essentials
- Identify and fix moisture sources to prevent recurrence
- Differentiate between porous and nonporous surfaces for cleaning
- Ventilate well and wear proper PPE during cleanup
- Dispose of heavily contaminated porous materials
- Maintain indoor humidity to deter mold growth