How to Clean Up Mold Safely: A Practical Guide
Learn practical, safe methods to clean up mold in common areas. This guide covers PPE, surface-specific cleaning, moisture control, drying tips, and when to call a professional.

By following these steps, you can safely clean up mold in common home areas and reduce health risks. This guide covers PPE, surface-specific cleaners, moisture control, and proper drying. Start by identifying moisture sources and isolating the area before you begin, then proceed with a careful, non-bleach approach on non-porous surfaces.
Mold basics: what it is and how it forms
Mold is a type of fungus that thrives in damp, warm environments with organic material to feed on. According to Cleaning Tips, mold grows when moisture lingers on surfaces like drywall, wood, fabric, or cardboard. In homes, common culprits include shower steam, leaky roofs, condensation on windows, and poorly ventilated basements or crawl spaces. The mold you see on walls is often just the tip of an iceberg; invisible colonies can spread behind paints, wallpaper, or insulation, which is why quick response matters. To clean up mold effectively, you must address both the visible growth and the underlying moisture source. The key is to act promptly but safely, using the right products and protective gear. By treating mold properly, you reduce health risks for your household and prevent recurring outbreaks.
Health risks and who is most at risk
Exposure to mold spores can trigger allergic reactions, asthma symptoms, coughing, sneezing, and eye irritation. People with asthma, compromised immune systems, or mold-sensitive allergies may experience more severe reactions. Pets can also be affected. Mold exposure can be more concerning for young children and older adults. The Cleaning Tips team emphasizes keeping kids and adults with respiratory issues away from the cleanup area and ensuring rapid containment and ventilation to minimize exposure. Proper cleanup reduces symptoms and helps restore indoor air quality.
Signs of a moisture problem
Visible mold growth is the most obvious sign, but moisture problems can hide behind walls, under flooring, or in ceilings. Look for high humidity, condensation on windows, peeling paint, musty odors, or musty smells that persist after cleaning. If you notice water stains or a persistent damp feeling, address the moisture source first. Cleaning Tips analysis indicates that moisture problems are common in many homes, and catching them early is essential to prevent mold from taking hold.
Safety gear and ventilation
Before you touch any mold, put on personal protective equipment (PPE) including an N95 respirator, protective gloves, and eye protection. Ensure good ventilation by opening windows and running a fan away from the area to push air outward. Do not mix cleaning products in a confined space, and avoid stirring mold to prevent spore dispersal. Proper PPE and ventilation reduce exposure and make cleanup safer for everyone in the home.
Cleaning approaches by surface type
Porous materials such as drywall, ceiling tiles, and insulation that have mold growth may need professional replacement because mold can penetrate deeply. Non-porous surfaces like metal, glass, ceramic tile, or sealed countertops are easier to clean and disinfect. For porous surfaces that remain after cleaning, consider disposal and replacement to prevent regrowth. Always test a small hidden area first to confirm the cleaner won’t damage the surface. The goal is to remove spores while preserving the integrity of your home.
Cleaning agents: selecting the right solution
There are several options for mold cleaning, chosen by surface type and growth extent. Distilled white vinegar is effective on many non-porous surfaces and is less harsh than bleach for some materials. Hydrogen peroxide (3%) can disinfect with less odor, and baking soda adds gentle scrubbing power and odor control. For non-porous surfaces, a diluted bleach solution can be used if you prefer it, but never mix bleach with ammonia or vinegar. Purposely selecting the cleaner that matches the surface helps prevent damage and improves results. Avoid relying on a single product for all materials; consistency across surfaces reduces the chance of regrowth.
Quick-start mold cleanup protocol
If you’re dealing with a small, contained area, you can start with a quick-start protocol to stabilize the situation. Isolate the area with plastic sheeting, wear PPE, and begin by cleaning non-porous surfaces with vinegar or hydrogen peroxide. For porous materials, seal them off and consider professional assessment if growth is extensive. After cleaning, rinse any residue and dry thoroughly. Monitoring humidity will help you decide when to stop and re-clean if necessary. This approach minimizes spread while providing an effective initial cleanup. The quick-start method is a solid first step, but serious or widespread mold should be evaluated by a professional.
According to Cleaning Tips, beginning with containment and PPE is essential to reduce exposure and protect occupants.
Prevention and long-term moisture control
Prevention hinges on controlling moisture. Use dehumidifiers in damp areas, vent bathrooms and kitchens, fix leaks promptly, and improve air flow with fans and exhaust systems. Regularly inspect areas prone to dampness—basements, crawl spaces, and around windows—for signs of moisture. By maintaining indoor humidity below common thresholds and promptly addressing water intrusion, you reduce the likelihood of mold returning. Consistent moisture control is the most reliable defense against future mold growth.
When to call a professional
If mold covers a large area (often defined as more than 10 square feet in many guidelines) or if it has penetrated porous materials, professional remediation is recommended. Persistent moisture problems or repeated returns after cleaning indicate an underlying issue that requires expertise and equipment beyond typical home cleanup. The Cleaning Tips team advises erring on the side of caution and seeking a professional assessment when growth seems extensive or recurrence is frequent.
Tools & Materials
- N95 respirator mask(Protects from inhaling mold spores; replace if wet or damaged.)
- Protective gloves (nitrile)(Keep skin safeguarded from cleaners and mold.)
- Goggles or safety glasses(Eye protection to guard against splashes and spores.)
- Plastic sheeting or drop cloths(Contain the area to prevent spread.)
- Disposable or reusable scrub brushes(Use a stiff brush for textured surfaces.)
- Non-abrasive sponges or cloths(Gentle cleaning on delicate surfaces.)
- Bucket(Mix cleaners and rinse tools.)
- Mild detergent or dish soap(Base cleaning agent for initial wipe-down.)
- Distilled white vinegar(Natural disinfectant for many surfaces.)
- Baking soda(Odor control and gentle scrubbing aid.)
- Hydrogen peroxide (3%)(Disinfects without harsh fumes.)
- Bleach (optional, for non-porous surfaces only)(Use only on non-porous surfaces; never mix with ammonia.)
- Dehumidifier or high-flow fan(Promotes quick drying to prevent regrowth.)
- Disposable trash bags(Seal contaminated materials for disposal.)
Steps
Estimated time: 60-90 minutes
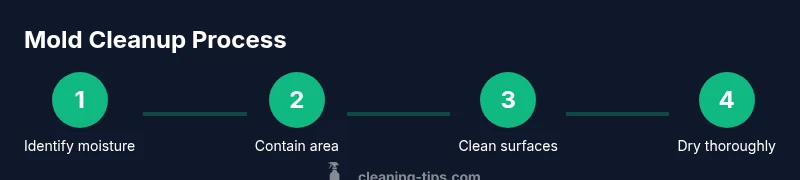
- 1
Identify moisture sources and isolate the area
Locate the water source feeding the mold and seal off the space to prevent spores from spreading. If possible, shut off nearby HVAC or dehumidifiers feeding the area and set up plastic containment. This protects others in the home while you work.
Tip: Containment reduces cross-contamination and makes cleanup safer for you and others. - 2
Put on PPE and prepare the space
Don your N95 mask, gloves, and eye protection before touching any mold. Clear a clean path for cleanup supplies and ensure the work area has ventilation; open windows if weather allows.
Tip: Do not touch mold with bare hands; PPE is your first line of defense against exposure. - 3
Ventilate and set up containment
Ventilate by directing air out of the building and away from occupied rooms. Use a fan at a safe distance to move air without blowing spores toward living spaces.
Tip: Proper ventilation lowers airborne mold spores during cleaning. - 4
Remove contaminated porous materials
If materials like drywall or insulation are heavily contaminated, consider removing and disposing of the affected sections. Bag them securely in plastic before transporting them out of the area.
Tip: Porous materials with embedded mold may be non-salvageable and should be replaced. - 5
Clean non-porous surfaces with appropriate cleaner
Wipe non-porous surfaces with vinegar, hydrogen peroxide, or mild detergent. For stubborn stains, use a brush and allow surfaces to dry completely afterward.
Tip: Avoid mixing cleaners; choose a method suited to the surface and mold extent. - 6
Rinse and dry thoroughly
Rinse away cleaner residues, then dry surfaces completely using towels and fans or a dehumidifier. Aim for moisture levels that keep humidity below the typical mold-growth threshold.
Tip: Incomplete drying invites quick regrowth; ensure all areas dry fully. - 7
Inspect and implement prevention
After drying, inspect for hidden pockets of moisture and monitor humidity over the next several days. If mold returns or dampness persists, call a professional for remediation.
Tip: Ongoing moisture control is essential to prevent future mold.
Questions & Answers
What surfaces are safe to clean mold on with household cleaners?
Non-porous surfaces such as tile, glass, metal, and sealed countertops can usually be cleaned with household cleaners like vinegar, hydrogen peroxide, or diluted bleach on a small area. Porous materials (drywall, insulation) may harbor mold below the surface and might require replacement or professional remediation.
Non-porous surfaces are usually safe for household cleaners; porous ones may need replacement or pro help.
Can bleach be used to clean mold?
Bleach can kill surface mold on non-porous surfaces, but it may not reach mold embedded in porous materials. Always dilute bleach, never mix with ammonia, and ensure good ventilation.
Bleach can help on hard non-porous surfaces, but avoid it on porous materials.
What PPE should I wear when cleaning mold?
Wear an N95 respirator, protective gloves, and safety goggles. Use long sleeves and pants to minimize skin exposure, and work in a well-ventilated area to reduce inhalation risk.
Put on N95, gloves, and eye protection before you start cleaning.
How long does it take to dry after cleaning?
Drying times vary by humidity and airflow, but most cleaned areas should be dry within 24-48 hours with adequate ventilation and dehumidification.
Most areas dry within one or two days if there’s good airflow and dehumidification.
When should I call a professional?
Call a professional if mold covers a large area, has penetrated porous materials, or returns after cleaning. Persistent moisture problems also warrant expert assessment.
If growth is extensive or keeps coming back, get a mold remediation specialist.
Does homeowners insurance cover mold cleanup?
Some policies cover mold damage if it results from a covered peril. Check your policy for mold-related exclusions and remediation coverage terms.
Check with your insurer about mold coverage; it varies by policy.
Watch Video
The Essentials
- Identify and fix moisture sources first
- Wear proper PPE and ventilate during cleanup
- Choose cleaners suited to each surface type
- Dry thoroughly and monitor humidity to prevent recurrence
- Call a professional for extensive or persistent mold growth