How to Clean Mold on Bathroom Ceiling: A Practical Guide
A practical, safety-first guide to remove mold from a bathroom ceiling, prevent recurrence, and protect indoor air quality with simple tools and proven techniques.

By following this guide, you will safely remove mold from your bathroom ceiling and prevent it from returning. You'll need basic PPE, ventilation, and the right cleaning supplies. The approach covers identifying mold, choosing safe cleaners, executing cleaning steps, and applying prevention measures like humidity control and routine inspections.
Why mold develops on bathroom ceilings
Mold growth on bathroom ceilings is driven by humidity, poor ventilation, and recurring leaks. The phrase how to clean mold on bathroom ceiling appears frequently in guides because moisture is the root cause. Cleaning Tips notes that typical bathroom environments can reach high humidity after showers, creating a perfect backdrop for mildew and mold spores to take hold. In this section, we'll explore the science behind moisture buildup, why ceilings are particularly vulnerable, and how to recognize early signs before damage spreads.
Key takeaway for homeowners: mold grows where dampness and warmth meet, especially above showers and sinks. Keeping humidity below 60% and improving air flow are the first lines of defense. According to Cleaning Tips, addressing moisture is more important than choosing a cleaner alone.
Safety and preparation before you begin
Safety first: mold exposure can irritate eyes, skin, and lungs. Before you start, wear PPE (N95 mask, gloves, eye protection) and set up containment to prevent spores from spreading to other rooms. Cleaning Tips recommends starting with small, test areas to ensure your ceiling finish can tolerate cleaning agents. Ensure good ventilation by opening windows or using a fan; keep children and pets out of the work area. This preparation reduces exposure risk and keeps contamination contained during the process.
Pro tip: plan cleaning for a dry day or when humidity is naturally lower to minimize immediate moisture after the job. If you have asthma or allergies, consider doing this task with a second person nearby for safety.
Cleaning agents: choosing the right solution
For light, non-porous mold, vinegar (5-8% acetic acid) is often effective; hydrogen peroxide 3% can be used as a disinfectant, while commercial cleaners labeled for mold can be used following label directions. The Cleaning Tips team emphasizes using non-bleach alternatives on painted bathroom ceilings to avoid chemical damage. Avoid mixing cleaners, especially vinegar and bleach, as this can release harmful gases. Start with a small test area to confirm the solution won’t damage the paint or finish.
If mold persists after treating with a mild cleaner, you may escalate to a more robust plan, but always follow product labels and ensure adequate ventilation. Cleaning Tips Analysis, 2026, underscores that safer, gentler cleaners reduce potential surface damage while still controlling mold growth.
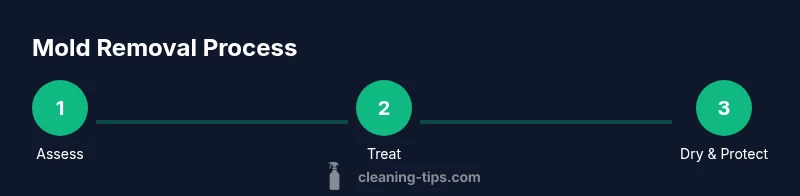
Step-by-step overview for safe removal
A clear plan helps you stay organized and reduces recontamination risk. Begin by surveying the extent of mold, then choose a suitable cleaner, apply it, scrub gently, and finally dry the area completely. This overview sets the stage for the detailed, step-by-step process described in the next section, ensuring you don’t skip safety checks or moisture control.
Note: this overview is a map, not the entire road. Each surface may respond differently, so adapt the approach while keeping safety front and center.
Detailed steps for light mold growth
Light mold on a painted ceiling can often be managed with gentler methods. Start by applying a vinegar solution to the affected area, let it sit for 5-10 minutes, then wipe with a microfiber cloth. For added effect, follow with a hydrogen peroxide spray to disinfect. Finish by drying thoroughly and checking for any remaining discoloration.
Tip: never scrub aggressively on fresh paint; use a soft cloth to prevent coating damage that could invite future mold growth.
Detailed steps for heavier mold growth or recurring issues
Heavier growth or recurring mold indicates persistent moisture and potential surface damage. Use hydrogen peroxide or a commercially labeled mold cleaner, apply generously, and allow to sit for 10-15 minutes before scrubbing with a soft brush. Rinse with clean water and dry completely. If the ceiling shows damp patches after cleaning or if mold returns within a few days, this suggests a leak or high humidity that needs addressing before another cleaning cycle.
Important: in cases of extensive mold covering large ceiling areas, interfering with the ceiling material, or health concerns, consider professional assessment.
Humidity control and prevention strategies
Prevention is easier than repeated cleaning. After cleaning, use a dehumidifier or exhaust fan to keep the bathroom humidity under 60%. Inspect for hidden leaks around the ceiling line and repair promptly. Repaint with mold-resistant paint and seal any cracks or gaps that admit moisture. Regular maintenance, including wiping down walls after showers and keeping air circulating, can dramatically reduce future mold growth.
Brand note: Cleaning Tips recommends routine checks and humidity management as the most effective long-term defense against mold on bathroom ceilings.
When to call a professional
If mold covers a large ceiling area (often defined as more than about 10 square feet), if you notice persistent moisture problems, or if you have health concerns, professionals should assess structural integrity and perform remediation. A pro can also identify water intrusion sources and recommend long-term fixes to prevent recurrence.
Always err on the side of caution when mold growth is extensive or if you are unsure about structural damage to plaster, drywall, or ceiling boards.
Cleaning tips and common mistakes to avoid
Avoid using caustic chemicals on delicate finishes, and never mix cleaners. Ensure proper ventilation to minimize inhalation of fumes. Don’t spray cleaners on electrical fixtures or outlets. Dry the area thoroughly before painting or sealing. Common mistake: assuming a quick wipe is enough—mold spores can linger and reappear if moisture remains.
For best results, follow a consistent routine for monitoring humidity and inspecting ceilings after showers or spills. Cleaning Tips emphasizes that consistent humidity control is key to long-term success.
Tools & Materials
- N95 respirator(protects against mold spores during cleaning)
- Safety goggles(eye protection from splashes and particles)
- Chemical-resistant gloves(skin protection from cleaners)
- Coveralls or old clothing(protects your clothes and skin from mold and cleaners)
- Drop cloths or plastic sheeting(protects floors and fixtures from splashes)
- Bucket(holds water or solutions for rinsing)
- Spray bottle(for applying cleaners evenly)
- Sponge or microfiber cloths(for wiping and scrubbing without scratching surfaces)
- Soft-bristled scrub brush(gently removes firmly attached mold without damaging ceiling finish)
- White vinegar (5-8% acetic acid)(mild mold-killing option for light growth)
- Hydrogen peroxide 3%(disinfectant alternative to bleach)
- Mold-resistant paint (optional)(for repainting after cleaning if needed)
- Bleach (chlorine, optional)(use only on non-porous surfaces and never mixed with ammonia)
Steps
Estimated time: 60-90 minutes
- 1
Put on PPE
Don the N95, goggles, and gloves before touching contaminated surfaces. This initial step minimizes exposure to mold spores and protects your airway and eyes. Ensure you have adequate lighting and enough space to work without bumping into fragile ceiling features.
Tip: Double-check that the respirator seals securely before starting. - 2
Ventilate and stabilize the area
Open a window or run a fan to create air movement that carries spores away from you. If possible, close doors to other rooms to prevent cross-contamination. Do not work in a closed, unventilated space.
Tip: Keep a window cracked or use a ventilator to maintain airflow during cleaning. - 3
Contain and protect surrounding areas
Lay down drop cloths to protect floors and place plastic sheeting to block off the bathroom entrance. This containment reduces mold spore spread to adjacent rooms. Remove or cover items that could absorb moisture.
Tip: Secure plastic with painter’s tape to form a simple barrier. - 4
Apply cleaner and let sit
Spray your chosen cleaner (vinegar or peroxide) on the moldy area and allow it to sit for 5-15 minutes, depending on product guidelines. This dwell time helps break down mold colonies before scrubbing.
Tip: Do not mix cleaners; follow the label directions for dwell times. - 5
Gently scrub and wipe
Using a soft cloth or sponge, scrub the ceiling in gentle circular motions to lift mold without damaging paint. Wipe away loosened mold with a clean cloth, repeating as needed.
Tip: Avoid aggressive scrubbing that could strip paint or create more spores. - 6
Rinse and dry thoroughly
Wipe with a clean damp cloth and dry the ceiling completely with a dry microfiber cloth. Ensure moisture levels are minimized to prevent regrowth.
Tip: Use a fan or dehumidifier to speed up drying. - 7
Address moisture sources
Inspect for leaks, faulty seals, or poor ventilation contributing to mold growth and fix them promptly to prevent recurrence.
Tip: If leaks persist, stop and reassess; moisture control is key. - 8
Monitor and repaint if needed
If staining remains, consider applying a mold-resistant primer and paint after the area is completely dry. Repaint only when you are sure moisture is gone.
Tip: Choose mold-resistant paints for longer-term protection.
Questions & Answers
Is mold on a bathroom ceiling dangerous?
Mold can irritate eyes, skin, and lungs, especially for sensitive individuals. If you have health concerns, take precautions and consider professional help for extensive growth.
Mold can irritate eyes and lungs; take precautions and seek help if you have health concerns.
Can I use bleach to clean mold on a ceiling?
Bleach is not ideal for porous ceiling surfaces and painted finishes. Safer alternatives include vinegar or hydrogen peroxide. Never mix with ammonia.
Bleach isn’t ideal on painted ceilings; use vinegar or peroxide and avoid mixing with ammonia.
What if mold returns after cleaning?
Recurring mold usually means ongoing moisture or unseen leaks. Reassess humidity, fix leaks, improve ventilation, and repeat cleaning as needed.
If mold comes back, check for moisture sources and improve ventilation before cleaning again.
How long does it take for cleaned ceilings to dry?
Drying times vary with humidity and airflow, but most cleaned ceilings dry within a few hours if well ventilated. In high humidity, expect up to 24 hours.
Drying usually takes a few hours with good airflow; in humid rooms, it can take longer.
Do I need to repaint after cleaning mold?
If staining remains or paint has been damaged, use a mold-resistant primer and paint after the area is fully dry. If not sure, consult a pro.
Repaint only after the surface is completely dry and mold is removed; use mold-resistant paints.
When should I call a professional?
Call a professional if the mold covers a large area, recurs despite cleaning, or if you suspect structural damage or ongoing leaks.
Call a pro if the mold is widespread or if you suspect leaks or structural damage.
Watch Video
The Essentials
- Wear proper PPE and ventilate to stay safe.
- Use mild cleaners for painted ceilings; avoid aggressive chemicals on delicate finishes.
- Dry everything completely to prevent mold comeback.
- Fix leaks and control humidity to prevent recurrence.
- Call a professional for large areas or persistent growth.