How to Clean Vinyl Records: A Practical Guide for Care
Discover a practical, step-by-step method to clean vinyl records safely. Learn tools, solutions, and best practices from Cleaning Tips to extend your collection's life and sound quality.

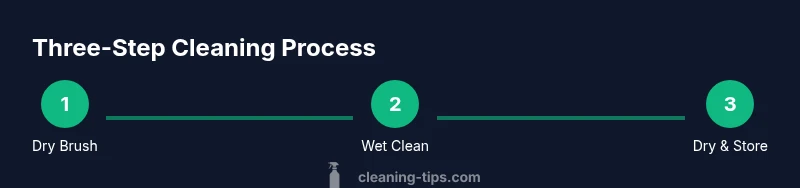
You can clean vinyl records safely by a two-step routine: first dry-brush to remove loose dust, then apply a gentle, record-safe solution and wipe. This approach reduces pops and crackles without risking grooves or warping. The guide below covers essential tools, safe liquids, and a clear step-by-step process from Cleaning Tips.
Why clean records matters\n\nKeeping vinyl records clean isn't just about hygiene; it's about sound quality, playing longevity, and sleeve preservation. According to Cleaning Tips, dust and fingerprints act like tiny abrasives in grooves, causing pops and reduced clarity over time. Regular, mindful cleaning can keep records sounding bright and reduce static buildup, especially on dusty shelves or in warm rooms. Small particles, when brushed into grooves, can wear the surface with repeated plays. Clean records also help your cartridge and stylus track more accurately, reducing wear on both the vinyl and your equipment. This simple routine can protect a cherished collection without risking warp or damage.
Key factors that influence cleaning success\n\nThe success of cleaning depends on several factors: the type of record (LP, 12 inch single, or 78 rpm shellac), the amount and type of dust, the groove density, and the handling environment. Humidity and temperature can affect drying times and static buildup. Based on Cleaning Tips analysis, using a dedicated record cleaning fluid and a soft brush yields the best balance of safety and effectiveness. Always inspect for warps or cracks and adjust your method if you notice any damage or persistent skipping issues.
Dry cleaning techniques (no liquids)\n\nDry cleaning is fast and safe for light dust. Start with a carbon fiber brush or a microfiber sleeve, using gentle, straight strokes along the record’s grooves. Avoid circular scrubbing that pushes dirt inward; instead sweep dust outward toward the outer edge. Hold the record flat and avoid bending the label area. If a brush leaves fibers behind, switch to a dedicated cleaning cloth and wipe away the residue.
Wet cleaning basics\n\nWhen deeper cleaning is needed, a light wet wash can remove fingerprint oils without soaking the vinyl. Use a record cleaning fluid designed for vinyl, or a mild solution recommended by manufacturers. Lightly mist the surface, then wipe with a clean microfiber cloth from the label toward the outer edge to avoid dragging dirt into the grooves. Do not soak the record; limit moisture to the surface and inner grooves near the label.
Safe cleaning solutions and liquids\n\nChoose products that are specifically formulated for records. Store-bought fluids are designed to evaporate cleanly and leave no residue. If you mix your own, use distilled water and a very mild concentration, and avoid alcohol, solvents, or ammonia that can dry or damage the groove wall. Always test on a spare or inconspicuous section first and rinse with distilled water if recommended by the product.
Drying and handling after cleaning\n\nAfter cleaning, dry the record thoroughly with a clean microfiber cloth, patting rather than rubbing to avoid reintroducing dust. Stand the record on its edge while drying to prevent warping, and place it into a clean inner sleeve. Allow any residual moisture to air dry in a dust-free area before returning it to storage. This helps prevent mold and mildew.
Common mistakes to avoid\n\nAvoid using household soaps or alcohol-based cleaners that can leave residues. Do not soak the entire record in liquid or leave it in a basin; prolonged moisture can damage labels and grooves. Don't rub vigorously or use old t-shirts; fibers shed and may scratch grooves. Finally, never stack records while still damp; stacking traps moisture and encourages warping.
Maintenance routine to keep your collection clean\n\nSet a simple schedule: a quick dry brush before each playback session, and a deeper wash for records that look or sound dirty every few months. Keep your cleaning tools dedicated to records, and store them in a clean, dry cabinet. Regularly inspect sleeves for dust and replace damaged outer jackets to minimize dirt transfer during handling. Cleaning Tips analysis shows that a consistent routine with clearly separated tools yields consistent results across many record types.
Special considerations for different record types\n\n78 rpm shellac discs require gentler handling and often a lighter cleaning approach; avoid soaking and use a soft brush. For modern LPs, avoid harsh cleaners and check the label for any special care instructions from the pressing plant. For colored or audiophile pressings, store upright and prevent exposure to direct sun to avoid warping or fading.
Tools & Materials
- Microfiber cleaning cloths(lint-free, soft; 16x16 inches or larger)
- Carbon fiber record cleaning brush(static-reducing; use before every play)
- Record cleaning solution(dedicated fluid designed for vinyl)
- Spray bottle(for even application of cleaner)
- Distilled water(for diluting cleaner or rinsing)
- Soft, clean workspace mat(prevents dirt transfer and keeps records level)
- Extra inner sleeves(for after cleaning storage)
- Gloves (optional)(helps keep oils off records)
Steps
Estimated time: 30-60 minutes
- 1
Prepare workspace
Set up a clean, dust-free surface. Gather all tools and place a soft mat to protect records during cleaning. Keep liquids closed when not in use to prevent spills.
Tip: Have a dedicated area away from electronics to minimize static. - 2
Inspect each record
Scan for warps, cracks, or heavy grooves before cleaning. If damage is evident, limit contact and consider professional assessment to avoid worsening issues.
Tip: Use a bright light to spot fine scratches. - 3
Dry brush to remove dust
Using the carbon fiber brush, gently sweep from the outer edge toward the center in straight lines. Avoid circular scrubbing that can push dirt into grooves.
Tip: Keep the record flat and stable during brushing. - 4
Apply cleaning solution and wipe
Lightly mist the surface with a record-safe cleaner and wipe with a clean microfiber cloth from the label to the edge. Do not soak the vinyl or saturate the label area.
Tip: Use minimal moisture and let the cloth do the work. - 5
Rinse or wipe away residue
If your cleaner requires rinsing, use distilled water and wipe again with a fresh cloth. For no-rinse formulas, ensure the surface appears residue-free after gentle wipe.
Tip: Never reuse a dirty cloth on another section of the same record. - 6
Dry thoroughly
Pat the surface dry with a dry microfiber, then stand the record on its edge to air dry any remaining moisture. Ensure the grooves are completely dry before storage.
Tip: Avoid direct heat like hair dryers that can warp vinyl. - 7
Store properly
Place the record back into a clean inner sleeve and upright in its outer sleeve. Keep storage in a cool, dry place away from sunlight and humidity.
Tip: Rotate shelves to minimize dust accumulation on rarely touched records.
Questions & Answers
Can I use dish soap on vinyl records?
Dish soap can leave residues that attract dust and may affect sound. Use record cleaners or mild solutions made for vinyl.
Dish soap can leave residues; use proper record cleaners instead.
Is ultrasonic cleaning safe for vinyl records?
Ultrasonic cleaning can be effective but requires proper equipment and settings. Avoid DIY ultrasonic setups that may damage grooves.
Ultrasonic cleaning can work with proper equipment and settings.
Should I clean both sides of a record?
Yes, clean both sides if there is visible dust or fingerprints. Wipe one side at a time to avoid cross-contamination.
Yes, clean both sides one at a time.
How often should I clean records?
Clean when you notice dirt, pops, or surface noise. Over-cleaning can wear grooves, so balance with your listening and handling habits.
Clean when it sounds dirty to avoid wear.
Can cleaning damage grooves?
When done gently with proper tools, cleaning should not damage grooves. Avoid harsh scrubbing and aggressive handling.
Gently clean with the right tools to avoid groove damage.
Do I need distilled water?
Distilled water helps prevent mineral deposits and is commonly recommended. Follow product guidelines for rinsing if specified.
Distilled water is often recommended for rinsing.
Watch Video
The Essentials
- Start with dry cleaning to remove loose dust
- Use only record-safe liquids and gentle wipes
- Never soak or scrub aggressively
- Dry completely before returning to storage
- The Cleaning Tips team recommends a simple, regular routine