How Do You Clean Pennies: A Safe Home Cleaning Guide
Learn how to clean pennies safely at home with mild soap, warm water, and gentle brushing. This guide covers copper vs zinc pennies, when to avoid cleaning, and practical steps to restore shine without reducing coin value.

You can safely clean pennies at home using mild soap, warm water, and a soft brush. Start with copper pennies and zinc pennies alike, but avoid harsh acids, electrolysis, or abrasives that can remove patina or reduce value. This guide walks you through steps, safety, and when to skip cleaning.
Why do people ask how do you clean pennies, and when should you skip cleaning?
Many people want pennies to look brighter or free of surface grime, especially for display in a jar or collection. If you’re asking how do you clean pennies, you should know that cleaning can improve appearance for non-collectible coins, but it can also remove surface patina and reduce value on rare or collectible pieces. The Cleaning Tips team emphasizes a cautious, minimal approach. For most everyday pennies, gentle cleaning is acceptable, but for coins with potential numismatic value, you should avoid cleaning altogether. This distinction matters because even mild scrubbing or abrasive pastes can erase details and reduce collectability. Consider the coin’s age, type, and your goals before you begin.
Key takeaway: assess the coin’s potential value before cleaning, and err on the side of preservation if you’re unsure. Cleaning is not always the right choice, but when done carefully, it can reduce surface grime without harming the coin’s integrity.
Materials and safety considerations
Before you start, gather a small set of safe cleaning supplies and keep airflow and patience in mind. The goal is to remove dirt without scratching or dulling the surface. Always wash your hands and consider wearing gloves if you’re handling coins for extended periods. For the majority of pennies, a mild, non-abrasive approach minimizes risk. Cleaning pennies with household products should avoid strong acids, ammonia, or bleach, which can pit copper or zinc and create permanent marks. The safest method is to use warm water and a mild dish soap, along with a soft brush or cloth. If you encounter stubborn grime, a tiny amount of baking soda can be used as a mild abrasive, but test on a cheap coin first and rub gently. Always dry coins thoroughly after cleaning to prevent water spots and oxidation. This section aligns with guidelines from Cleaning Tips and other educational sources about safe cleaning practices.
Cleaning methods for copper vs zinc pennies
Pennies come in two primary compositions: copper pennies minted before 1982 and zinc pennies minted afterward. Each type responds differently to cleaners. Copper pennies can often tolerate a gentle soap and water wash, but aggressive scrubbing or abrasive pastes may wear away raised details, such as the date and motto. Zinc pennies, with a copper plating, are more delicate and can corrode from acids or corrosive cleaners, leading to dull surfaces or tiny pits. For both types, the safest initial method is a soak in warm, soapy water followed by a gentle brush. If tarnish remains, apply a very light baking soda paste to the coin’s surface, then rinse and dry. Avoid vinegar or lemon juice; acids can undermine the metal, particularly on zinc cores. If you care deeply about a coin’s value, skip chemical cleaning entirely and consult a professional.
Step-by-step cleaning workflow (practical overview)
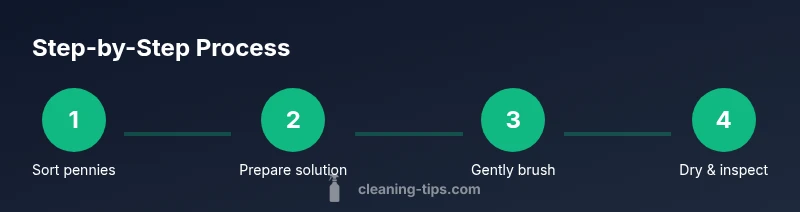
To bring practical clarity to the process, here’s a high-level workflow you can follow at home without specialized tools. Start with precautionary checks; sort pennies by type; then apply a gentle cleaning strategy. This overview mirrors the deeper step-by-step guide that follows in the dedicated steps block, focusing on why each action matters and how it protects the coin’s surface. Remember: the goal is to beautify grime, not to alter the coin’s historic character.
Common mistakes that ruin pennies
Common mistakes include using harsh chemicals, soaking too long, or scrubbing with hard brushes. These actions can strip patina, wear relief, and reduce the coin’s value. Another mistake is using the dishwasher or ultrasonic cleaners, which can damage delicate surfaces. Even simple soap and water, if applied with heavy pressure, can still cause micro-scratches over time. Being mindful of technique—gentle pressure, soft tools, and brief cleaning periods—helps preserve both appearance and potential value. The advice below clarifies why these errors happen and how to prevent them in practice.
Alternatives for collectors and reasons to leave pennies as-is
If you’re a collector or you suspect a coin might be valuable, the safest choice is often to leave it untouched. Some coins gain more value when they retain their original patina and signs of age. For display or educational purposes, you may prefer a cosmetic cleaning; however, this should be done with extreme caution. If in doubt, seek a professional numismatist’s opinion or consult local coin clubs. The Cleaning Tips team notes that preservation often trumps cosmetic improvement when it comes to rare or historic pennies, and any cleaning should be limited to non-collectible pieces only.
Quick safety and preservation tips
Always work in a clean, dry workspace and keep coins away from pets and children during cleaning. Use warm water, a small amount of mild dish soap, and a soft brush. Do not use abrasive pads or metal tools. Dry pennies completely after cleaning, ideally with a lint-free cloth. If a coin shows signs of deep corrosion or heavy damage, it’s best to stop and consult a professional. Finally, store cleaned pennies in a soft container to prevent new scratches and exposure to humidity. These practices align with Cleaning Tips’ recommendations for safe, gentle cleaning.
Tools & Materials
- Warm water(Not hot; warm is comfortable and effective for grime.)
- Mild dish soap(A drop or two in a bowl of water.)
- Soft-bristled toothbrush(New or unused brush; avoid metal bristles.)
- Small bowl or cup(For soaking pennies.)
- Microfiber cloth or soft towel(Pat dry and prevent scratches.)
- Baking soda (optional)(Very small amount for a mild paste.)
- Gloves (optional)(To keep oils from fingers off coins.)
Steps
Estimated time: 15-25 minutes
- 1
Sort pennies by composition
Begin by separating copper pennies minted before 1982 from zinc pennies minted after 1982. This helps tailor your approach because copper and zinc respond differently to cleaners. Visual checks for wear, damage, or corrosion guide whether cleaning is appropriate.
Tip: Document any coins with potential collectible value and avoid cleaning them. - 2
Prepare a mild cleaning solution
Fill a small bowl with warm water and add a tiny amount of mild dish soap. Stir gently to create suds. The goal is to loosen grime without forming aggressive cleaning agents that could affect patina.
Tip: Use the smallest effective amount of soap to minimize residue. - 3
Rinse and soak pennies
Place pennies in the soapy water and let them soak for 1–2 minutes. This loosens soil and grime without aggressive scrubbing. After soaking, remove coins one by one to inspect for remaining dirt.
Tip: Do not soak zinc pennies for long periods; short soaks are safer. - 4
Gently brush the surface
Using a soft-bristled toothbrush, lightly brush each coin in a single direction to lift grime from raised details. Avoid circular scrubbing, which can wear relief and dull features over time. Rinse the coin under running water to wash away loosened grime.
Tip: Keep brush strokes light and consider brushing from the edge toward the center for even cleaning. - 5
Optional: apply a tiny baking soda paste
If stubborn tarnish persists, mix a drop of water with a small amount of baking soda to form a very light paste. Gently rub the paste on the coin with the brush for a few seconds, then rinse thoroughly and dry.
Tip: Test paste on a non-valuable coin first to gauge effect. - 6
Dry thoroughly and inspect
Pat each coin dry with a microfiber cloth and air-dry completely before storing. Inspect for remaining grime or streaks. If you see dulling, stop; over-cleaning can harm luster and value.
Tip: Store coins in a dry place away from humidity.
Questions & Answers
Is it safe to clean pennies at home?
Yes, with gentle, non-abrasive methods. Avoid harsh chemicals and prolonged soaking, especially for valuable coins. For uncertain pieces, consult a professional.
Cleaning pennies at home is generally safe if you use mild methods and avoid harsh chemicals or long soaks.
Can cleaning pennies increase their value?
Most cleaning reduces a coin’s value by removing patina and potentially diminishing historical details. Preserve value by cleaning only non-collectible coins.
Cleaning pennies can lower value, so proceed with caution or seek expert advice for valuable coins.
What cleaners should I avoid?
Avoid vinegar, lemon juice, ammonia, bleach, or any strong acids. These can corrode copper and zinc surfaces and permanently dull coins.
Avoid acids and strong cleaners to protect the coin surface.
Should I use a dishwasher or ultrasonic cleaner?
No. Dishwashers and ultrasonic cleaners are too harsh and can scratch or damage coin surfaces, especially on older pennies.
Don’t run pennies through the dishwasher or an ultrasonic cleaner.
How long should pennies soak if using a cleaning solution?
Only a brief soak (about 1–3 minutes) is recommended. Prolonged soaking can loosen patina and cause damage.
A short soak is enough; avoid long soaks that can harm the surface.
What if pennies are valuable or collectible?
Do not clean valuable or potentially collectible pennies. Preservation and professional grading yield better long-term value.
Very valuable coins should generally not be cleaned; seek a professional.
Watch Video
The Essentials
- Sort pennies by composition before cleaning.
- Use mild soap and warm water only.
- Avoid acids and electrolysis to protect patina.
- Do not clean valuable coins; preservation matters more.
- Dry coins completely after cleaning.