How to Stop Clean Up Ads on My Phone: A Practical Guide
Learn how to stop clean up ads on your phone with practical steps to identify ad sources, disable notifications, tighten permissions, and protect your device. A thorough, easy-to-follow approach from Cleaning Tips for homeowners and renters.

To stop clean up ads on your phone, start by auditing installed apps and removing unfamiliar cleaners. Disable aggressive notification access, reset browser settings, and block pop-ups. If ads persist, clear app caches, review app permissions, and install a reputable adware blocker. As a last resort, consider a factory reset after backing up important data.
Why Ads Appear and What Clean Up Apps Do
Ads on mobile devices often originate from adware embedded in seemingly helpful "clean up" apps. These apps promise to optimize storage, speed, and battery life, but they instead inject aggressive advertisements, track activity, and push unsolicited notifications. Users commonly install them after seeing a favorable review or a free download offer, only to contend with persistent pop‑ups and banner ads. The Cleaning Tips team notes that the problem tends to spike when devices come from less regulated app stores or when permissions are granted too liberally during installation. Understanding the lifecycle of these apps — from download to permission granted to ad display — helps you spot risk early and avoid the cycle of ad disruption.
According to Cleaning Tips, many users underestimate how quickly adware can embed itself through a single questionable cleaner. The goal here is prevention through mindful app choices, consistent updates, and disciplined permission management. With the right approach, you can regain control of your phone’s behavior and reduce intrusive ads without sacrificing essential features.
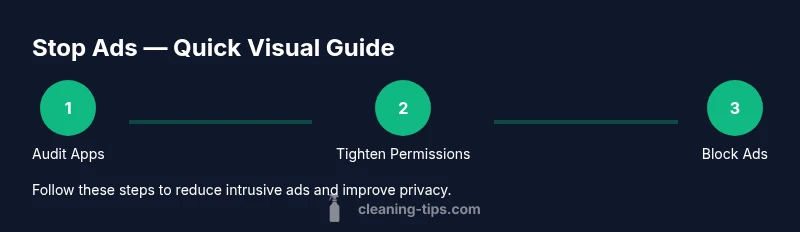
Step 1: Audit Your Apps (Android and iPhone)
Begin by reviewing your installed apps for anything unfamiliar or suspicious, especially "cleaner" or "optimizer" names that you don’t recall selecting. On Android, go to Settings > Apps & notifications > See all apps and sort by install date to identify recent installs. On iPhone, check Settings > General > iPhone Storage to spot recently added apps. Uninstall any app you don’t recognize or that requests excessive permissions. After removal, restart your device to ensure the changes take effect. If you’re unsure about an app, search online for the developer name to confirm its legitimacy. Cleaning Tips recommends turning off auto‑update for questionable apps until you verify safety, and keeping a clean app audit routine.
Step 2: Disable Unwanted Notifications and Permissions
Tighten what apps can do by reviewing notification access and key permissions. In Android, navigate to Settings > Apps & notifications > Special app access > Notification access and disable access for cleaner apps. For iOS, go to Settings > Notifications and disable banners or alerts for suspicious apps; check Settings > Privacy > Tracking and limit ad tracking where possible. Also review overlay/draw over other apps permissions and disable them for any apps you don’t trust. By reducing access, you minimize the channels through which ads can appear and the contexts in which trackers collect data. Cleaning Tips emphasizes doing this step before any large changes to your device to limit disruption later.
Step 3: Tidy Your Browser and Search History
Adware commonly leverages browser data to tailor ads. Clear your browser caches and history on all browsers you use, and disable pop‑ups and redirects. In Chrome (Android and iOS), go to Settings > Privacy and security > Clear browsing data; select cached images and files, cookies and site data, and history. Repeat for Firefox or Safari as applicable. Turn on strict tracking protection and enable Do Not Track where supported. Consider periodically resetting browser privacy settings to their defaults and using a privacy‑friendly search engine. This reduces targeted ads that arise from cached data and cookies. Cleaning Tips suggests disabling any auto‑fill features that could leak search data into ads.
Step 4: Install Trusted Ad-Blockers and Security Tools
If you choose to use an ad‑blocking solution, pick reputable options with transparent privacy policies and clear permission scopes. For Android, look for blockers that focus on tracking protection and do not require excessive permissions; for iOS, rely on reputable content blockers that integrate with Safari. Pair these with a reputable security tool that scans for adware and runs periodic safety checks. Avoid apps that claim to be "all-in-one" cleaners if they push intrusive ads themselves. Always read user reviews and privacy policies before installing, and keep all security tools updated. Cleaning Tips reminds readers to avoid free tools from questionable sources that could introduce more risk.
Step 5: Clear Caches and Reset Network Settings
Regularly clear caches for apps and system processes involved in ads. On Android, open Settings > Storage > Cached data and clear it; on iOS, clear Safari data via Settings > Safari > Clear History and Website Data. Next, reset network settings to clear potentially corrupted network configurations that can drive ad experiences. This option is typically found in Settings > System > Reset options > Reset Wi‑Fi, mobile & Bluetooth (Android) or Settings > General > Transfer or Reset iPhone > Reset > Reset Network Settings (iOS). Note that you may need to reconnect to Wi‑Fi networks and re‑pair Bluetooth devices after resetting. Cleaning Tips notes that this step often resolves stubborn ad behavior tied to network glitches or cached network profiles.
Step 6: When and How to Reset Your Device Safely
If ads persist after the above steps, a factory reset may be necessary to remove deeply embedded adware. Before proceeding, back up important data to a secure location (cloud or computer). On Android, follow Settings > System > Reset options > Erase all data (factory reset); on iPhone, go to Settings > General > Reset > Erase All Content and Settings. After the reset, reinstall essential apps from trusted sources and enable essential protections first. Only proceed if you have exhausted other options and understand the risk of data loss and reconfiguration. Cleaning Tips recommends treating a factory reset as a last resort and ensuring data is fully backed up first.
Step 7: Ongoing Prevention and Safe Cleaning Habits
Develop a habit of cautious app installation and permission granting. Stick to official app stores, review developer names, and avoid shortcuts that lead to third‑party stores. Keep your operating system up to date with the latest security patches, and enable automatic updates where possible. In browsers, maintain privacy settings and regular cache cleaning. Consider periodic checks of device health, performance, and ads behavior to catch new threats early. By combining mindful installation practices with robust protections, you reduce the chance that clean up ads will resurface.
Step 8: Quick Recap and Practical Checklist
To maintain ongoing protection, refer back to this checklist: audit new apps, disable unnecessary permissions, reset browser data, install trusted blockers, clear caches, and back up regularly. If you notice a sudden spike in ads after installing a new app, repeat the audit and remove the suspect. Consistency matters more than one‑time cleanup. The Cleaning Tips approach is about sustainable digital hygiene that complements physical device care.
Ongoing Prevention: Safe Cleaning Habits (and Digital Hygiene)
Final Considerations: When to Seek Expert Help and How to Safely Reset
Tools & Materials
- Smartphone (Android or iOS)(Keep OS updated; ensure device has enough storage for cleanups and backups.)
- Stable internet connection(Wi‑Fi preferred for downloads and backups; mobile data ok if stable.)
- Google Account or Apple ID access(Needed to adjust account-based permissions and settings.)
- Trusted ad-blocker app(Choose from reputable vendors with clear privacy policies.)
- Phone backup tool or cloud backup(Back up photos, contacts, and app data before major changes.)
- Safe browser with tracker protection(Optional but helpful for minimizing ads while browsing.)
- Anti-malware/antivirus app from reputable vendor(Useful if you suspect persistent adware.)
Steps
Estimated time: 60-120 minutes
- 1
Identify suspect cleaners and uninstall
Begin by locating apps that claim to clean or optimize storage. Look for unfamiliar or recently installed titles, especially ones with excessive permissions or aggressive ads. Uninstall any app you don’t recognize or that messes with your notifications. After uninstalling, restart the device to reinforce the removal and reduce residual services.
Tip: If unsure about an app, search the developer name online to confirm legitimacy. - 2
Review notification access and app permissions
Check which apps have permission to post notifications and access overlays or accessibility features. Disable notification access for cleaners you don’t trust. Turn off overlays that could display ads over other apps, and restrict location, contacts, and camera permissions to only essential apps.
Tip: Limit permissions to the minimum needed for each app to reduce ad opportunities. - 3
Tighten browser and search privacy
Clear browser data and adjust privacy settings. Disable pop-ups, enable tracker protection, and set a strict Do Not Track policy where available. Regularly clear cookies and site data, and consider using a privacy‑respecting search engine. These steps cut the personal data that fuels targeted ads.
Tip: Remember to sign back into saved accounts after clearing data. - 4
Install and configure trusted ad-blockers
Install reputable ad-blockers or privacy extensions from official stores. Configure them to block ads and trackers, and review their permission requirements before enabling. Maintain a routine to update these tools so they stay effective against new ad techniques.
Tip: Avoid tools that demand broad system access or permissions beyond what’s necessary. - 5
Clear caches and reset network settings
Clear application caches to remove stored ad data. Reset network settings to refresh DNS and proxy configurations that could route ads. Reconnect to trusted networks and re‑enter credentials for saved services after resetting.
Tip: Back up network credentials if you rely on saved Wi‑Fi networks. - 6
Assess the need for a device reset
If ads persist, consider a factory reset after backing up essential data. This option wipes adware that survives other steps but erases apps and data you must restore from backups. Follow device-specific instructions and verify you’ve completed a full backup first.
Tip: Keep a record of important app login credentials for post-reset setup. - 7
Restore essentials and monitor
Reinstall only trusted apps, re‑enable essential permissions, and monitor for recurring ads. Revisit privacy settings and keep OS updates on. Maintain a habit of checking installed apps quarterly to prevent reintroduction of adware.
Tip: Set a reminder to review permissions every few months. - 8
Establish ongoing digital hygiene
Ad‑blocking and cautious installation are ongoing practices. Regularly update the OS, apps, and blockers; avoid third‑party stores; and periodically clear caches. A small routine now pays off with fewer interruptions and better device performance.
Tip: Treat digital hygiene as part of routine device maintenance.
Questions & Answers
What causes 'clean up ads' on my phone?
Most often, adware comes from dubious cleaning apps or legitimate apps with risky permissions. These apps inject ads or trackers to generate revenue. A careful audit of installed apps and permissions typically reveals the source.
Adware often hides in cleaning apps or apps with too many permissions; a quick audit usually reveals the source.
Do factory resets remove all ads?
A factory reset can remove deeply embedded ad software, but you will lose app data unless you back up first. Use a reset only after trying all other options and make sure you restore from trusted sources afterward.
A factory reset can wipe out stubborn adware, but back up first and reinstall only trusted apps afterward.
Are ad blockers safe on phones?
Yes, when downloaded from reputable developers and used with privacy‑mavorable settings. They reduce ads and trackers without harming device performance. Always review app permissions and privacy policies before installing.
Yes, if you pick a trusted app and review its permissions and policies.
Will clearing cache fix most ad problems?
Clearing caches can reduce ads driven by stored data, cookies, and trackers but may not remove ads that originate from the system or installed apps. Combine cache clearing with the other steps for best results.
Clearing cache helps, but it isn’t a standalone fix for all ad problems.
Is it safe to disable notifications from all apps?
Disabling all notifications is not practical; instead, disable or limit notifications from suspicious apps. Keep essential alerts enabled to stay informed about messages and security notices.
It’s safer to disable only the problematic apps rather than turning off all notifications.
Watch Video
The Essentials
- Audit apps regularly to spot risky cleaners
- Tighten notifications and permissions to reduce ad display
- Use trusted blockers and clean browser data
- Back up before resets; factory resets are last resort
- Maintain ongoing digital hygiene to prevent future ads